
Overview#
You can integrate Amazon SES notifications to receive status changes during file transfer tasks by email.
After completing the integration, a notification email is automatically sent to the designated recipient email whenever designated events occur, such as a transfer being Started, Completed, or Failed.
The entire process proceeds in the following order: ① Obtain AWS credentials → ② Verify the sender email → ③ Configure notifications in the product.
Prerequisites#
Before you begin, check the following.
| Item | Description |
|---|---|
| AWS account | An AWS account with access to Amazon SES and IAM is required. |
| Sender email/domain | The email address or domain to be used as the sender must be verified in Amazon SES. |
| Region | Check the AWS Region where Amazon SES will be used. The same Region as the sender verification must be used. |
| Network | Outbound HTTPS communication to email.<region>.amazonaws.com (443) must be allowed from the environment where the product is installed. |
Obtain AWS Credentials (Access Key)#
To send emails through Amazon SES, AWS credentials (Access Key / Secret Access Key) with SES sending permissions are required.
Create a user and access key in IAM.
Step 1. Prepare an IAM User and Grant Permissions#
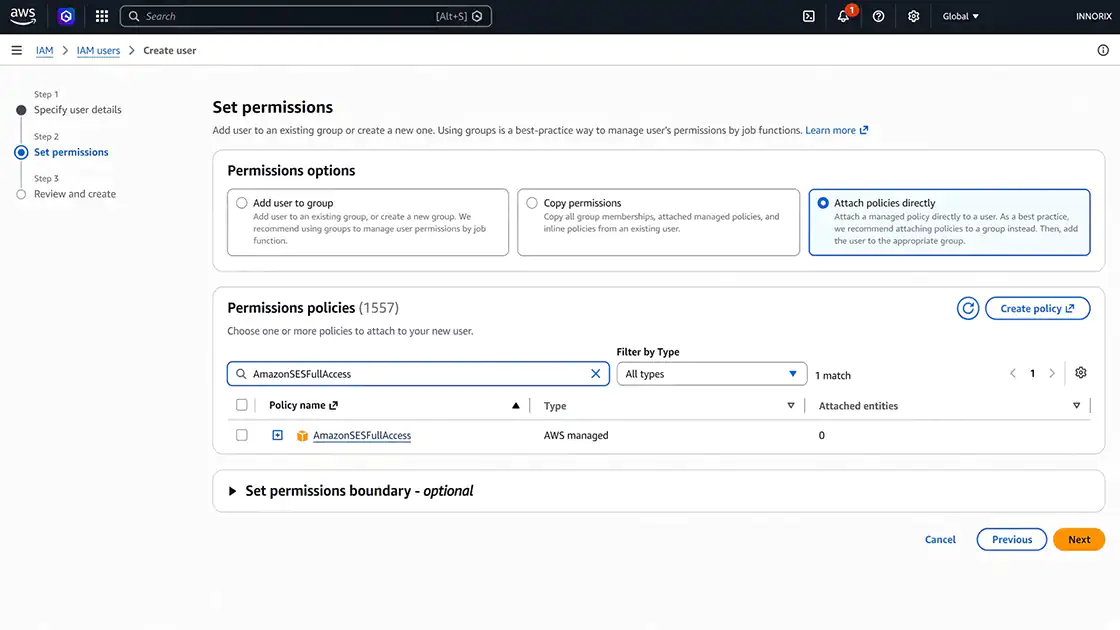
In the AWS Console, go to IAM → Users and create a new user or select an existing user.
Attach a policy that includes Amazon SES sending permissions (ses:SendEmail, ses:SendRawEmail) or the AmazonSESFullAccess policy.
In a production environment, it is recommended to grant only the required permissions according to the principle of least privilege.
Step 2. Create an Access Key#
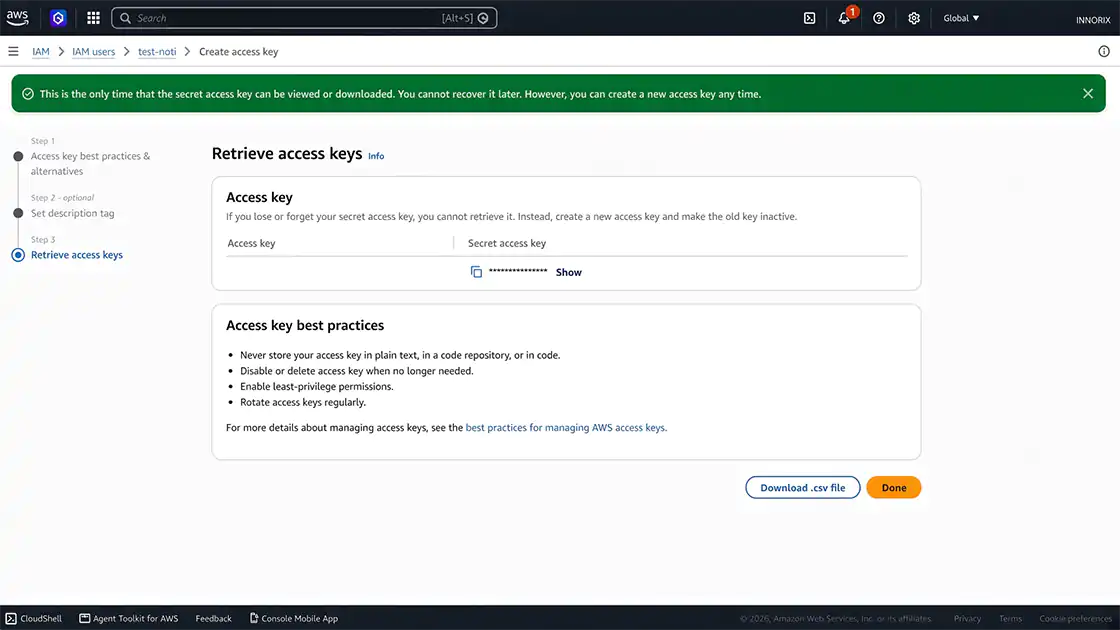
On the user's Security credentials tab, select Create access key.
For the use case, select Application running outside AWS, then create the access key.
Step 3. Copy the Access Key and Secret Access Key#
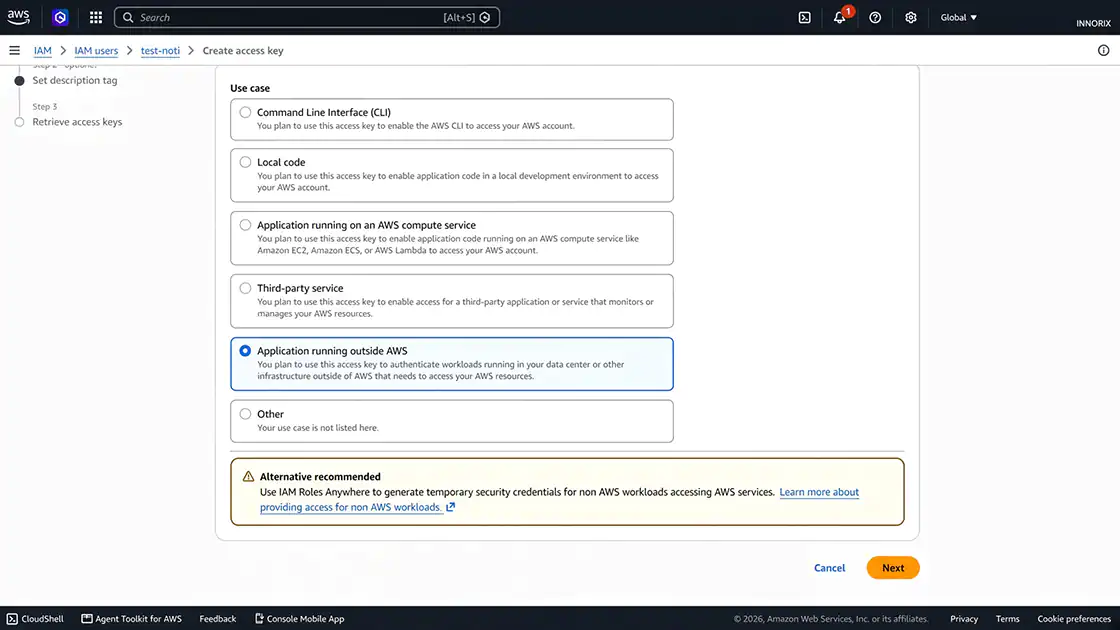
Copy the generated Access Key ID and Secret Access Key.
ℹ️ The Secret Access Key can only be viewed once when it is created, so store it in a secure location. This information requires the same level of security as a password and must not be exposed externally. If it is exposed, deactivate or delete the key in IAM and then issue a new one.
Checklist#
- ✔ Amazon SES sending permissions have been granted.
- ✔ The Access Key ID and Secret Access Key have been copied.
Verify the Sender Email and Check Sending Requirements#
Only verified email addresses or domains can be used as senders in Amazon SES.
Step 1. Select the AWS Region#
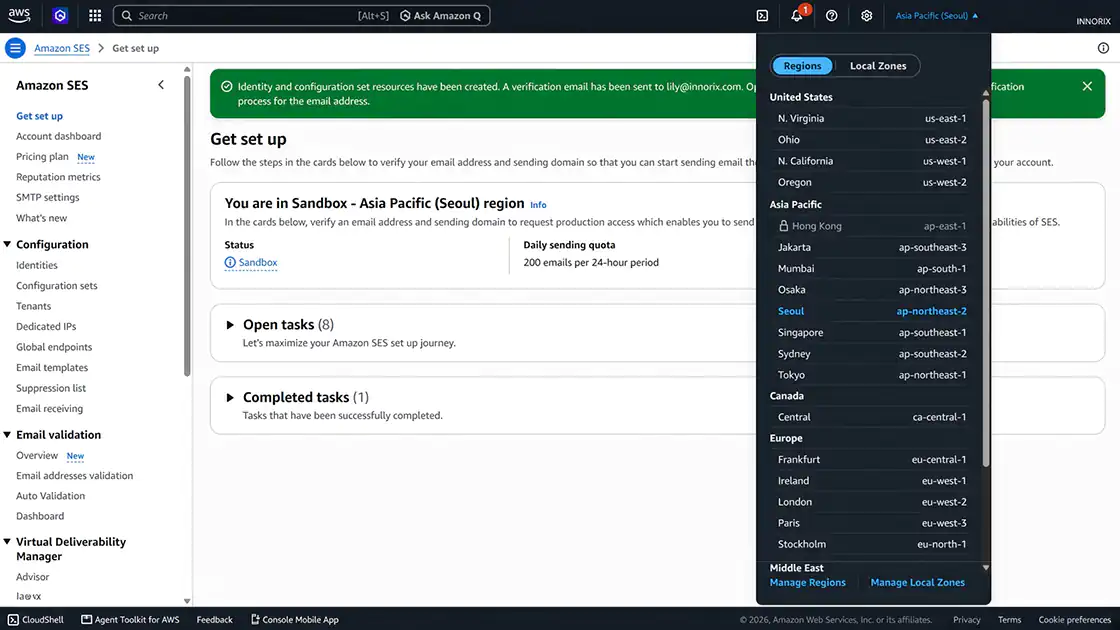
Select the Region to use in the upper-right corner of the Amazon SES Console.
Example:
us-east-1Both sender verification and email sending must be performed in the same Region.
Step 2. Verify the Sender Email#
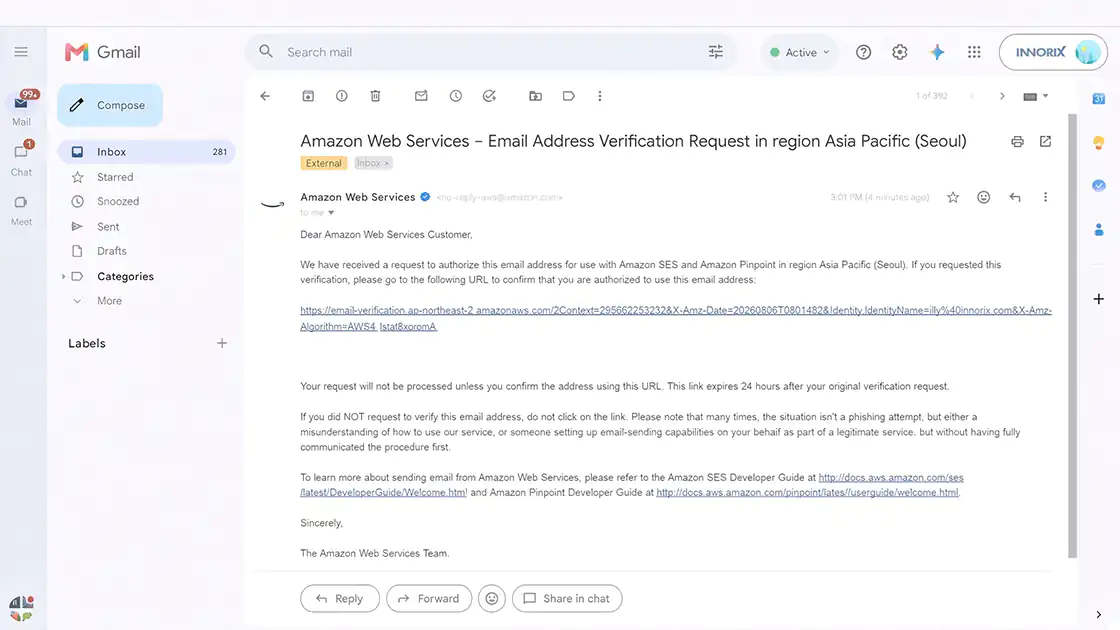
In the Amazon SES Console, select Identities → Create identity.
Register the email address or domain to be used for sending, then complete the verification.
- Complete email verification by clicking the link in the received verification email.
- Complete domain verification by adding the provided DNS records.
Step 3. Check Sandbox Status#
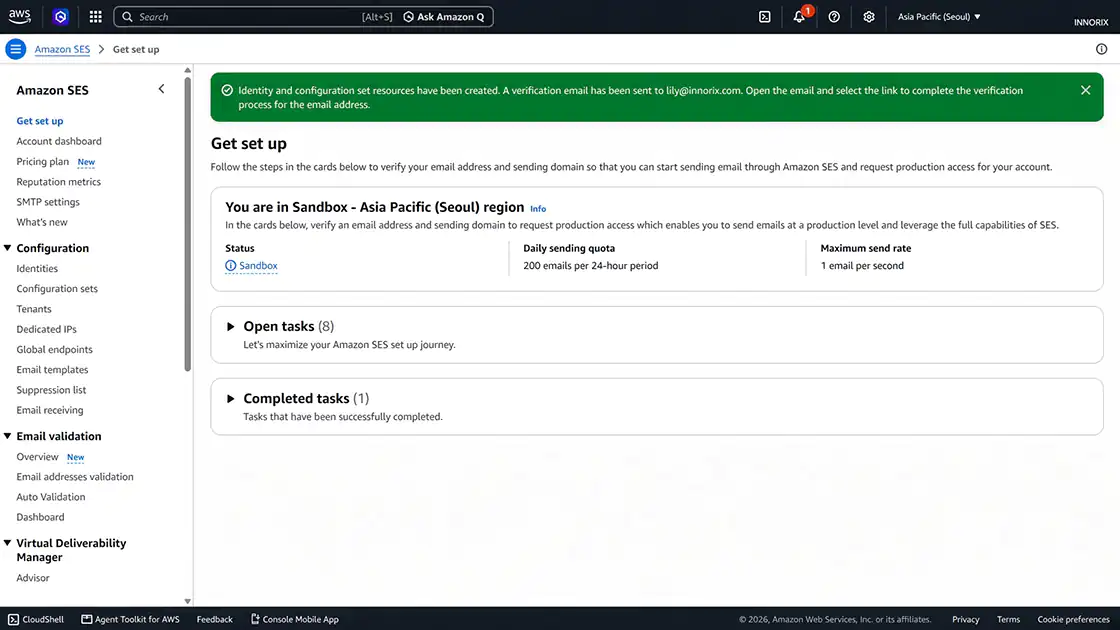
New Amazon SES accounts are in Sandbox status by default.
The following restrictions apply in Sandbox:
- Emails can only be sent to verified recipients
- Maximum of 200 emails per day
- Maximum sending rate of 1 email per second
To send emails to general recipients in a production environment, you must apply for Request production access to exit the Sandbox.
Checklist#
- ✔ The Region to use has been confirmed.
- ✔ The sender email address (or domain) has been verified.
- ✔ The Sandbox status and sending requirements have been checked.
Amazon SES Notification Settings#
Enter the issued AWS credentials and verified email information in the product's notification settings.
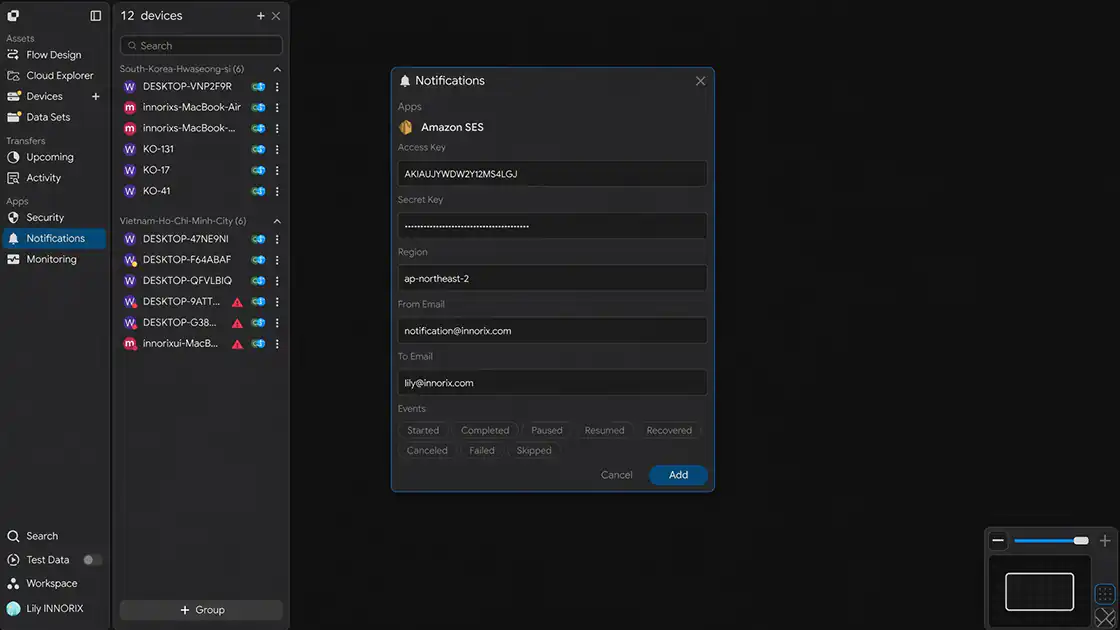
When you open the Notifications settings window, the following screen is displayed.
Step 1. Enter the Access Key#
Enter the generated Access Key ID in the Access Key field.
Step 2. Enter the Secret Key#
Enter the generated Secret Access Key in the Secret Key field.
Step 3. Enter the Region#
Enter the selected Region in the Region field.
Example:
us-east-1It must match the Region where the sender was verified.
Step 4. Enter the From Email#
Enter the verified sender email address in the From Email field.
Step 5. Enter the To Email#
Enter the recipient email address that will receive notifications in the To Email field.
If the Amazon SES account is in Sandbox status, this email address must also be verified.
Step 6. Select Notification Events#
Select the events for which you want to receive notifications under Events.
You can select multiple events, and emails are sent only when the selected events occur.
| Event | When It Occurs |
|---|---|
| Started | When the transfer task starts |
| Completed | When the transfer is completed successfully |
| Paused | When the transfer is temporarily paused |
| Resumed | When a paused transfer starts again |
| Recovered | When the transfer is automatically recovered and resumed after an interruption or error |
| Canceled | When the user cancels the transfer |
| Failed | When the transfer fails |
| Skipped | When a specific file is skipped (Example: an existing file or a file matching a filter condition) |
Step 7. Save the Settings#
After completing the input, click Add to save the integration.
Checklist#
- ✔ The Access Key and Secret Key have been entered.
- ✔ The Region and sender/recipient email addresses have been entered.
- ✔ The events for which notifications will be received have been selected.
Verify the Integration#
Verify that the settings are working correctly.
Step 1. Trigger a Test Event#
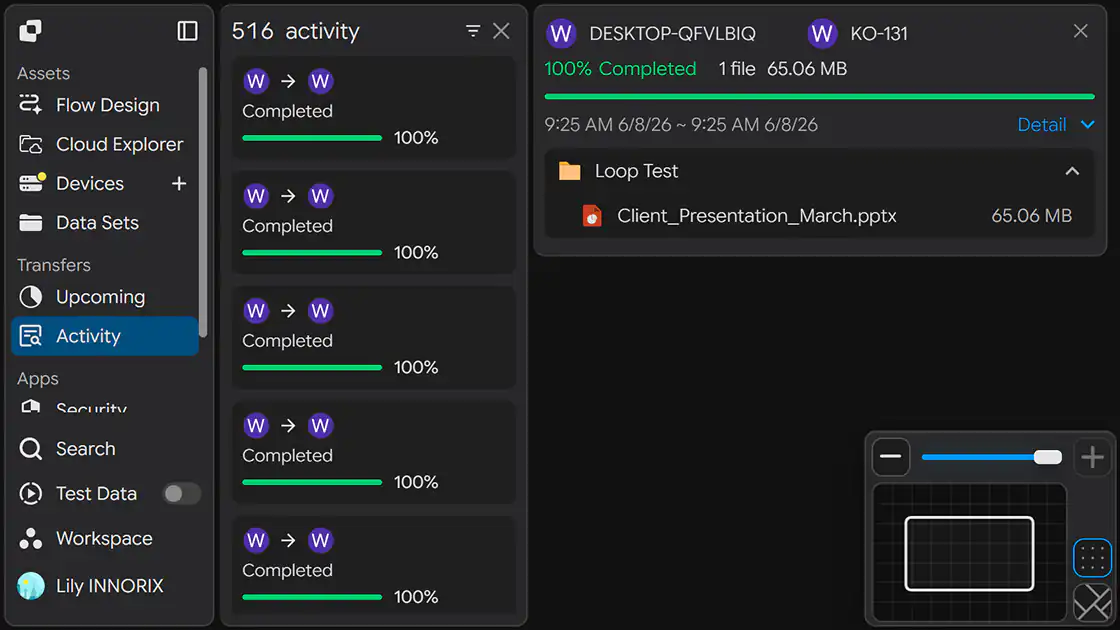
Run an actual transfer task or trigger one of the selected events.
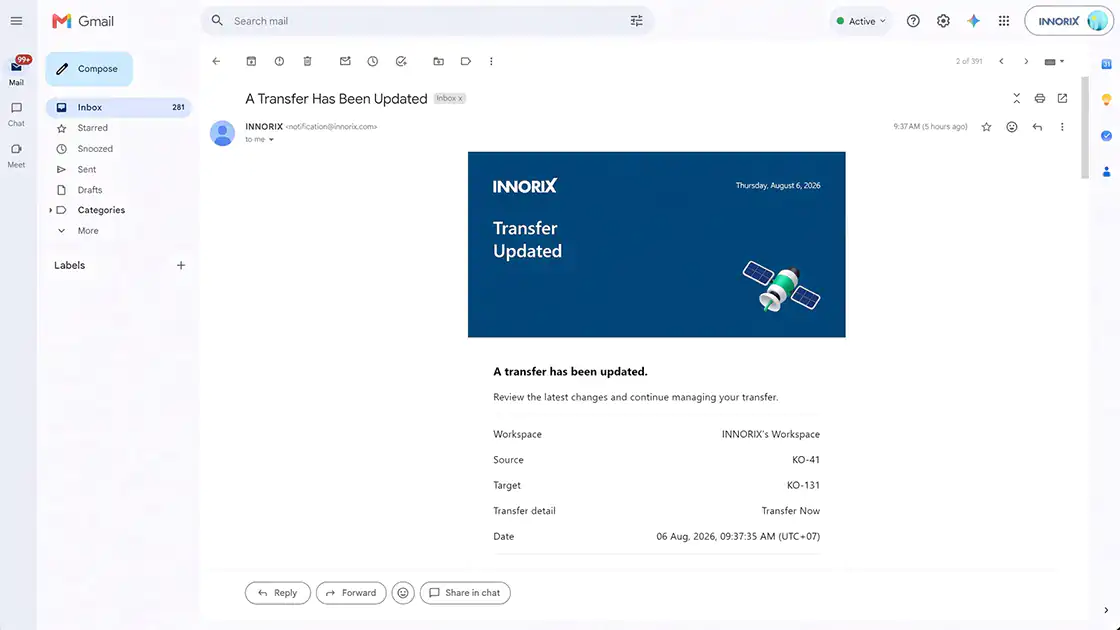
Step 2. Check the Recipient Inbox#
Check whether a notification email has arrived at the designated email address.
Checklist#
- ✔ A notification email has arrived at the recipient email address.
- ✔ The triggered event was delivered accurately.
Setup Complete#
Once the settings are saved, the integration is applied.
After that, a notification email is automatically sent to the designated recipient email whenever the selected events occur.
Troubleshooting#
If emails do not arrive, check the following items.
| Issue | What to Check |
|---|---|
| Email is not sent | Check whether the Access Key, Secret Key, Region, sender email, and recipient email were entered correctly. |
| Email address is not verified error | Check whether the sender email address (and the recipient email address when in Sandbox status) has been verified in the applicable Region. |
| Region mismatch | Check whether the Region where the sender was verified matches the Region in the product settings. |
| Cannot send to general recipients | Check whether the Amazon SES account is in Sandbox status and apply for Production Access if necessary. |
| AccessDenied error | Check whether the IAM user has been granted ses:SendEmail and ses:SendRawEmail permissions. |
| Integration fails in a closed network | Check whether outbound HTTPS communication to email.<region>.amazonaws.com (443) is allowed by the firewall or proxy. |