
Integrate Atlassian Jira Notifications
Overview
You can integrate Atlassian Jira notifications to automatically create Jira issues for file transfer events.
Once the integration is complete, a new issue is automatically created in the specified Jira project whenever selected events occur, such as Started, Completed, or Failed.
The setup consists of two steps:
① Generate a Jira API Token → ② Configure notification settings in the product
Prerequisites
Before you begin, verify the following requirements.
| Item | Description |
|---|---|
| Atlassian Account | An account with permission to create issues in the target Jira project is required. |
| Target Project | Identify the Jira project and its Project Key where issues will be created. |
| Network | The environment where the product is installed must allow outbound HTTPS (443) access to your Jira instance (for example, your-domain.atlassian.net). |
Generate a Jira API Token
To receive notifications through Jira, generate an API Token from your Atlassian account.
The generated API Token is used together with your Atlassian account email address for authentication.
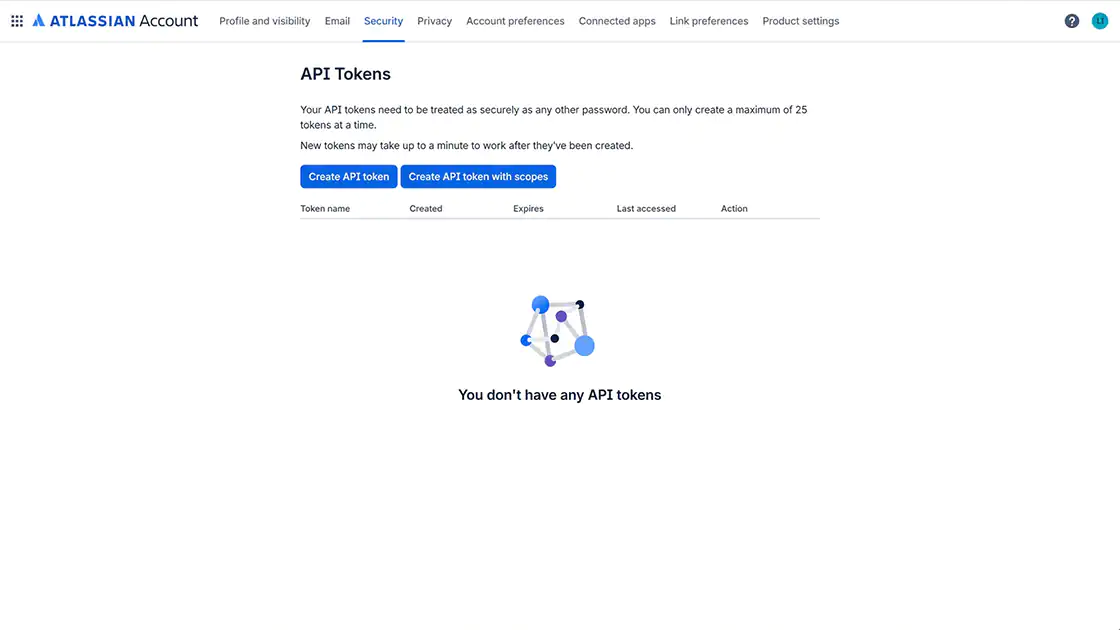
Step 1. Open the API Token Management Page
Open the following page:
https://id.atlassian.com/manage-profile/security/api-tokens
If you sign in using a password or an external identity provider, you may be prompted to verify your identity using a one-time code sent to your email.
Step 2. Create an API Token
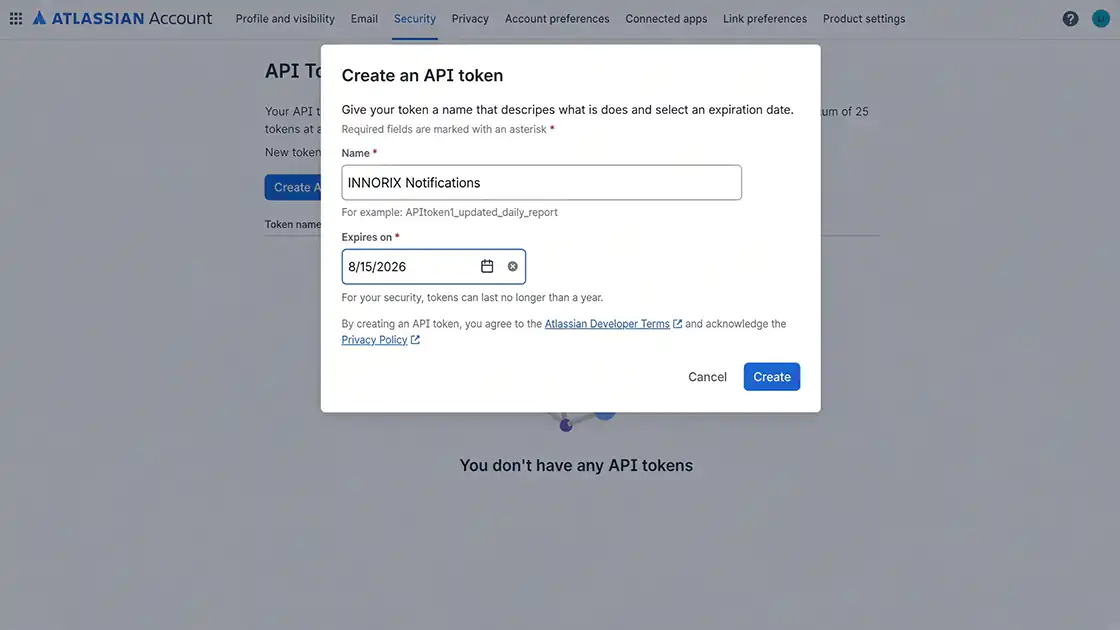
Click Create API token.
Enter a token name (for example, INNORIX Notifications), select an expiration period (1–365 days), and create the token.
When the token expires, the notification integration will stop working. Be sure to generate and replace it before the expiration date.
Step 3. Copy the API Token
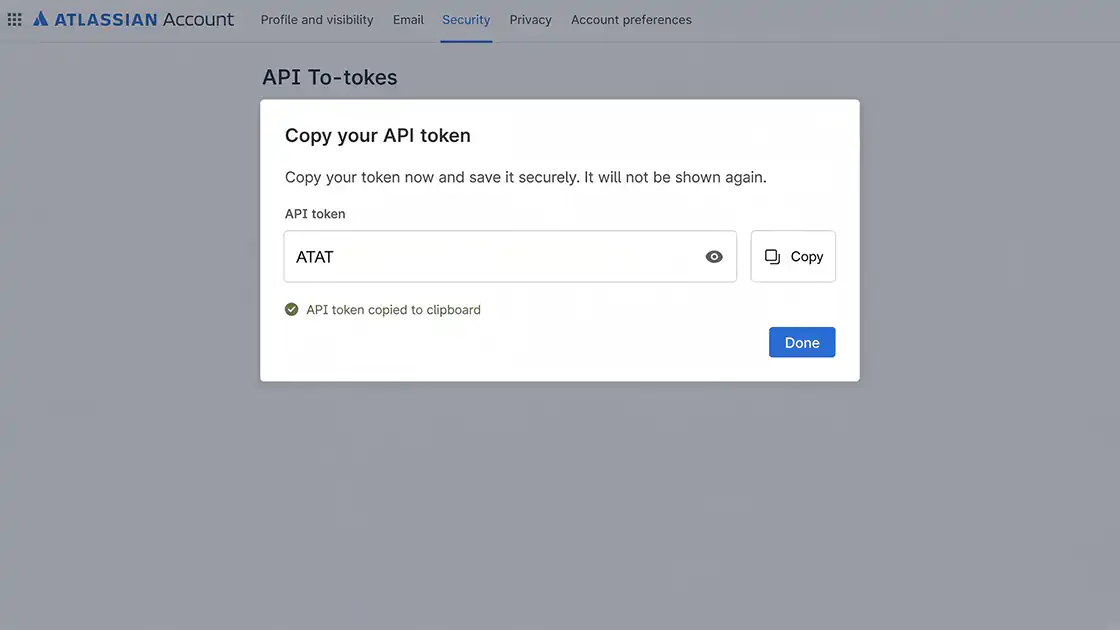
Click Copy to clipboard to copy the API Token.
The API Token is a sensitive credential. Anyone with this token can access Jira using your account permissions, so do not expose it in public repositories or external documents.
Once you close the creation dialog, the token cannot be viewed again. Store it securely. If it is lost or compromised, revoke the existing token and generate a new one.
Verification
- ✔ The API Token has been created.
- ✔ The API Token has been copied and stored securely.
Configure Jira Notifications
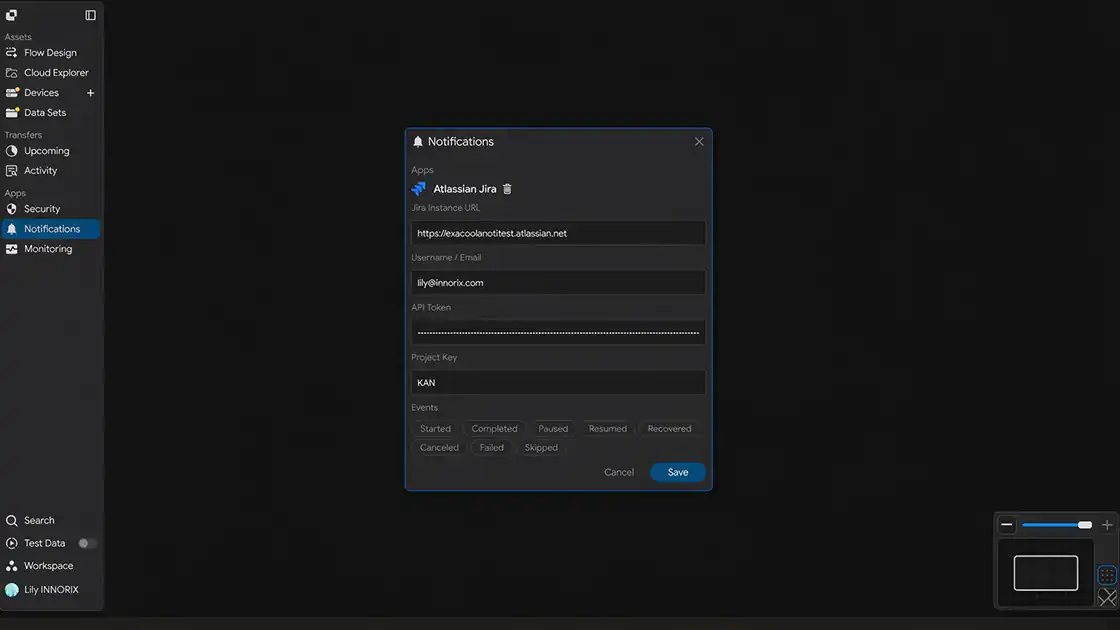
Enter the generated API Token and account information into the product notification settings.
Open the Notifications settings page.
Step 1. Enter the Jira Instance URL
In the Jira Instance URL field, enter the URL of your Jira site.
Example:
Step 2. Enter the Username / Email
In the Username / Email field, enter the email address of the Atlassian account that generated the API Token.
This account must have permission to create issues in the target project.
Step 3. Enter the API Token
Paste the API Token copied in the "Generate a Jira API Token" section into the API Token field.
Step 4. Enter the Project Key
In the Project Key field, enter the Project Key of the Jira project where issues will be created.
Example:
The Project Key can be found in the project settings or in an existing issue key (for example, PROJ-123).
Step 5. Select Notification Events
Select the events that should create Jira issues.
You can select multiple events. A Jira issue is created only when one of the selected events occurs.
| Event | Trigger |
|---|---|
| Started | When a file transfer starts |
| Completed | When a file transfer completes successfully |
| Paused | When a transfer is paused |
| Resumed | When a paused transfer resumes |
| Recovered | When a transfer automatically recovers after an interruption or error |
| Canceled | When a transfer is canceled by the user |
| Failed | When a transfer fails |
| Skipped | When a file is skipped (for example, because it already exists or matches a filter rule) |
Step 6. Save the Configuration
Click Add to save the integration.
Verification
- ✔ The Jira Instance URL has been entered.
- ✔ The Username / Email has been entered.
- ✔ The API Token has been entered.
- ✔ The Project Key has been entered.
- ✔ The notification events have been selected.
Verify the Integration
Verify that the integration is working correctly.
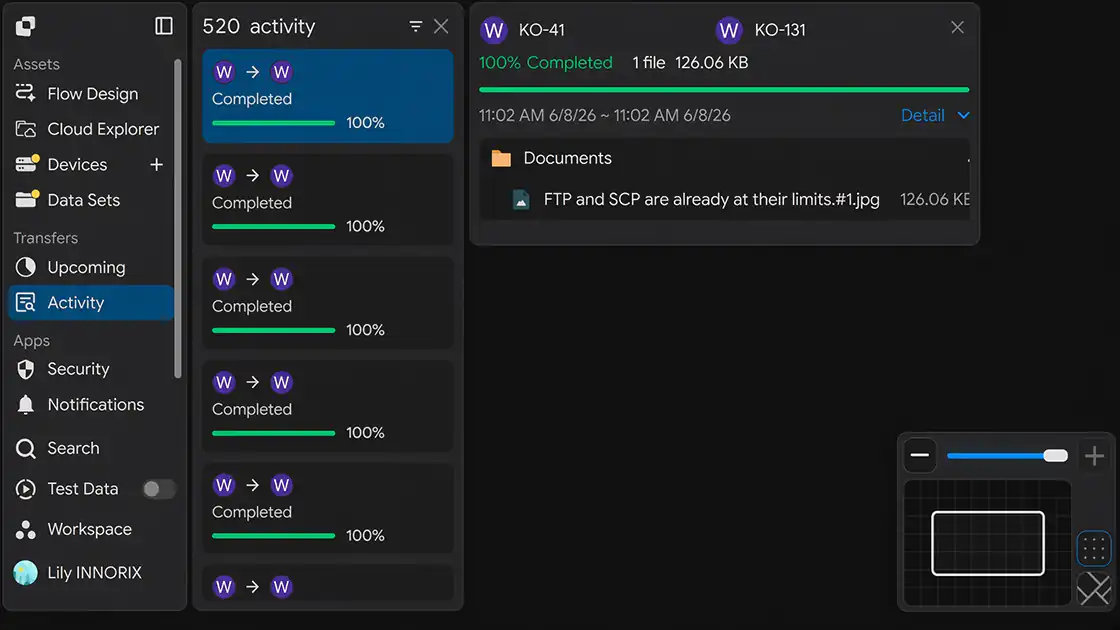
Step 1. Trigger a Test Event
Start an actual file transfer or trigger one of the selected notification events.
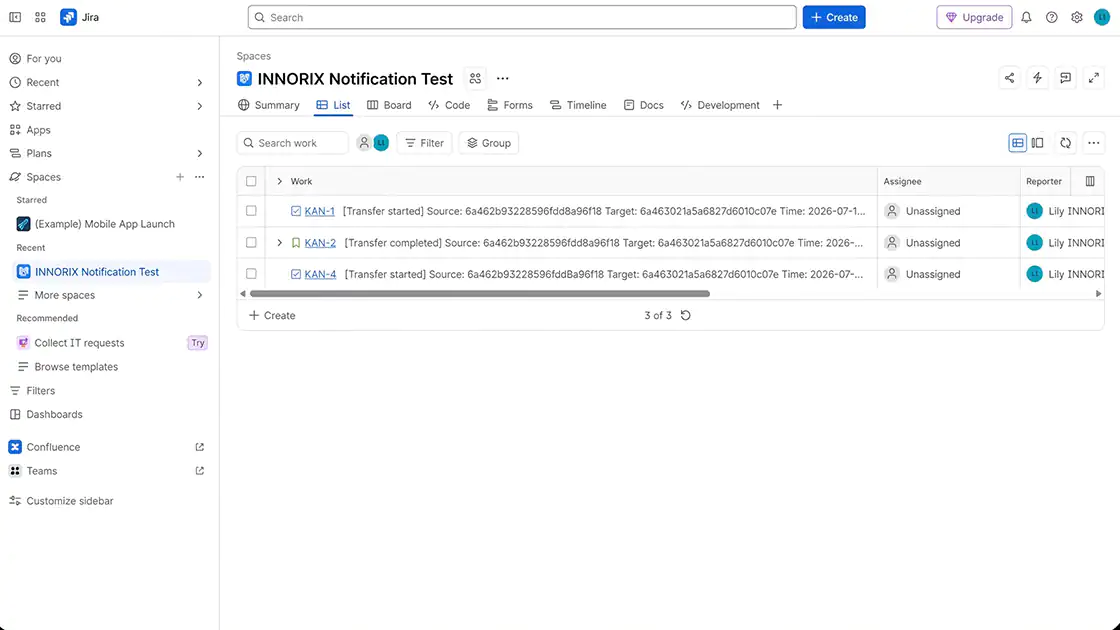
Step 2. Check the Jira Project
Confirm that a new issue has been created in the configured Jira project.
Verification
- ✔ A new issue has been created in the Jira project.
- ✔ The event information has been recorded correctly.
Configuration Complete
Once the configuration is saved, the integration becomes active.
From this point forward, a new Jira issue is automatically created in the configured project whenever one of the selected events occurs.
Troubleshooting
If Jira issues are not created, verify the following items.
| Issue | Check |
|---|---|
| No issue is created | Verify that the Jira Instance URL, Username / Email, API Token, and Project Key are entered correctly and contain no extra spaces or missing characters. |
| Authentication error (401) | Confirm that the email address matches the account that generated the API Token and that the API Token has not expired. If it has expired, generate a new token. |
| Permission error (403) | Confirm that the account has Create Issue permission in the target Jira project. |
| Project cannot be found | Verify that the Project Key is correct (for example, PROJ). |
| Notification delivery fails in a restricted network | Ensure that outbound HTTPS (443) access to your Jira instance is allowed through the firewall or proxy. |