
Integrate McAfee ENS Antivirus
Overview
You can integrate McAfee ENS Antivirus to scan files during Transfer and detect or block potential threats.
Once configured, files are scanned according to the selected Scan timing. If a threat is detected, the configured On detection action is applied to block the Transfer or generate an alert. The files to be scanned are determined by the selected Scan scope.
The overall process consists of the following steps:
① Verify McAfee API Credentials → ② Configure the Integration in the Product
Prerequisites
Before you begin, verify the following requirements.
| Item | Description |
|---|---|
| McAfee ENS | A McAfee ENS environment with API access for file scanning is required. |
| API Credentials | An API Endpoint and API Key are required. |
| Network | The environment where the product is installed must allow outbound HTTPS communication (port 443) to the API Endpoint. |
Verify McAfee API Credentials
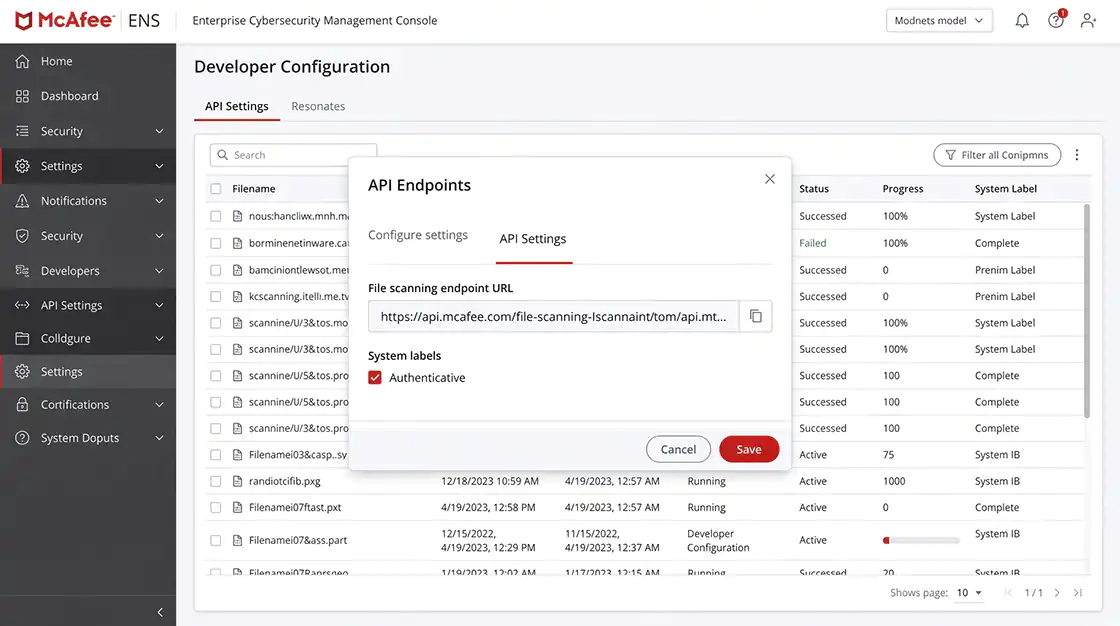
To scan files with McAfee ENS, you need an API Endpoint and API Key.
Step 1. Verify the API Endpoint
In the McAfee management console, verify the API Endpoint used for file scanning (for example, https://api.mcafee.com/...).
Step 2. Generate an API Key
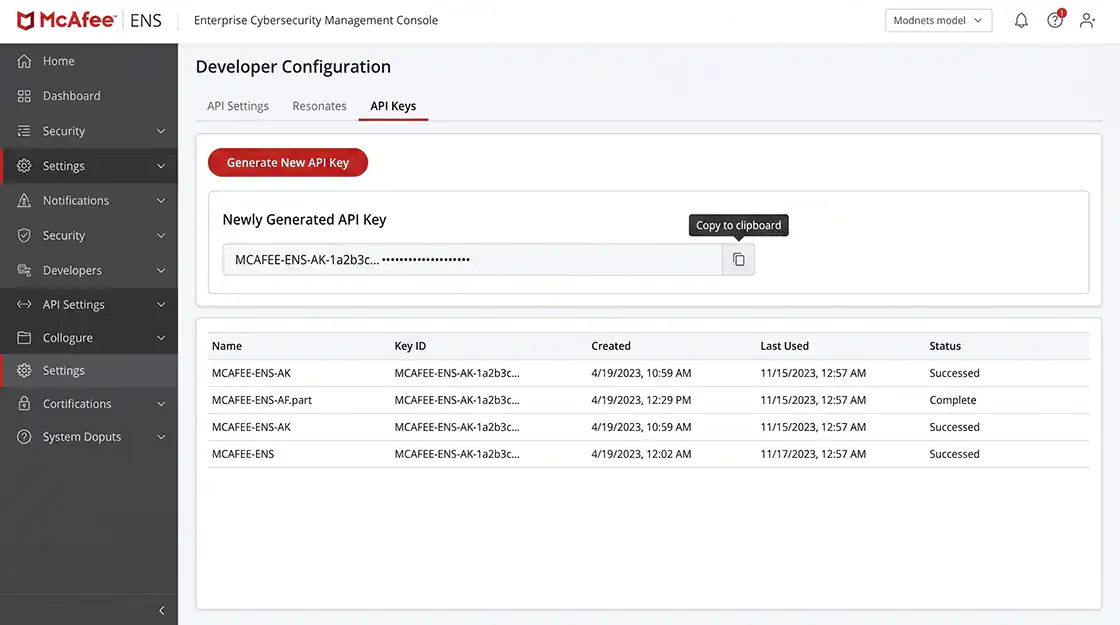
In the management console, open the API access settings, generate or retrieve the API Key, and copy it.
Treat the API Key as a password. Anyone with access to the API Key can use the scanning API, so do not expose it in public repositories or external documentation. If the API Key is compromised, revoke it and generate a new one.
Verification
✔ The API Endpoint has been verified.
✔ The API Key has been generated.
Configure McAfee ENS Integration
Enter the verified credentials and configure the scanning options.
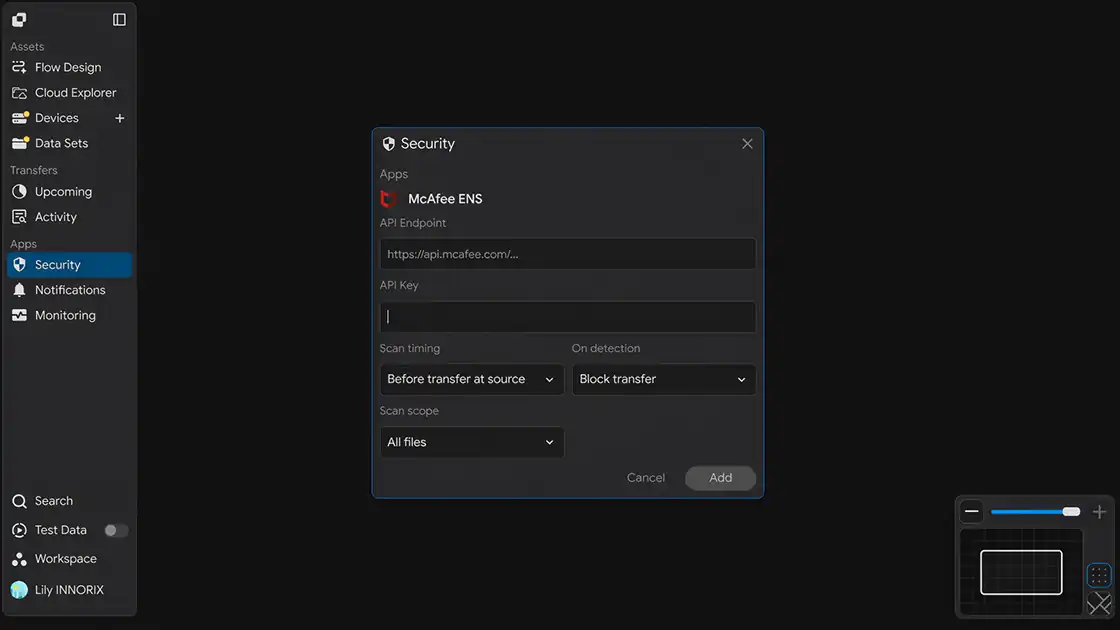
When you open the Security configuration page, the following screen is displayed.
Step 1. Enter the API Endpoint
Enter the API Endpoint verified in the "Verify McAfee API Credentials" section into the API Endpoint field (for example, https://api.mcafee.com/...).
Step 2. Enter the API Key
Enter the API Key generated in the "Verify McAfee API Credentials" section into the API Key field.
Step 3. Select Scan Timing
Select when files should be scanned in Scan timing.
| Option | Description |
|---|---|
| Before transfer at source | Scan files on the source before the Transfer starts. |
| After transfer at target | Scan files on the target after the Transfer completes. |
| Bothway | Scan files both before the Transfer at the source and after the Transfer at the target. |
Step 4. Select On Detection
Select how the system should respond when a threat is detected in On detection.
| Option | Description |
|---|---|
| Block transfer | Block the Transfer when a threat is detected. |
| Alert only | Allow the Transfer to continue and generate an alert only. |
| Admin confirm | Require administrator confirmation before proceeding. |
Step 5. Select Scan Scope
Select which files should be scanned in Scan scope.
| Option | Description |
|---|---|
| All files | Scan every transferred file. |
| Executable files only | Scan executable files only. |
| Custom exceptions | Scan files according to user-defined exception rules. |
Step 6. Save the Configuration
After completing the configuration, click Add to save the integration.
Verification
✔ The API Endpoint and API Key have been entered.
✔ The Scan timing, On detection, and Scan scope options have been selected.
Verify the Integration
Verify that the integration is operating correctly.
Step 1. Perform a Test Transfer
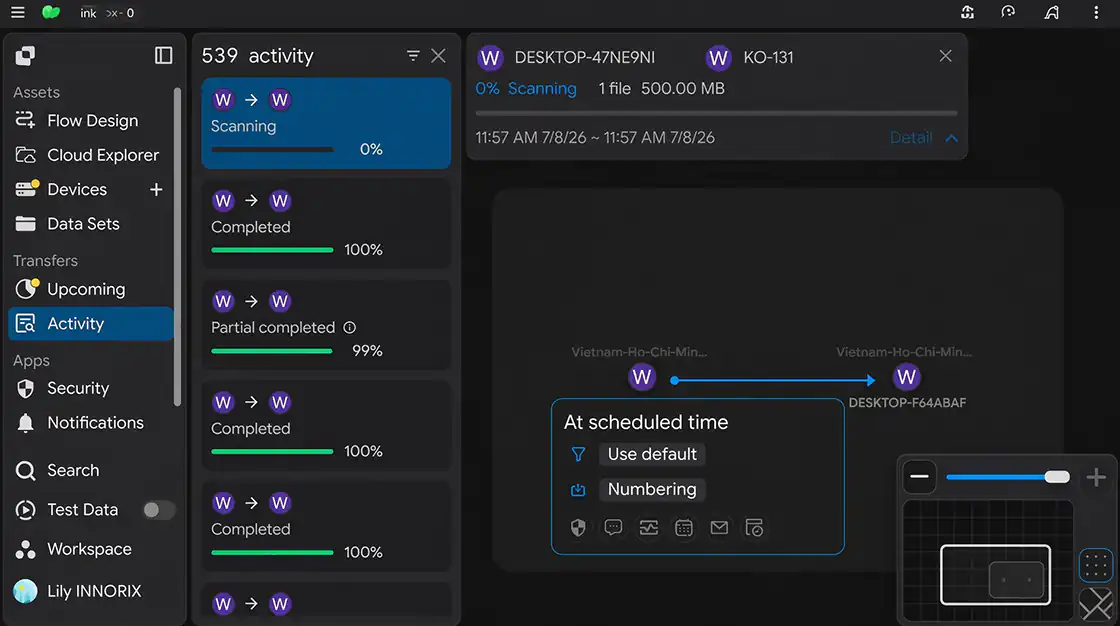
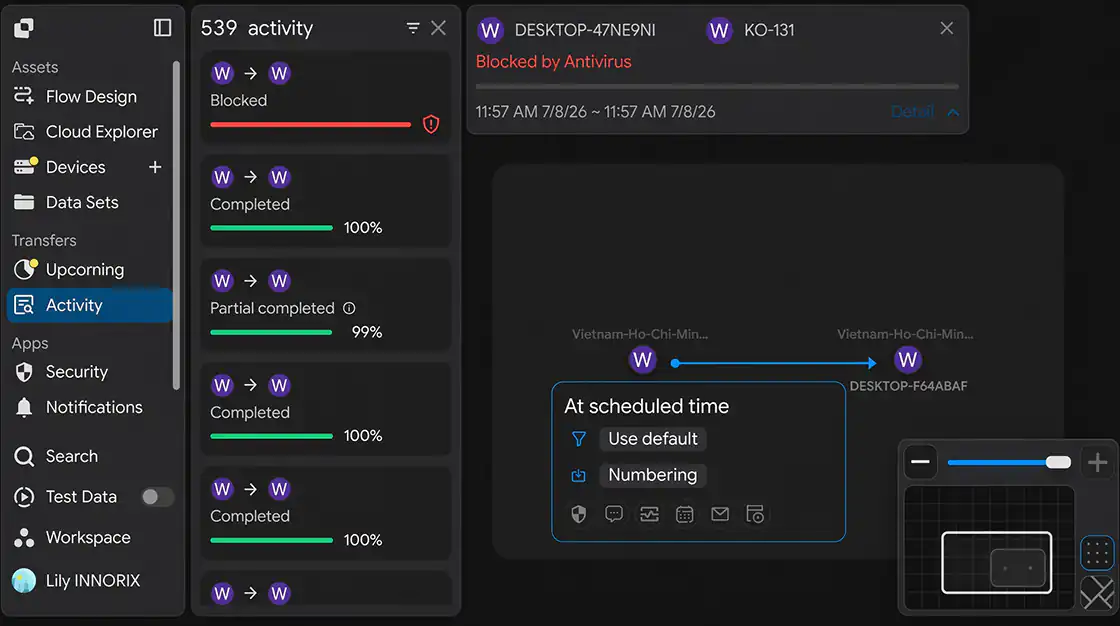
Transfer a file to verify that scanning is performed. You can safely verify the scanning behavior using a standard antivirus test file such as EICAR.
Step 2. Verify the Result
Verify that the configured On detection action is applied correctly (for example, Block transfer blocks the Transfer, while Alert only generates a warning).
Verification
✔ File scanning has been performed.
✔ The configured detection action is applied correctly.
Configuration Complete
After the configuration is saved, the integration becomes active.
From this point forward, transferred files are scanned according to the configured timing and scope. If a threat is detected, the configured action is applied automatically.
Troubleshooting
If scanning does not operate correctly, verify the following.
| Issue | Verification |
|---|---|
| Scanning is not performed | Verify that the API Endpoint and API Key are correct and do not contain leading or trailing spaces. |
| Authentication error occurs | Verify that the API Key is valid and has not been revoked or regenerated. |
| Threats are detected but Transfers are not blocked | Verify that On detection is set to Block transfer. |
| Certain files are not scanned | Verify the Scan scope configuration (All files, Executable files only, or Custom exceptions). |
| Transfer performance is slower | When Bothway is selected for Scan timing, files are scanned at both the source and target, which may increase processing time. Adjust the setting if necessary. |
| Integration fails in a restricted network | Verify that outbound HTTPS communication (port 443) to the API Endpoint is allowed by the firewall or proxy. |