
Getting Started#
Basic Concept#
Automatically bring files prepared in Amazon S3 into a Linux working environment
In cloud environments, applications, external systems, data collection services, and other environments store files in Amazon S3.
If those files then need to be processed on a Linux server, it may be necessary to check whether new files have been uploaded to S3 and download the required files to the server's working folder.
Automatic Amazon S3 file download is a method that directly connects S3, where files are stored, with the Linux server where actual processing takes place.
By specifying a particular S3 bucket and path and connecting a working folder on the Linux server, required files can be automatically transferred to the server environment according to specified conditions after they are ready.
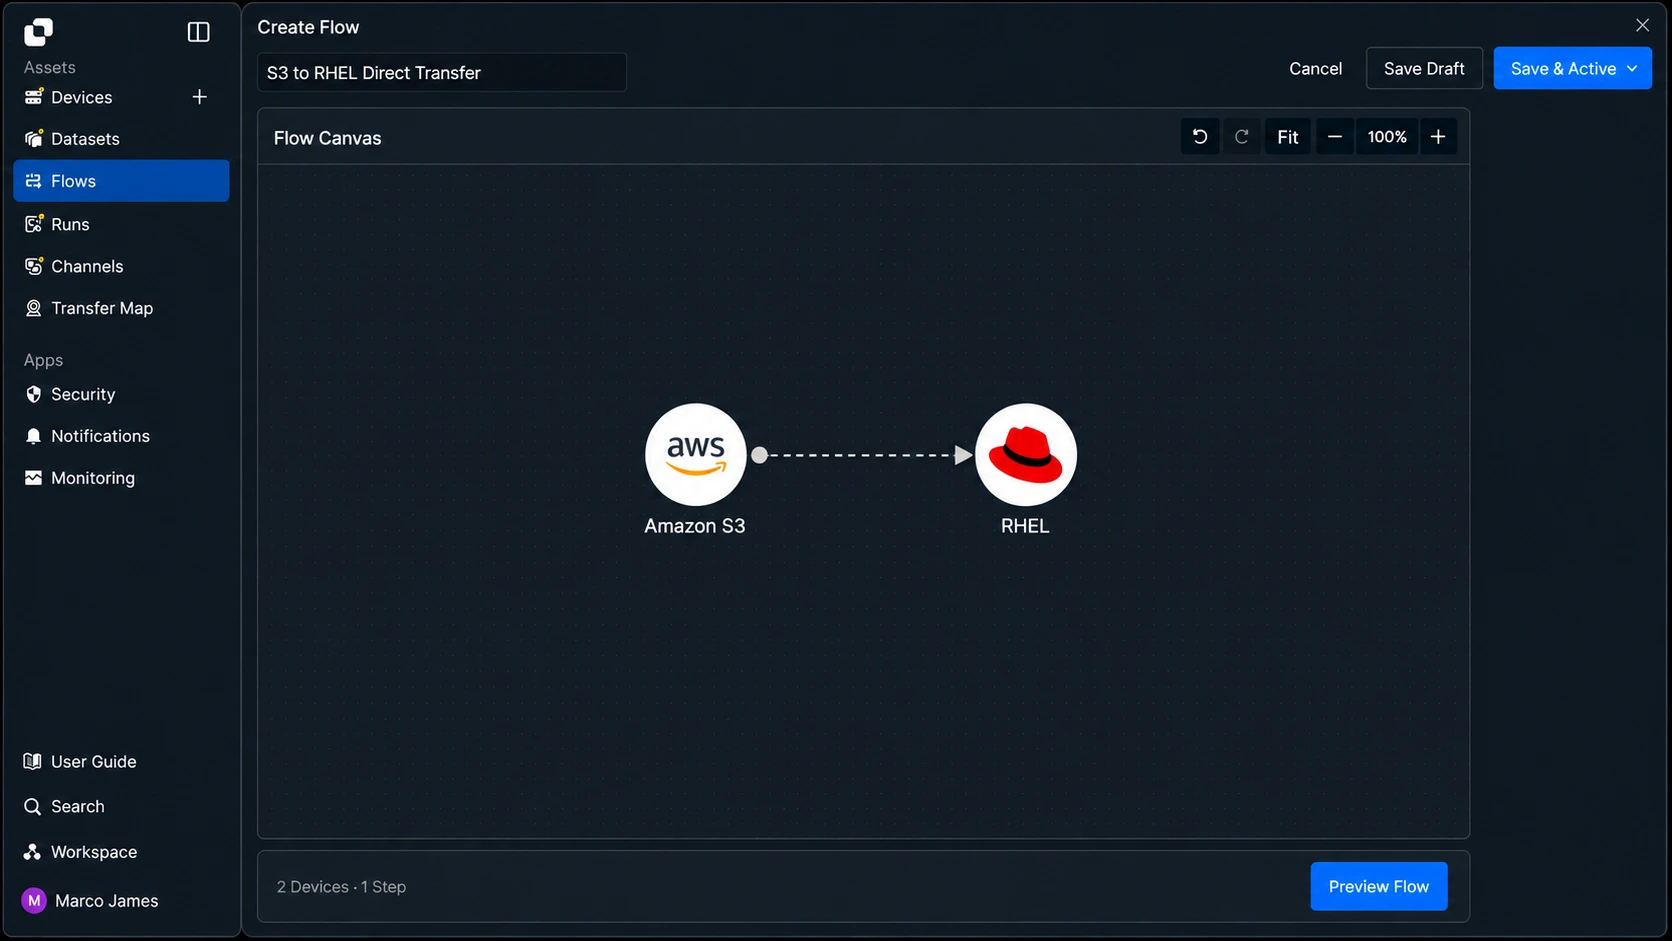
For example, you can configure the following environment.
| Environment Where Files Are Created | Environment Where Files Are Processed |
|---|---|
| Amazon S3 | Linux Server |
s3://company-data/incoming/ |
/data/incoming/ |
| External system uploads files | Analytics program processes files |
With this connection, S3 becomes the location where files are collected, while the Linux server becomes the environment that receives the required files and performs the actual work.
In other words, rather than simply downloading files from S3, you can connect files prepared in the cloud to a Linux workflow.
Download Flow#
Check whether files have been uploaded and bring only the required files to the Linux server
Automatic download does not need to be configured only as a method that copies all files in S3 at once.
You can configure it to bring only the files actually required by the Linux server based on the file storage location, file type, and execution conditions.
For example, assume the following files are stored in the /incoming/ path in S3.
incoming/sales-20260901.csvCSVsales-20260902.csvCSVimage.zipZIPtemporary.txtTXTREADME.mdMD
Of these, you can configure only CSV files to be automatically downloaded to the Linux analytics server.
Amazon S3incoming/sales-20260901.csvCSVLinux Server /data/input/sales-20260902.csvCSVLinux Server /data/input/image.zipZIPExcludetemporary.txtTXTExcludeREADME.mdMDExclude
After the files are applied to the Linux server, they can be used immediately by analytics programs or follow-up processing tasks.
The overall flow is configured as follows.
| Stage | Processing Details |
|---|---|
| File Storage | External system or application uploads files to S3 |
| Target Check | Check files in the specified bucket and path |
| Apply Conditions | Check conditions including file name, extension, and path |
| File Transfer | Download files matching the conditions to the Linux server |
| Apply to Working Folder | Save files to the specified path |
| Result Processing | Use files in the next task in the Linux environment |
Through this flow, you can connect the point when files are ready in S3 with the point when work starts on the Linux server as a single file flow.
Workflow Change#
Automate file preparation without checking S3 and manually downloading files
Previously, when files to be used on a Linux server were uploaded to S3, an operator or operational task might repeatedly perform the following process.
- Connect to S3
- Check for New Files
- Select Required Files
- Download to Linux Server
- Move to Working Folder
- Start Processing
With automatic download configured, the file preparation process changes as follows.
- Upload File to S3
- Automatically Check Conditions
- Apply to Linux Working Folder
- Start Next Task
The differences between the two methods are as follows.
| Category | Previous Method | Automatic Download |
|---|---|---|
| Check New Files | Check S3 manually | Automatically check using specified conditions |
| File Selection | Manually select required files | Automatically select files matching rules |
| Download | Run manually whenever needed | Run automatically based on conditions |
| Storage Location | Check or specify each time | Use a preconfigured Linux path |
| Next Task | Start manually after files are ready | Can connect automatically after files are applied |
For example, this can be applied when bringing daily generated data files to an analytics server or when the results of an external system need to be used by the next task on a Linux server.
IT Engineer#
Environment Connection#
Connect the S3 file location to the Linux server working folder
First, connect Amazon S3 as the Source and the Linux server as the Target.
In S3, specify the bucket and path where files will be checked. On the Linux server, configure the actual working folder where downloaded files will be stored.
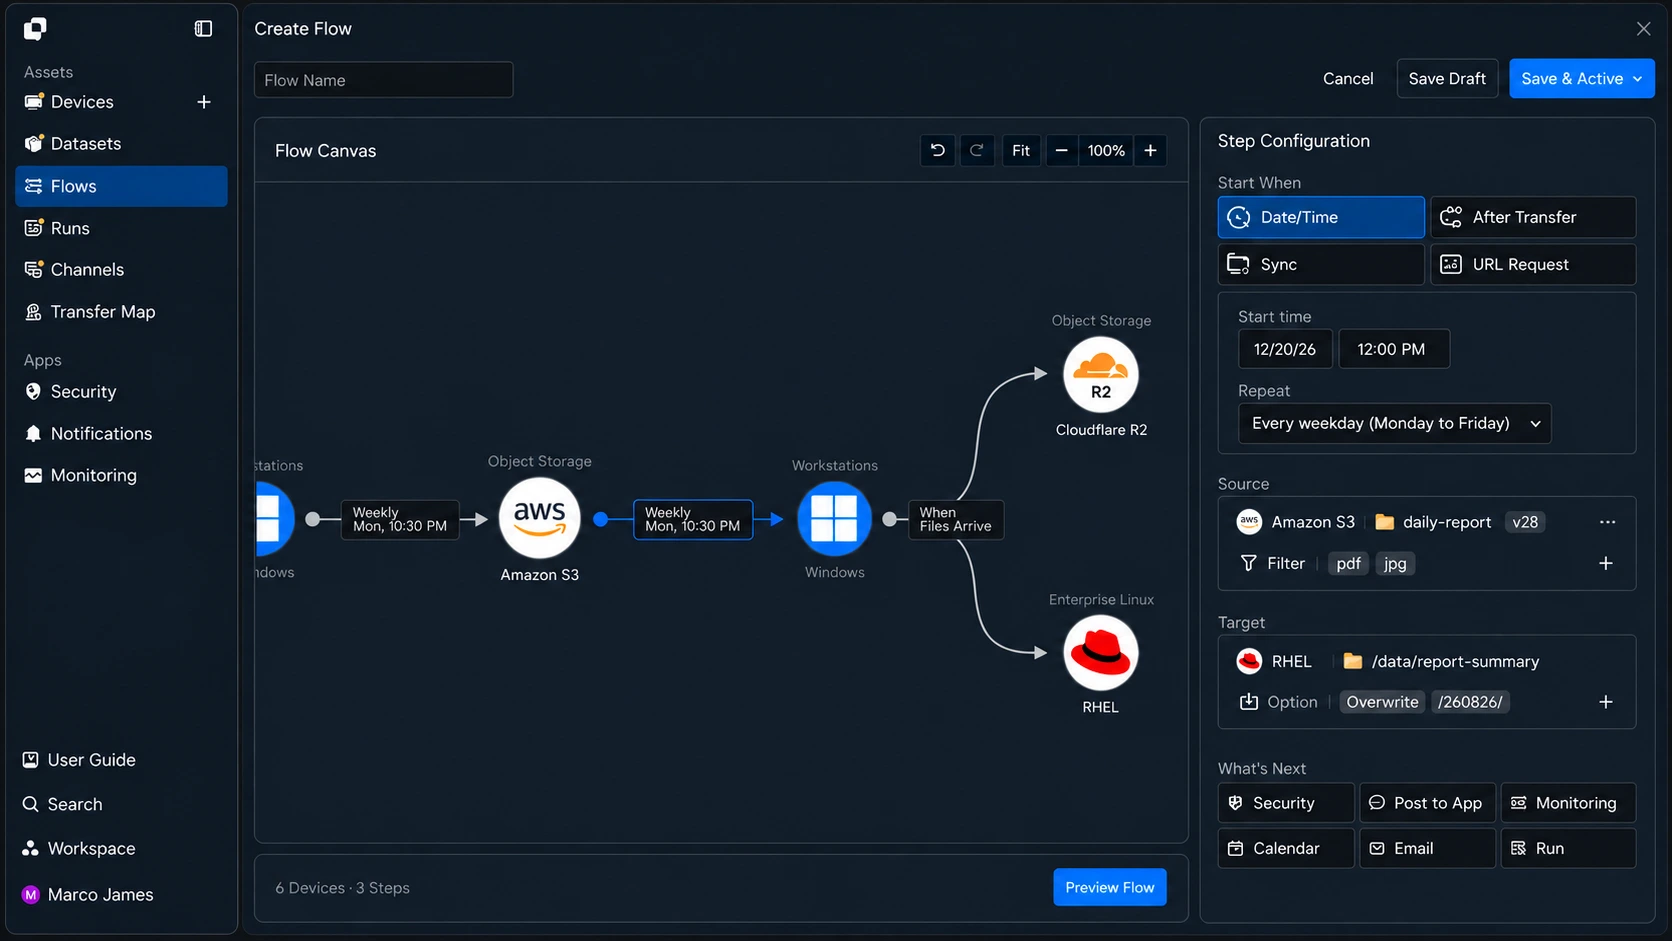
When connecting the environments, check the following scope.
| Category | Check |
|---|---|
| S3 Access | Check whether the bucket and file path can be accessed |
| Source Path | Check the location where the actual files are stored |
| Linux Connection | Check the connection status of the target server |
| Target Path | Specify the working folder where files will be stored |
| Storage Permission | Check whether files can be created on the Linux server |
This configuration clearly defines the transfer path for where files are retrieved from and where they are stored.
File Conditions#
Select only the S3 files actually required by the Linux server
A single S3 bucket may store files from multiple systems together.
Therefore, instead of transferring every file to the Linux server, you can set conditions to select only the files required for actual work.
For example, a data processing server can use the following conditions.
Source Path/incoming/data/File RulesInclude : *.csvCSVInclude : *.jsonJSONExclude : temporary/*
Applied to the actual file flow, it looks as follows.
Amazon S3data/customer.csvCSV✓ Downloadorder.jsonJSON✓ Downloadtest.tmpTMP✕ Skiptemporary/sample.csvCSV✕ Skip
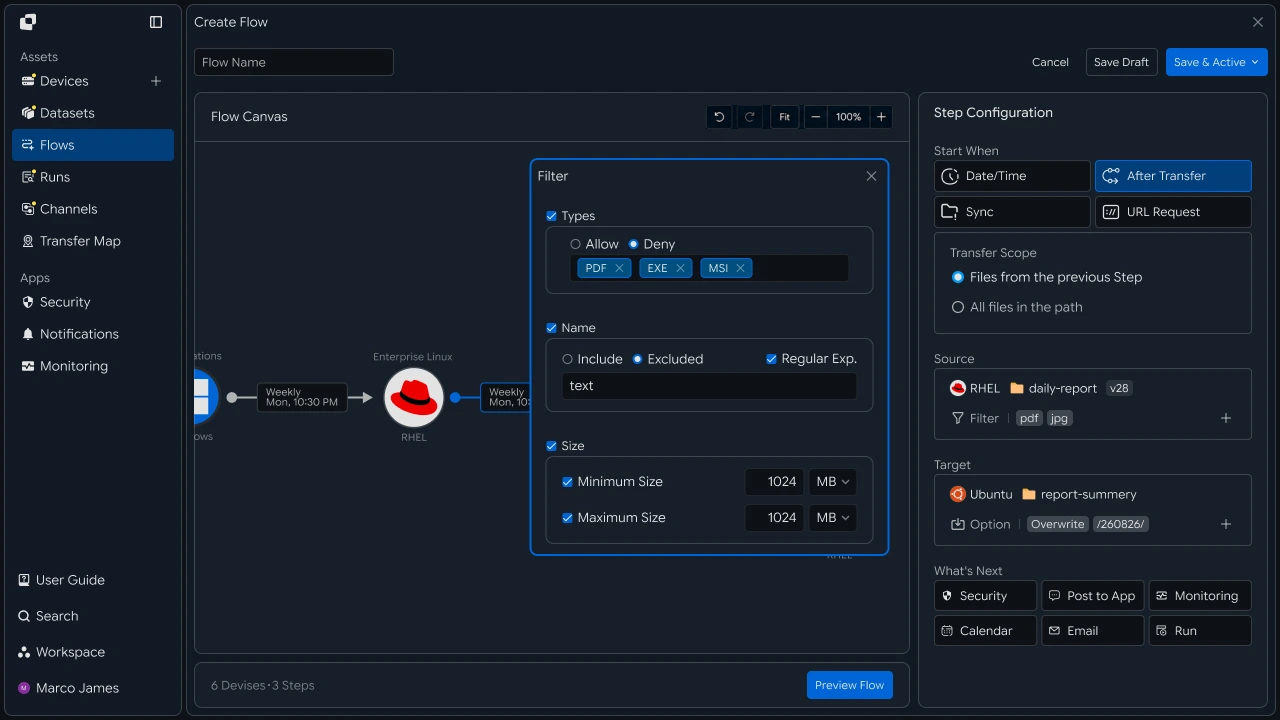
File conditions can be configured using the following criteria.
| Criteria | Usage Example |
|---|---|
| File Path | Process only files in a specific folder |
| File Name | Select files matching date or business-name rules |
| Extension | Process only required types including CSV, JSON, and ZIP |
| Exclusion Condition | Exclude temporary or test files |
| Execution Time | Run based on file readiness or a specified schedule |
This allows you to use S3 as shared storage while automatically preparing only the files actually required for processing on the Linux server.
Execution Configuration#
Automatically run download tasks according to file readiness
After setting the conditions for retrieving files, configure the criteria for starting the actual download task.
For example, you can configure it to run automatically when a new file is ready or to check S3 at a specific time each day.
The execution method can be configured differently depending on the work environment.
| Execution Criteria | Usage Environment |
|---|---|
| File Ready | Process after a new file is stored in S3 |
| Scheduled Run | Check files daily or at a specified time |
| Previous Task Complete | Run after another file-processing or transfer task |
| External Request | Run from an application or API request |
For example, if an external system uploads data to S3 every night, you can download it to a Linux analytics server after the files are ready and connect it to the next analytics task.
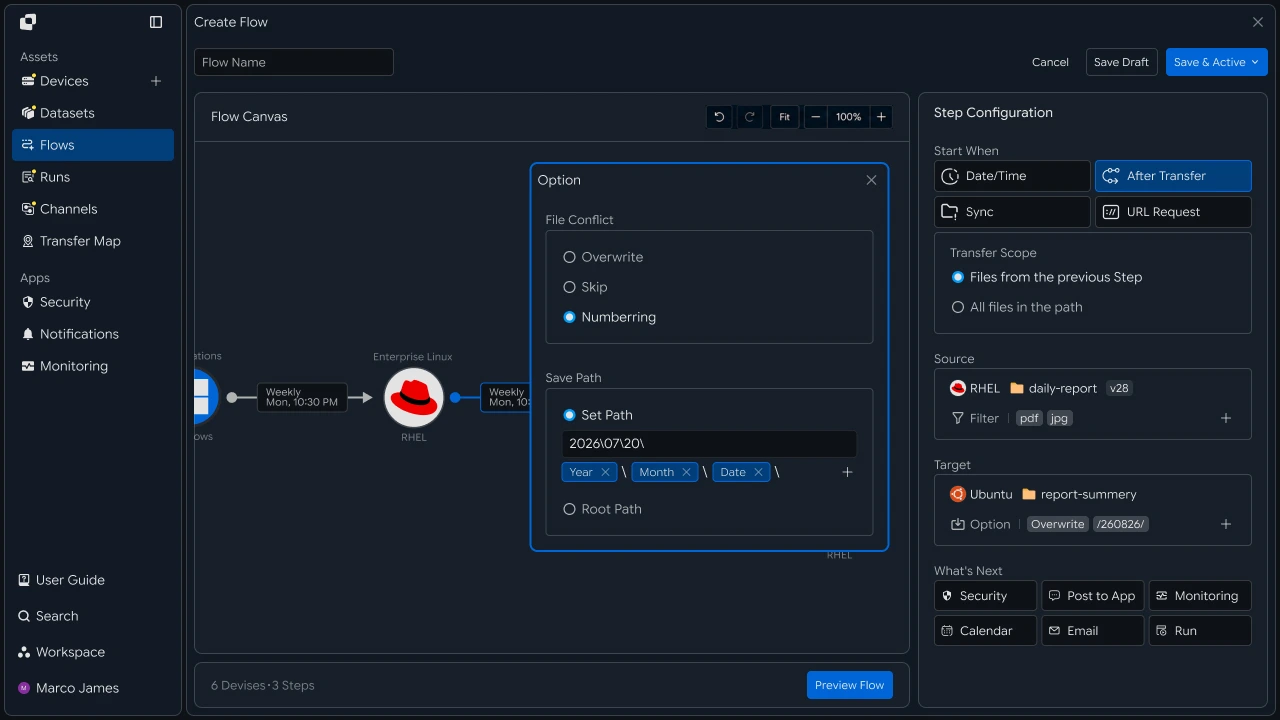
Path Design#
Separate multiple S3 files into different Linux working environments according to purpose
When multiple types of files are used from one S3 bucket, you can separate Linux servers or working folders according to the purpose of the files.
For example, you can configure it as follows.
Because each file type moves directly to the required working environment, you can reduce the process of collecting all files on one Linux server and then classifying them again.
Conversely, files from multiple S3 paths can also be collected on a single processing server.
In this way, you can configure collection-based or distributed download structures according to the actual server structure and business purpose.
Result Check#
Check download tasks and processing status for each file
When automatic download runs, check the overall task progress and processing results in Runs.
For running tasks, you can check the current transfer volume and progress. For completed tasks, you can check which files were actually applied to the Linux server.

In a Run, you can check the following information.
| Item | Details |
|---|---|
| Source | S3 bucket and path where files were retrieved |
| Target | Linux server and path where files are stored |
| Files | List of processed files |
| Total Size | Total transfer size |
| Progress | Current download progress |
| Status | Execution and completion status |
| Started | Task start time |
| Completed | Task completion time |
For example, you can check per-file results in a single Run as follows.
Run Details
────────────────────────────────

Source
Amazon S3 /incoming/data/

Target
Linux /data/input/

Files
────────────────────────────────
customer.csv       Completed
order.csv          Completed
product.json       Completed

Status
Completed
This allows you to check not only whether the overall task completed, but also whether the actual files were correctly applied to the specified location on the Linux server.
Follow-up Connection#
Continue to Linux server processing tasks after file download
After files are stored in the Linux working folder, you can start the next task based on those files.
For example, you can run an analytics program after downloading data files or start a conversion task after retrieving media files.
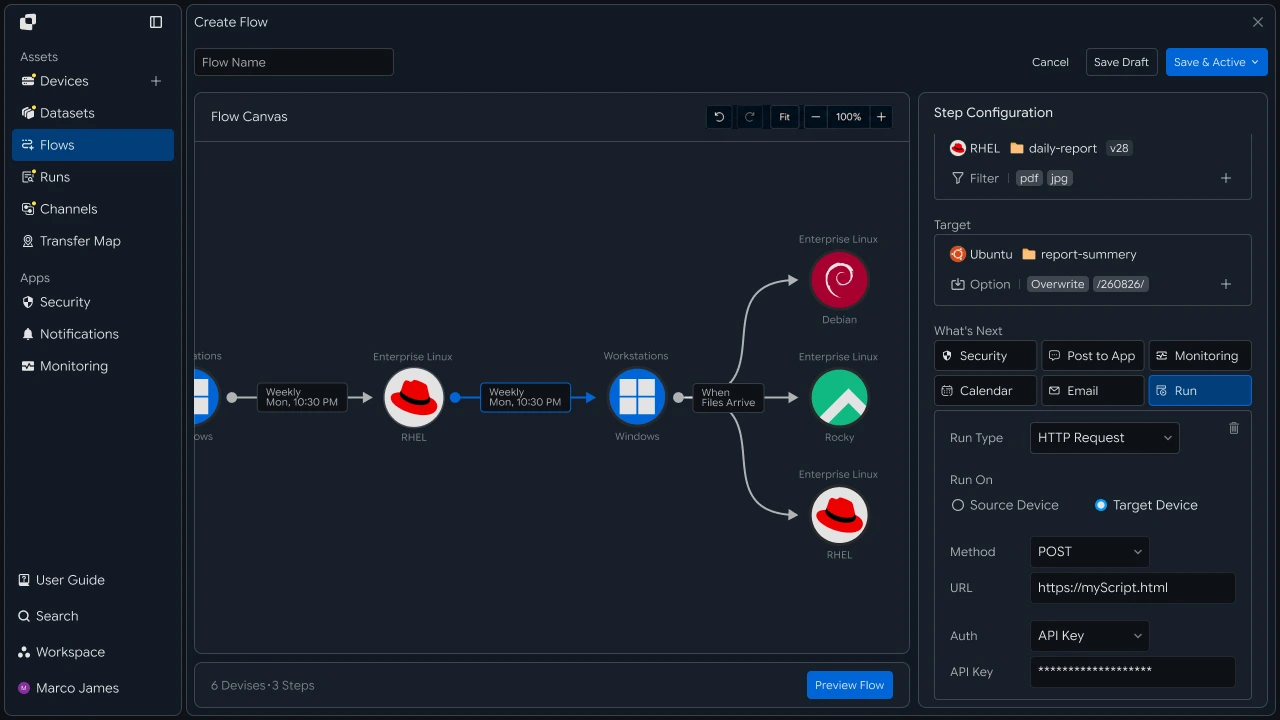
Follow-up tasks can be used as follows.
| Connection Method | Usage Example |
|---|---|
| Server Processing | Start analytics or conversion after files are applied |
| Next Flow | Transfer files to another device or storage |
| Notification | Notify download completion or failure results |
| Operations Check | Check execution status in the monitoring environment |
This allows you to go beyond simple S3 → Linux Server file movement and automatically connect to the next stage where the files are actually used for work.
Failure Handling#
Identify where a download did not complete and rerun the required task
If files are not applied correctly during automatic download, check the processing status through the details in Runs.
Depending on where the problem occurred, you can check the S3 Source, file conditions, Linux Target, or storage path.
Instead of checking every environment again from the beginning, failure diagnosis can proceed by starting from the stage where the problem occurred.
The check items can be divided as follows.
| Issue Location | Check | Action |
|---|---|---|
| S3 | Bucket access and source file status | Check connection and access settings |
| File Conditions | Path, name, and extension conditions | Adjust download rules |
| Linux | Server connection status | Check Target environment |
| Storage Path | Actual working folder location | Modify path |
| Access Permission | File creation and storage permissions | Check permission settings |
| Execution History | Processing results by Run and file | Check the problem stage and rerun |
After adjusting the environment, rerun the task and check the results through the new Run.
This allows you to configure and reliably operate a single automated flow from the point when files are stored in Amazon S3 through application to the Linux server working folder and subsequent processing tasks.
Developer#
Register scheduled automation in code to download S3 files to a Linux server
Create one automation that runs at a scheduled time to transfer S3 files to Linux. Prepare the following items before starting.
| Requirement | Details |
|---|---|
| INNORIX Authentication | INNORIX_ACCESS_TOKEN (Authorization: Bearer) |
| S3 Device | Source device ID and source path (e.g., my-bucket/incoming) |
| Linux Device | Target device ID and storage folder path (e.g., /work/incoming) |
| Runtime | Python 3 + requests, Java 17+, Node.js 18+, .NET 8+ |
Python and Node.js define and use a minimal
api()helper that directly calls REST (see API Call Recipe). Java and C# use the bundled-sourceInnorixClientandJsonhelper (Jfor C#), which includeencode_pathandnow_iso. Replace the device identifiers (device-s3,device-linux-01) and paths with actual values.
Create Scheduled Automation#
Scheduled transfers are created by attaching a schedule to transferType: "normal". Specify the schedule using schedules[].type: "day" (daily) and the execution time (hour, minute, ampm). For paths, use a token (encode_path) that combines the device identifier and encoded path.
def create_scheduled_download(source, source_path, target, target_path,
                              hour="02", minute="00", ampm="am", action="nosend"):
    body = {
        "name": "s3 to linux daily",
        "flowName": "s3 to linux daily",
        "transferType": "normal",
        "isUpcoming": False,
        "timezone": "Asia/Seoul",
        "details": [{
            "senderId": source,
            "receiverId": target,
            "sourceItem": [{
                "hash": encode_path(source, source_path),
                "filePath": str(source_path or "").replace("\\", "/"),
                "isDir": True,
            }],
            "targetPath": encode_path(target, target_path),
            "step": 1,
            "transferOptions": {
                "noSchedule": False,
                "target-action": action,   # nosend = skip files already on the target
                "send-fileoption": {},
            },
        }],
        "schedules": [{
            "type": "day",                 # run daily
            "startDateType": "now",
            "hour": hour, "minute": minute, "ampm": ampm,
            "startDate": now_iso(),
            "timezone": "Asia/Seoul",
        }],
        "step": 1,
    }

    return api("POST", "/api/automations", body)["automationId"]


automation_id = create_scheduled_download(
    "device-s3", "my-bucket/incoming",
    "device-linux-01", "/work/incoming", hour="02")
static String createScheduledDownload(InnorixClient client, String source, String sourcePath,
String target, String targetPath, String hour, String minute, String ampm, String action) {
Map<String, Object> detail = Json.newObj(
"senderId", source,
"receiverId", target,
"sourceItem", Json.newArr(Json.newObj(
"hash", InnorixClient.encodePath(source, sourcePath),
"filePath", sourcePath.replace("\\", "/"),
"isDir", true)),
"targetPath", InnorixClient.encodePath(target, targetPath),
"step", 1,
"transferOptions", Json.newObj(
"noSchedule", false,
"target-action", action, // nosend = skip files already on the target
"send-fileoption", Json.newObj()));
Map<String, Object> body = Json.newObj(
"name", "s3 to linux daily",
"flowName", "s3 to linux daily",
"transferType", "normal",
"isUpcoming", false,
"timezone", "Asia/Seoul",
"details", Json.newArr(detail),
"schedules", Json.newArr(Json.newObj(
"type", "day", // run daily
"startDateType", "now",
"hour", hour, "minute", minute, "ampm", ampm,
"startDate", InnorixClient.nowIso(), "timezone", "Asia/Seoul")),
"step", 1);
return Json.str(client.apiObj("POST", "/api/automations", body, null), "automationId");
}async function createScheduledDownload(source, sourcePath, target, targetPath,
hour = "02", minute = "00", ampm = "am", action = "nosend") {
const body = {
name: "s3 to linux daily",
flowName: "s3 to linux daily",
transferType: "normal",
isUpcoming: false,
timezone: "Asia/Seoul",
details: [{
senderId: source,
receiverId: target,
sourceItem: [{
hash: encodePath(source, sourcePath),
filePath: String(sourcePath ?? "").replace(/\\/g, "/"),
isDir: true,
}],
targetPath: encodePath(target, targetPath),
step: 1,
transferOptions: {
noSchedule: false,
"target-action": action, // nosend = skip files already on the target
"send-fileoption": {},
},
}],
schedules: [{
type: "day", // run daily
startDateType: "now",
hour, minute, ampm,
startDate: nowIso(),
timezone: "Asia/Seoul",
}],
step: 1,
};
return (await api("POST", "/api/automations", body)).automationId;
}
const automationId = await createScheduledDownload(
"device-s3", "my-bucket/incoming",
"device-linux-01", "/work/incoming", "02");static async Task<string> CreateScheduledDownloadAsync(InnorixClient client, string source, string sourcePath,
string target, string targetPath, string hour = "02", string minute = "00", string ampm = "am",
string action = "nosend")
{
var detail = new JsonObject
{
["senderId"] = source,
["receiverId"] = target,
["sourceItem"] = new JsonArray
{
new JsonObject
{
["hash"] = InnorixClient.EncodePath(source, sourcePath),
["filePath"] = sourcePath.Replace("\\", "/"),
["isDir"] = true,
}
},
["targetPath"] = InnorixClient.EncodePath(target, targetPath),
["step"] = 1,
["transferOptions"] = new JsonObject
{
["noSchedule"] = false,
["target-action"] = action, // nosend = skip files already on the target
["send-fileoption"] = new JsonObject(),
},
};
var body = new JsonObject
{
["name"] = "s3 to linux daily",
["flowName"] = "s3 to linux daily",
["transferType"] = "normal",
["isUpcoming"] = false,
["timezone"] = "Asia/Seoul",
["details"] = new JsonArray { detail },
["schedules"] = new JsonArray
{
new JsonObject
{
["type"] = "day", // run daily
["startDateType"] = "now",
["hour"] = hour, ["minute"] = minute, ["ampm"] = ampm,
["startDate"] = InnorixClient.NowIso(), ["timezone"] = "Asia/Seoul",
}
},
["step"] = 1,
};
return J.Str(await client.ApiObjAsync("POST", "/api/automations", body), "automationId");
}| Item | Value | Description |
|---|---|---|
transferType |
"normal" |
Scheduled transfer (not real-time monitoring) |
schedules[].type |
"day" |
Repeat daily |
schedules[].hour, minute, ampm |
string | Execution time |
transferOptions.target-action |
nosend, overwrite, numbering |
nosend = skip files already on the target |
isUpcoming |
false |
Register the recurring schedule in the request as-is (the server does not replace it with the next execution time value). Specify false for scheduled automation |
Difference Between
syncandnormaltransferType: "sync"continuously monitors the source folder. To transfer only at a scheduled time, specify a schedule withtransferType: "normal"as in this recipe. The Scheduled Transfer Recipe covers how to use different recurrence patterns, including weekly and monthly schedules.
Check Execution#
Each time the scheduled automation runs, an execution record is added. Query the status and monitorId for each execution. The newest execution appears first in the array.
runs = api("GET", f"/api/automations/{automation_id}/executions") or []

for run in runs:
print(run["startTime"], run["status"], run["monitorId"])List<Object> runs = Json.asArr(client.api("GET", "/api/automations/" + automationId + "/executions"));
for (Object run : runs) {
Map<String, Object> r = Json.asObj(run);
System.out.println(Json.str(r, "startTime") + " " + Json.intOrNull(r, "status") + " " + Json.str(r, "monitorId"));
}const runs = (await api("GET", `/api/automations/${automationId}/executions`)) || [];
for (const run of runs) {
console.log(run.startTime, run.status, run.monitorId);
}JsonArray runs = J.AsArr(await client.ApiAsync("GET", quot;/api/automations/{automationId}/executions"));
foreach (JsonNode run in runs)
Console.WriteLine(quot;{J.Str(run, "startTime")} {J.IntOrNull(run, "status")} {J.Str(run, "monitorId")}");Each execution's monitorId connects to file-level results (see API Call Recipe for transfer status and file queries).
Pause, Resume, Delete Schedule#
To temporarily stop the schedule, pause it; to turn it back on, resume it. To end the schedule completely, delete the automation. To change the source/target paths or execution time, delete the existing automation and create a new automation with the changed values.
api("POST", f"/api/automations/{automation_id}/pause", {"pause": True})   # pause
api("POST", f"/api/automations/{automation_id}/pause", {"pause": False})  # resume
api("DELETE", f"/api/automations/{automation_id}") # delete automation (permanent)client.api("POST", "/api/automations/" + automationId + "/pause", Json.newObj("pause", true)); // pause
client.api("POST", "/api/automations/" + automationId + "/pause", Json.newObj("pause", false)); // resume
client.api("DELETE", "/api/automations/" + automationId); // delete automation (permanent)await api("POST", `/api/automations/${automationId}/pause`, { pause: true }); // pause
await api("POST", `/api/automations/${automationId}/pause`, { pause: false }); // resume
await api("DELETE", `/api/automations/${automationId}`); // delete automation (permanent)await client.ApiAsync("POST", quot;/api/automations/{automationId}/pause", new JsonObject { ["pause"] = true }); // pause
await client.ApiAsync("POST", quot;/api/automations/{automationId}/pause", new JsonObject { ["pause"] = false }); // resume
await client.ApiAsync("DELETE", quot;/api/automations/{automationId}"); // delete automation (permanent)Implementation Result#
Applying this recipe allows you to regularly collect S3 files on a Linux server using the following flow.
- Files Stored in S3
- Run Automation at Scheduled Time (normal)
- Transfer to Linux Server
- Check Execution History, monitorId
At each scheduled time, S3 files are downloaded to Linux, automatically collecting cloud-stored data into an on-premises working environment.