
Getting Started#
Basic Concept#
Migrate S3 data directly to Cloudflare R2 without intermediate storage
When migrating data stored in S3 to R2, you can move all data at once or migrate it in stages by selecting specific Buckets or business-specific Prefixes.
Previously, files could be moved through an intermediate environment as follows.
This method may require additional storage space and file management in the intermediate environment.
By configuring a direct transfer, you can connect S3 and R2 in a single transfer path.
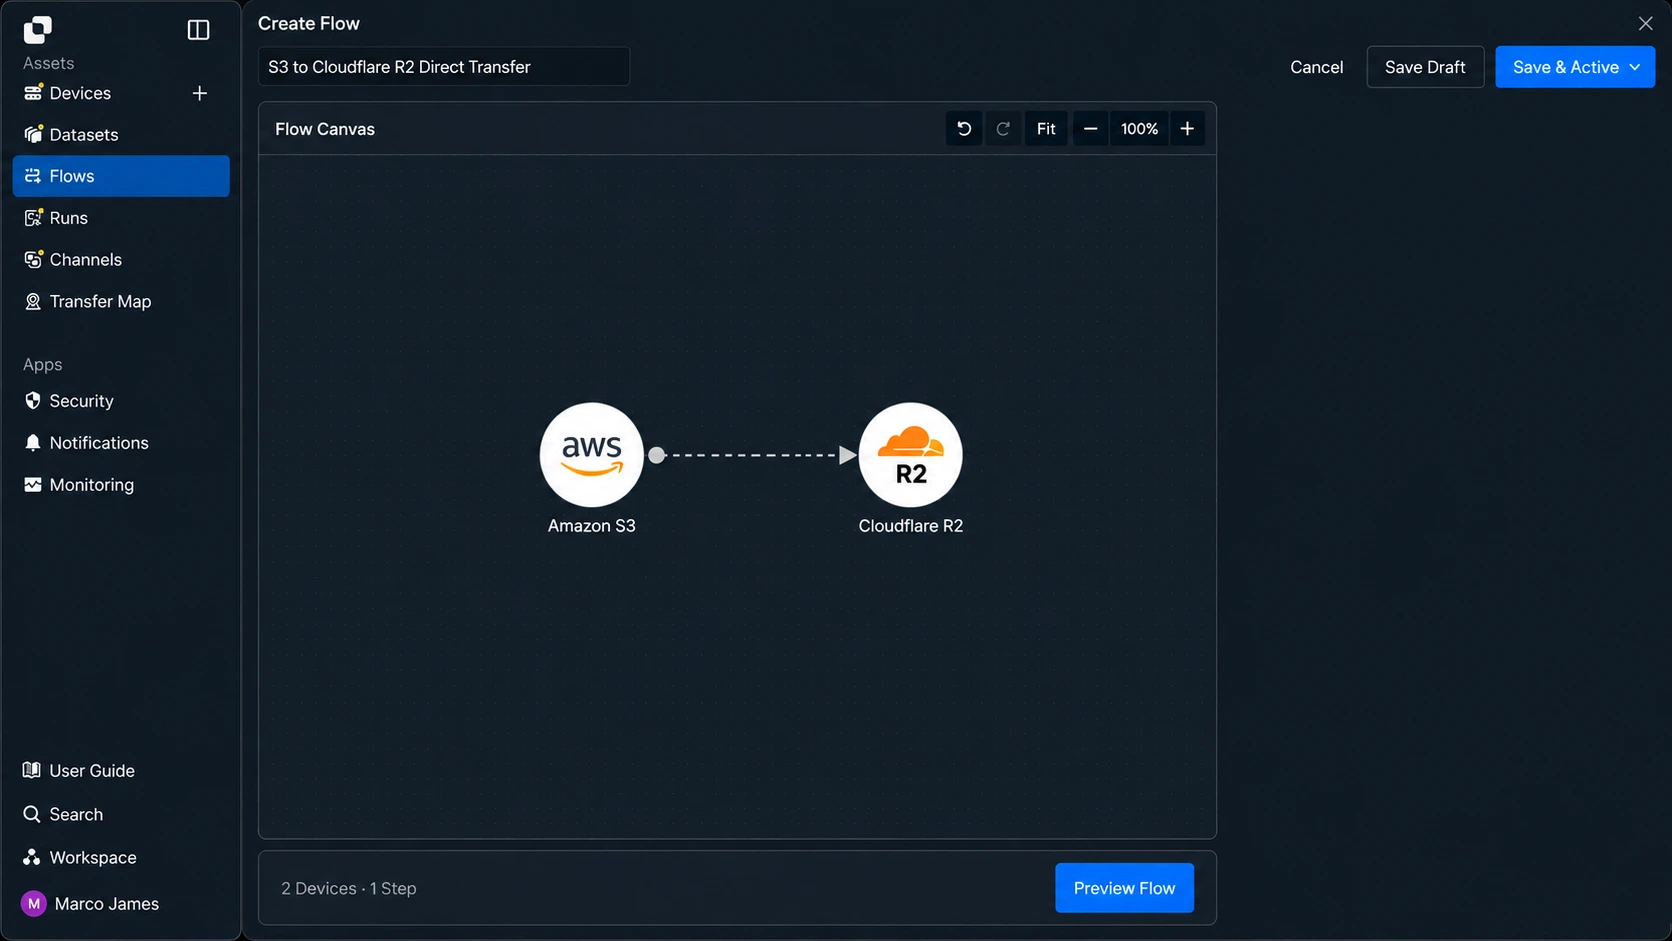
This allows you to manage Select S3 Files → Direct Transfer to R2 → Check Migration Results → Verify Files in a single flow.
Migration Scope#
Migrate an entire Bucket or select only the required data paths
An S3 Bucket may contain files for different purposes, including service data, backup files, logs, and temporary files.
Therefore, instead of migrating the entire Bucket as-is, you can select only the data required in the actual R2 environment.
For example, assume S3 has the following structure.
source-bucketmedia/original/processed/backup/daily/archive/logs/temporary/
Of these, you can configure only media/ and backup/ to be migrated to R2.

The migration scope can be divided according to the data type and migration purpose.
| Setting Criteria | Usage |
|---|---|
| Source Bucket | Specify the S3 Bucket to migrate |
| Source Path | Select a specific Prefix or folder |
| Target Bucket | Specify the target Bucket in R2 |
| Target Path | Configure where migrated files will be stored |
| File Condition | Select specific extensions or naming rules |
| Exclusion Condition | Exclude temporary files or unnecessary paths |
This allows you to configure a staged migration based on required files instead of unconditionally moving all data.
Migration Stages#
Move existing data first, then apply changed files
When migrating a large amount of data, existing files and files newly created during the migration do not need to be handled in the same way.
You can first migrate existing data to R2, then additionally apply files newly created or changed in S3 while the initial migration is being completed.
The overall flow can be divided as follows.
- ```flow
- Check Migration Scope
- Transfer Existing Files
- Compare File Count, Size
- Check Changed Files
- Apply Additional Files
- Final Verification
This method is suitable for large-scale file migration because it allows the initial bulk transfer and subsequent changes to be managed separately.

For example, if files continue to be generated by a service, you can configure the migration as follows.

```pipe
- Initial Migration | S3 Existing Files > Cloudflare R2 > Initial Result
- Sync Migration | S3 New / Changed Files > Cloudflare R2 > Final Result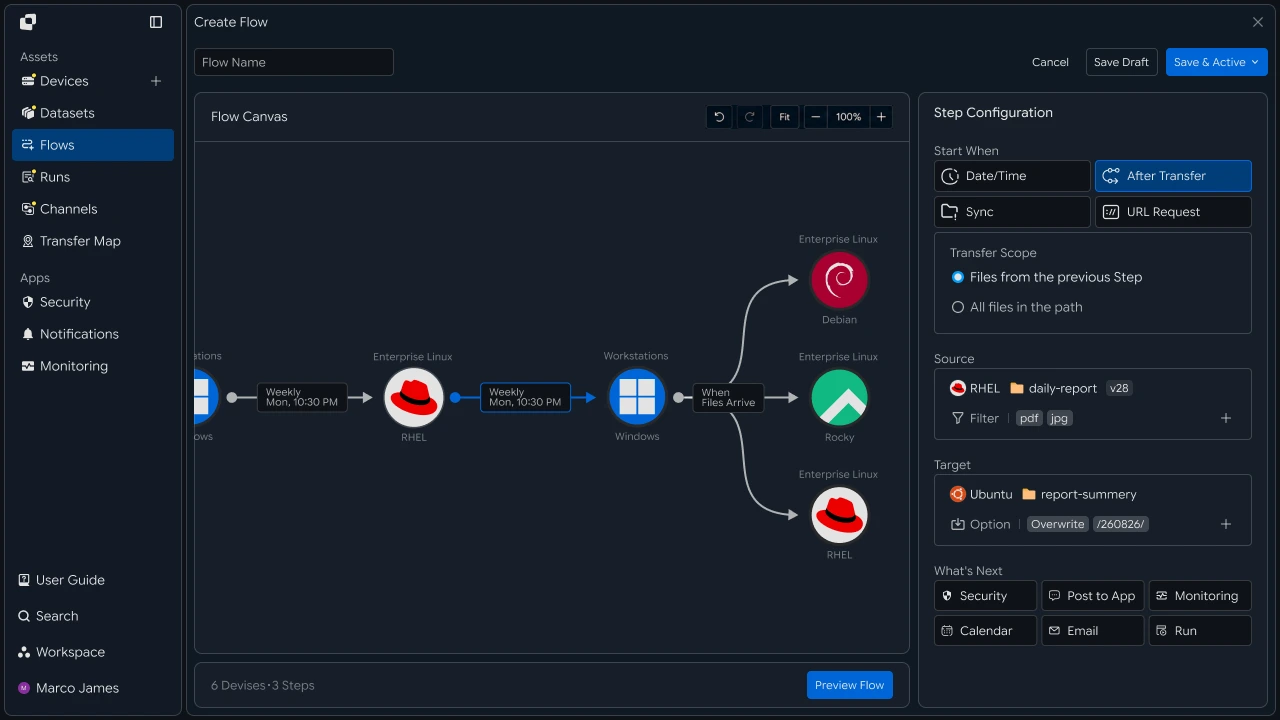
This allows you to migrate existing data first and then additionally apply changed files generated during service operation, reducing data differences at the final cutover point.
IT Engineer#
Storage Connection#
Register Amazon S3 and Cloudflare R2 separately in the transfer environment
First, connect Amazon S3, which stores the data to migrate, and Cloudflare R2, which will be used as the new storage environment.
Because the Source and Target are different object storage services, manage the scope for reading and storing files separately.
S3 must be able to read the Bucket and files to migrate, while R2 must be able to store files in the target Bucket and specified path.
Object Storage Connections
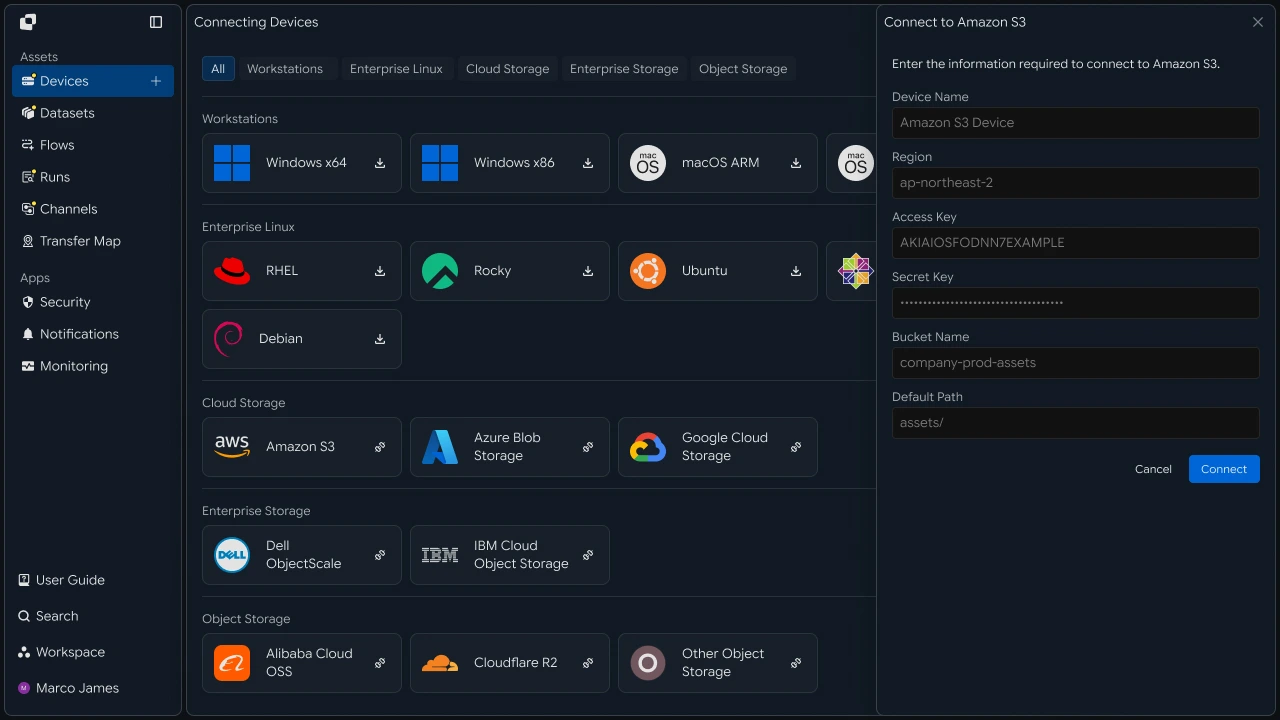
Before starting the migration, check the following items.
| Category | Check |
|---|---|
| S3 Connection | Source Bucket access status |
| Source Permission | Whether migration files and paths can be read |
| R2 Connection | Target Storage connection status |
| Target Bucket | Check the Bucket where migrated files will be stored |
| Storage Permission | Check whether files can be created and stored in R2 |
| Transfer Path | Check the migration scope of the Source and Target |
Separating the connection scope of each Storage allows you to independently manage access to the original Source data and the Target storage environment while connecting them in a single Flow.
Path Design#
Migrate the S3 file structure to match the R2 operating structure
After the storage connections are complete, configure the path for retrieving files from S3 and the location where files will be stored in R2.
You can keep the same file structure, or change the Target structure during migration to match the new operating environment.
For example, you can use the following S3 path as the Source.
s3://source-bucket/media/processed/In R2, you can specify the following location as the Target.
r2://migration-bucket/assets/media/The file migration structure is configured as follows.
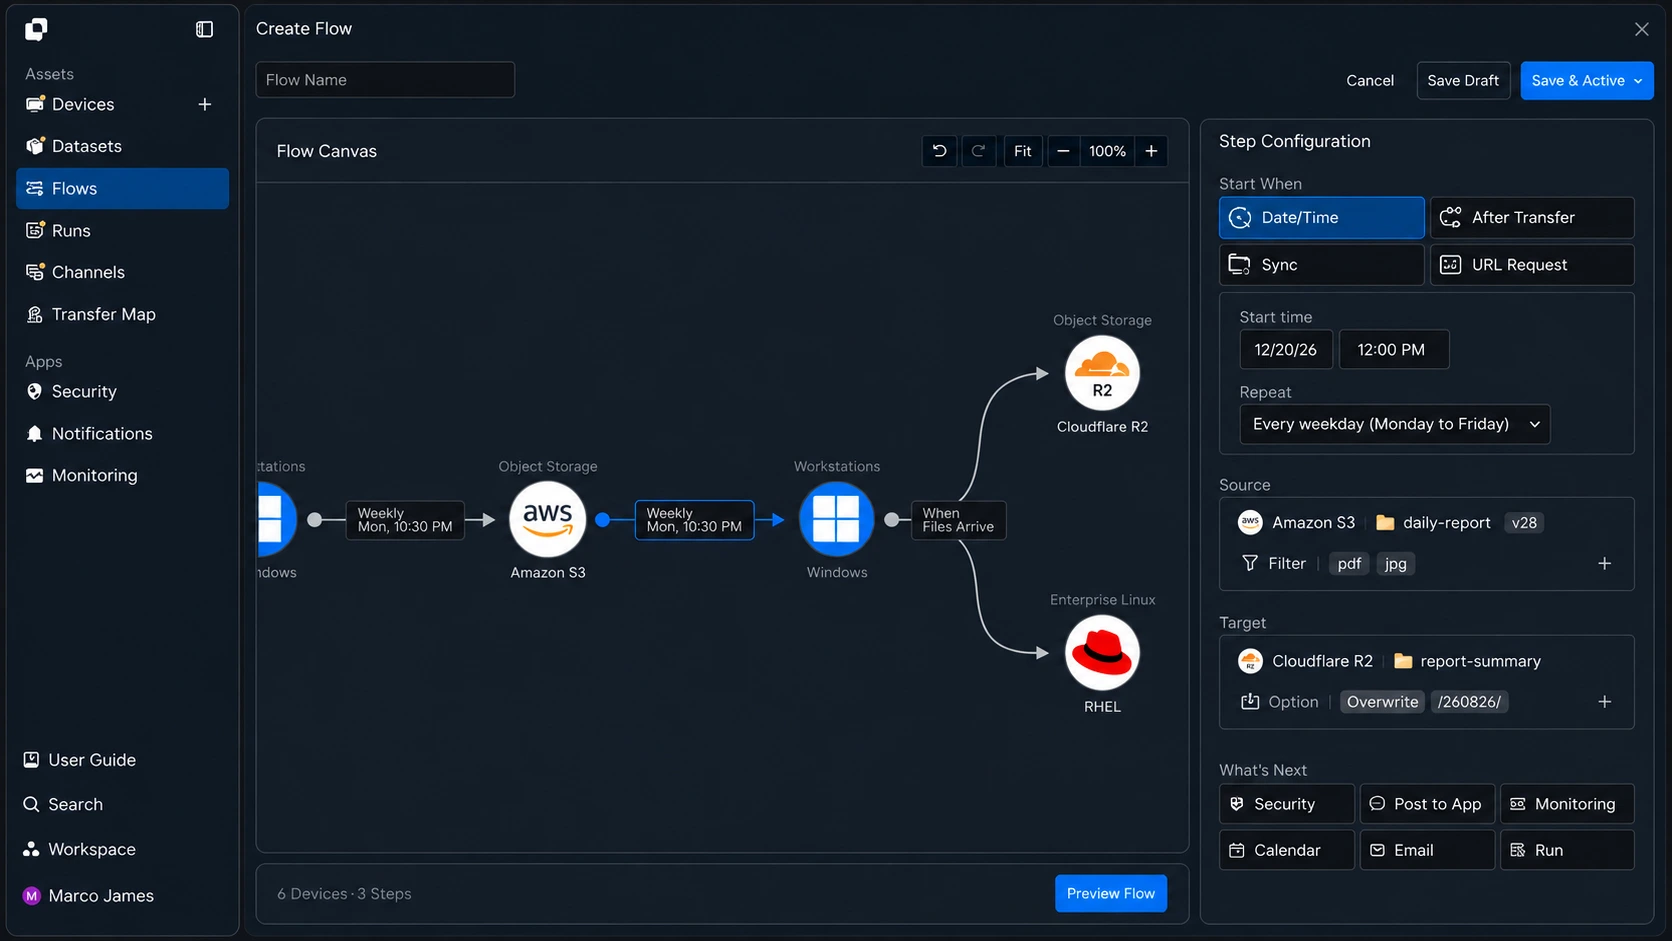
Depending on the work environment, you can consolidate multiple S3 paths into one R2 Bucket or separate them into different R2 Buckets by data type.
For example, you can configure it as follows.
S3 Source
- R2 / media/
- R2 / backup/
- R2 / archive/
This expands a simple Storage migration into a migration flow that reorganizes file storage locations according to the data structure of the new R2 environment.
Bulk Migration#
Manage many files and large datasets by dividing them into transfer tasks
When migrating large amounts of data, you can manage the work based on execution units and processing results rather than treating the entire task as a single file copy.
For example, you can divide migration tasks by data type or Source path.
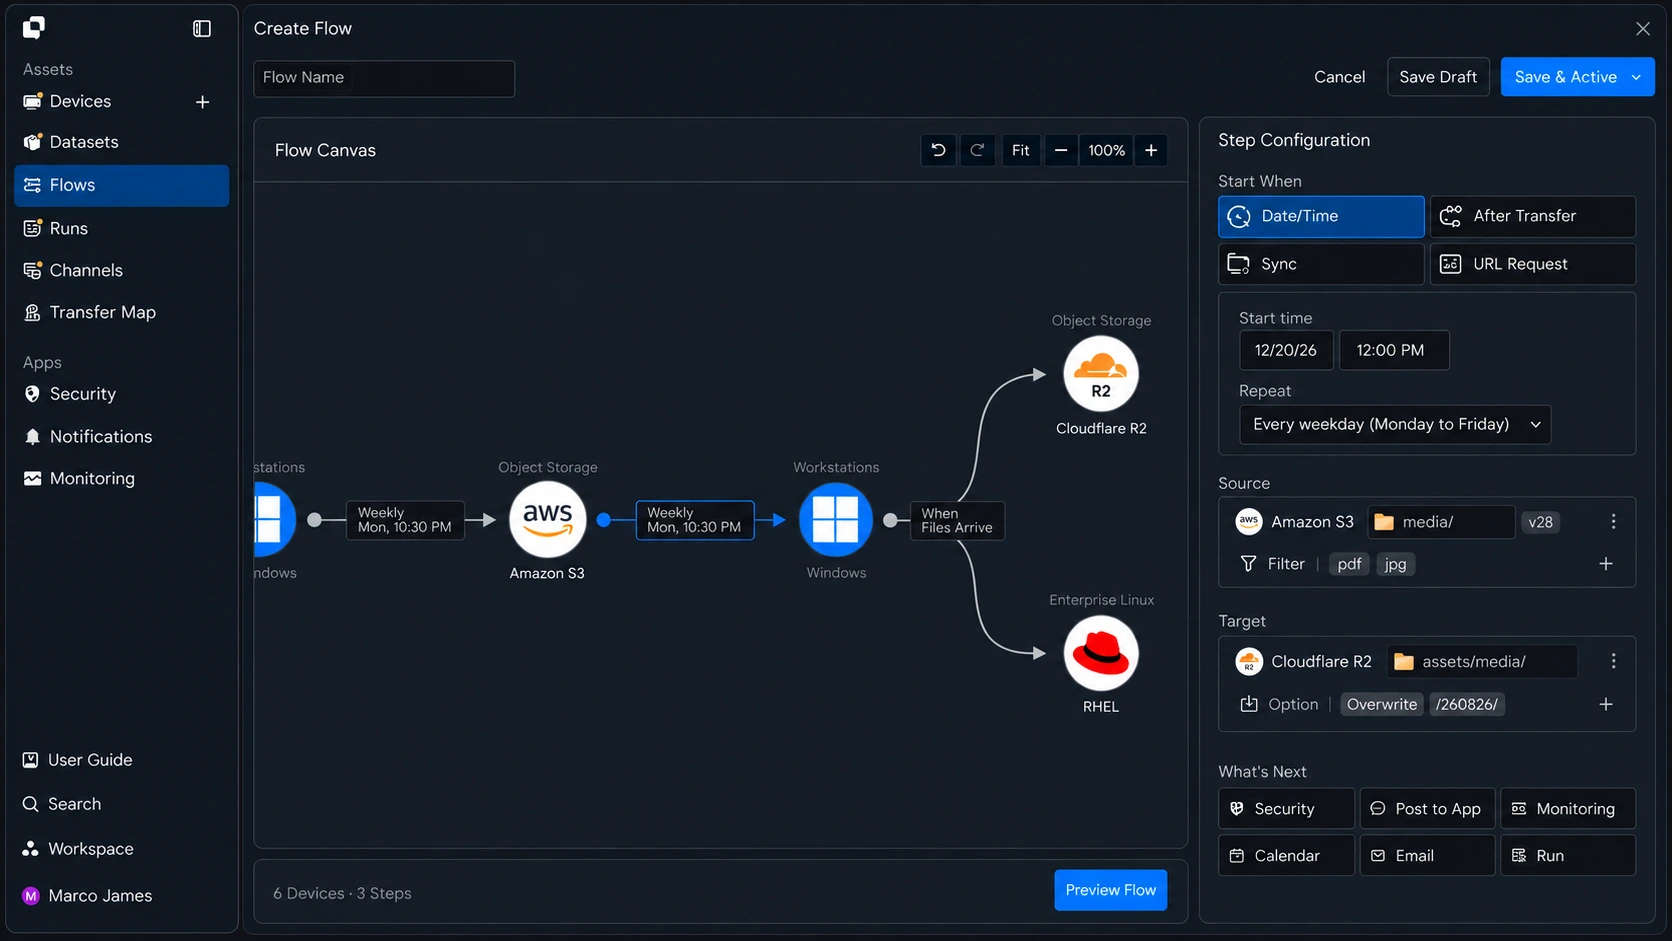
| Migration Segment | Source | Target |
|---|---|---|
| Media Files | S3 media/ |
R2 assets/media/ |
| Backup Files | S3 backup/ |
R2 backup/ |
| Long-Term Archive | S3 archive/ |
R2 archive/ |
During the initial migration, process all files. After the task is complete, use Runs to compare the file count and transfer size of each execution.
This allows you to manage which data within the overall migration scope has been completed and identify which segments require additional checks.
Apply Changes#
Add files newly created or changed after the initial migration
The original data in S3 may continue to change while the initial file migration is in progress.
For example, if new files are added or existing files are modified, the final state of S3 and R2 may differ if only the initial migration results are used.
Therefore, after the initial migration, you can check newly created or changed files and additionally apply them to the Target.
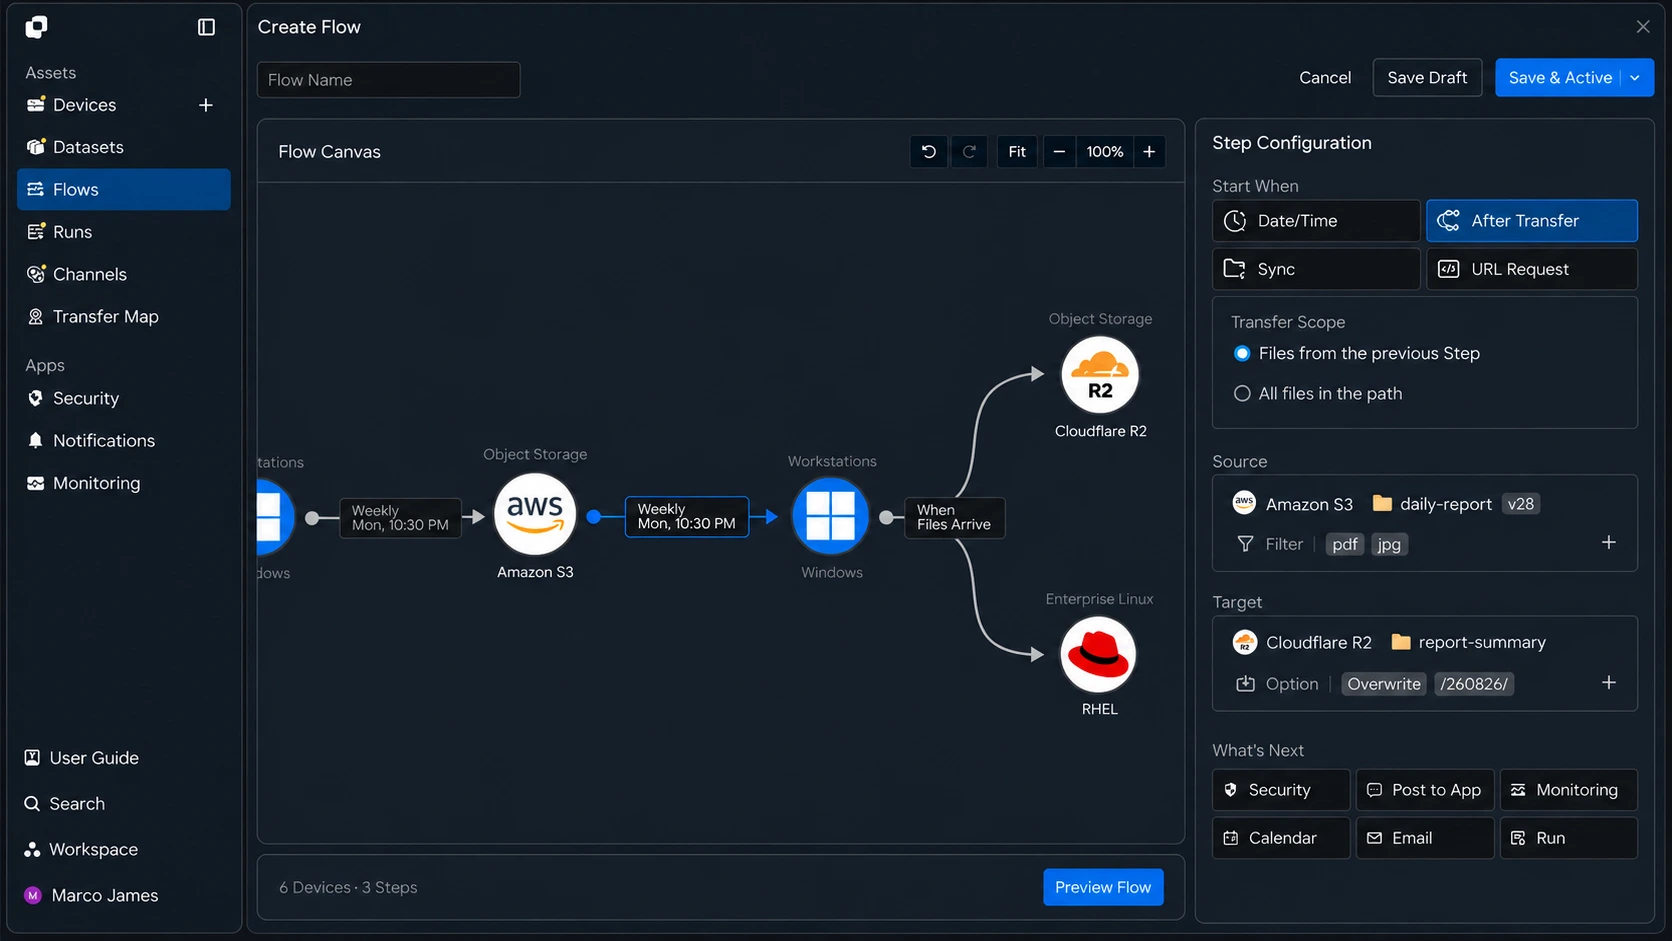
This allows you to configure the final synchronization task around files that changed after the initial migration, instead of retransferring all data.
Before the final cutover, you can check the results of applying the last changed files and compare the data state of the Source and Target.
Result Verification#
Compare the file count and total size, and verify integrity if necessary
After file migration is complete, instead of checking only whether the Run status is complete, you can verify the Source and Target states based on the actual migration results.
First, compare the total file count and transferred data size.
Migration Result
If the file count and total size differ from the expected results, you can check whether files are missing or require additional review.

If necessary, you can also compare file hashes or checksums to verify the integrity of the source and target files.
| Verification Item | Details |
|---|---|
| File Count | Total number of files in the Source and Target |
| Total Size | Total size of migrated data |
| File List | Whether files are missing or additional |
| Transfer Result | Successful and failed files and processing status |
| Integrity | Compare checksums of source and target files |
For example, if the file count is the same but there is a difference in the size or processing result of a specific file, you can check that file again or retransfer only the required files.
This allows you to verify step by step not only that the files were moved, but also that the migration results match the original data.
Cutover Management#
Apply final changes and switch to R2-based file operations
After the initial migration, changed-file application, and result verification are complete, you can switch the Storage used for actual operations from S3 to R2.
Before cutover, you can perform a final check of the following items.
Migration Status
- Initial FilesCompleted
- Changed FilesSynced
- File CountVerified
- Total SizeVerified
- Integrity CheckVerified
- Target StorageReady
The cutover flow continues as follows.
Even after cutover, you can review the execution history of migration tasks to manage when each file was moved and the final applied results.
Exception Handling#
Identify and reprocess only files that require review during migration
If the processing status of some files requires additional review during a bulk migration, you do not need to rerun the entire migration from the beginning. You can use the Run details to identify the segment where the issue occurred.
Check the Source and Target separately depending on where the issue occurred.

For example, if a specific file in S3 cannot be read, check the Source path and access scope. If a file was not stored in R2, check the Target Bucket and storage path.
After adjusting the environment, rerun the required task and check the file count and processing results again in the new Run.
Applying this guide allows you to configure a single migration flow covering Connect Amazon S3 → Select Migration Scope → Configure Cloudflare R2 Target → Initial Bulk Migration → Apply Changed Files → Compare File Count and Total Size → Verify Integrity → Final Cutover → Manage Execution Results.
This allows you to migrate S3 data directly to Cloudflare R2 without going through a local PC or intermediate storage server and configure a large-scale object storage migration environment spanning initial data movement, changed-file synchronization, final verification, and Storage cutover.
Developer#
Migrate S3 objects to R2 and check scale and failures
After registering the source and target storage as devices, specify prefixes to create the transfer and check the terminal status and file list. Prepare the following items before starting.
| Requirement | Details |
|---|---|
| INNORIX Authentication | INNORIX_ACCESS_TOKEN (Authorization: Bearer) |
| Source S3 Device | Device ID of the S3 bucket and source prefix (e.g., assets/2026) |
| Target R2 Device | Device ID of the R2 bucket and target prefix (e.g., assets/2026) |
| Runtime | Python 3 + requests, Java 17+, Node.js 18+, .NET 8+ |
Python and Node.js reuse the minimal
api()helper that directly calls REST and the status constants (STATUS_COMPLETE,TERMINAL) from the API Call Recipe. Java and C# use the bundled-sourceInnorixClient(including constants) andJsonhelper (Jfor C#). Replace the device identifiers (s3-src,r2-dst) and prefixes with actual values.
Create S3 → R2 Migration#
Use the prefix as the folder root (sourcePaths + sendAllFolder) to create the transfer. Set target-action to overwrite so an object with the same target key in the target prefix is overwritten. After creating the transfer, check the terminal status using monitorId.
import time


def transfer_objects(source, target, prefixes, target_prefix, action="overwrite"):
    transfer = api("POST", "/api/transfers/manual", {
        "sourceDevice": source,
        "targetDevice": target,
        "targetPath": target_prefix,
        "sourcePaths": prefixes,
        "sendAllFolder": True,
        "transferOptions": {"target-action": action},
    })
    return transfer["monitorId"]


def wait_transfer(monitor_id, timeout=14400, interval=5):
    deadline = time.time() + timeout
    while time.time() < deadline:
        detail = api("GET", f"/api/transfers/{monitor_id}") or {}
        if detail.get("status") in TERMINAL:
            return detail
        time.sleep(interval)
    raise TimeoutError(monitor_id)


monitor_id = transfer_objects("s3-src", "r2-dst", ["assets/2026"], "assets/2026")
detail = wait_transfer(monitor_id)
print("completed:", detail.get("status") == STATUS_COMPLETE)
static String transferObjects(InnorixClient client, String source, String target,
List<String> prefixes, String targetPrefix, String action) {
Map<String, Object> transfer = client.apiObj("POST", "/api/transfers/manual", Json.newObj(
"sourceDevice", source,
"targetDevice", target,
"targetPath", targetPrefix,
"sourcePaths", prefixes,
"sendAllFolder", true,
"transferOptions", Json.newObj("target-action", action)), null);
return Json.str(transfer, "monitorId");
}
static Map<String, Object> waitTransfer(InnorixClient client, String monitorId,
long timeoutSec, long intervalSec) throws InterruptedException {
long deadline = System.currentTimeMillis() + timeoutSec * 1000;
while (System.currentTimeMillis() < deadline) {
Map<String, Object> detail = client.apiObj("GET", "/api/transfers/" + monitorId, null, null);
Integer status = Json.intOrNull(detail, "status");
if (status != null && InnorixClient.TERMINAL.contains(status))
return detail;
Thread.sleep(intervalSec * 1000);
}
throw new RuntimeException("timeout: " + monitorId);
}async function transferObjects(source, target, prefixes, targetPrefix, action = "overwrite") {
const transfer = await api("POST", "/api/transfers/manual", {
sourceDevice: source,
targetDevice: target,
targetPath: targetPrefix,
sourcePaths: prefixes,
sendAllFolder: true,
transferOptions: { "target-action": action },
});
return transfer.monitorId;
}
async function waitTransfer(monitorId, { timeout = 14400, interval = 5 } = {}) {
const deadline = Date.now() + timeout * 1000;
while (Date.now() < deadline) {
const detail = (await api("GET", `/api/transfers/${monitorId}`)) || {};
if (TERMINAL.has(detail.status)) return detail;
await new Promise((r) => setTimeout(r, interval * 1000));
}
throw new Error(`timeout: ${monitorId}`);
}
const monitorId = await transferObjects("s3-src", "r2-dst", ["assets/2026"], "assets/2026");
const detail = await waitTransfer(monitorId);
console.log("completed:", detail.status === STATUS_COMPLETE);static async Task<string> TransferObjectsAsync(InnorixClient client, string source, string target,
IEnumerable<string> prefixes, string targetPrefix, string action = "overwrite")
{
var transfer = await client.ApiObjAsync("POST", "/api/transfers/manual", new JsonObject
{
["sourceDevice"] = source,
["targetDevice"] = target,
["targetPath"] = targetPrefix,
["sourcePaths"] = J.ArrOfStrings(prefixes),
["sendAllFolder"] = true,
["transferOptions"] = new JsonObject { ["target-action"] = action },
});
return J.Str(transfer, "monitorId");
}
static async Task<JsonObject> WaitTransferAsync(InnorixClient client, string monitorId,
int timeoutSec = 14400, int intervalSec = 5)
{
DateTime deadline = DateTime.UtcNow.AddSeconds(timeoutSec);
while (DateTime.UtcNow < deadline)
{
JsonObject detail = await client.ApiObjAsync("GET", quot;/api/transfers/{monitorId}", null, null);
int? status = J.IntOrNull(detail, "status");
if (status != null && InnorixClient.Terminal.Contains(status.Value))
return detail;
await Task.Delay(intervalSec * 1000);
}
throw new TimeoutException(monitorId);
}Overwrite Behavior When
numberingis used, an object with the same name at the target may be renamed. Useoverwriteto keep the target key identical to the source after migration.
Check Migration Scale Integrity verification is not supported, so after migration is complete, use
GET /api/transfers/{id}/filesto check the file list and failed objects and verify the migration scale.
If failed objects remain, use retry_failed from the Stop and Resume Recipe (GET /api/transfers/{id}/files → POST /api/transfers/{id}/retry) to retransfer only the failed items.
Implementation Result#
Applying this recipe allows you to migrate S3 data to R2 using the following flow.
- Amazon S3 (s3-src)Specify Prefix
- Create Transfer (overwrite)
- Wait for Terminal Status
- Cloudflare R2 (r2-dst)Apply Objects to Target Prefix
- Check File ListRetry Failed Objects Only
Run an S3 → R2 migration using only device IDs without handling storage credentials in code, verify the migration scale using the file list, and resend only the remaining failed objects.