
Overview#
You can configure New Relic integration to send and monitor file transfer tasks and device status changes.
After completing the integration, events are sent to New Relic whenever designated events occur, such as a transfer being Started (Transfer Started) or Completed (Transfer Completed), or a device being Connected (Device Connected) or Disconnected (Device Disconnected), allowing them to be monitored in New Relic.
The entire process consists of two steps: ① Obtain an Ingest License Key and Check the Data Region → ② Configure the Integration in the Product.
Prerequisites#
Before you begin, check the following.
| Item | Description |
|---|---|
| New Relic account | A New Relic account that can view or obtain an Ingest License Key is required. |
| Data Region | Check the account's data region (US or EU). |
| Network | Outbound HTTPS (443) communication to the New Relic Ingest endpoint for the selected Data Region must be allowed from the environment where the product is installed. |
Obtain an Ingest License Key and Check the Data Region#
An Ingest License Key is required to send data to New Relic, and you must also check the account's Data Region.
Step 1. Check the Ingest License Key#
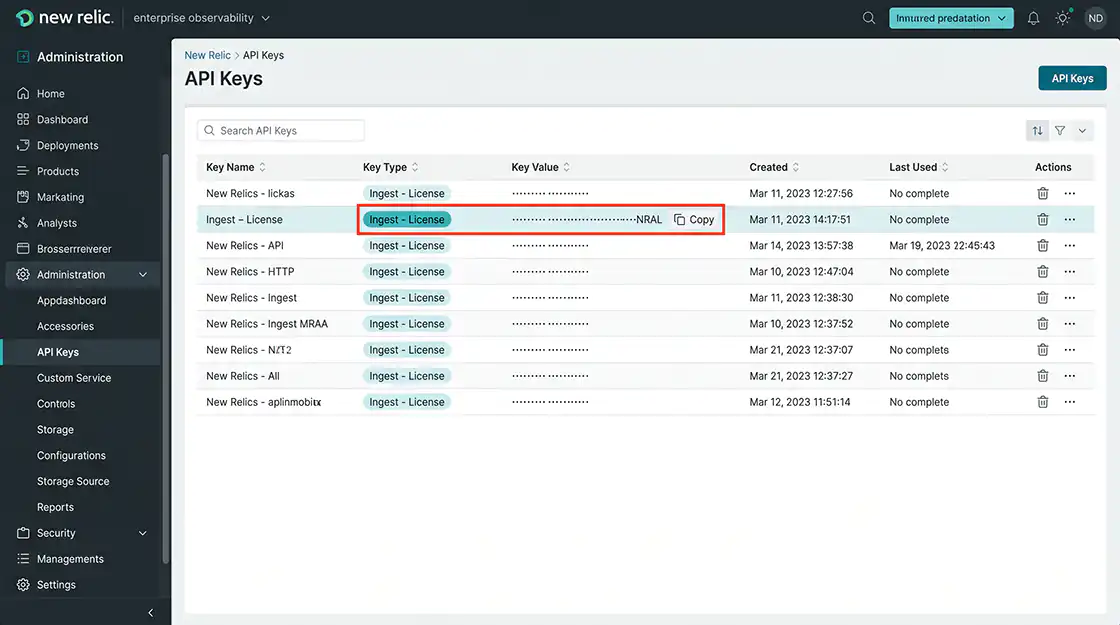
In New Relic, click the user menu in the lower-left corner, then go to API Keys (or **Administration → API Keys).
Find and copy the key whose type is Ingest - License.
If a new key is required, select Create a Key → Ingest - License to create one.
The License Key generally ends with NRAL.
ℹ️ This key has permission to send data to the account, so treat it like a password and make sure it is not exposed in public repositories or external documents. If it is exposed, rotate the existing key or create a new one.
Step 2. Check the Data Region#
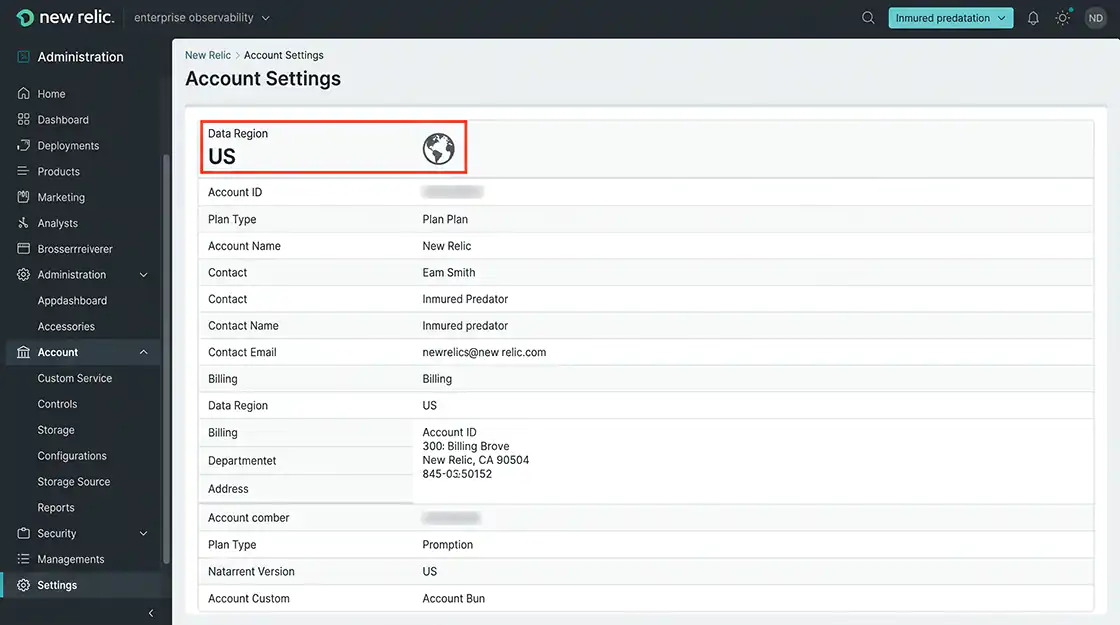
Check whether the account belongs to the US or EU Data Region.
ℹ️ The Data Region is selected when the account is created, and the same value must be selected in the product settings. If the regions do not match, data will not be collected correctly.
Checklist#
- ✔ The Ingest License Key has been confirmed.
- ✔ The Data Region has been confirmed.
Configure New Relic Integration#
Enter the confirmed License Key and Data Region in the product settings.
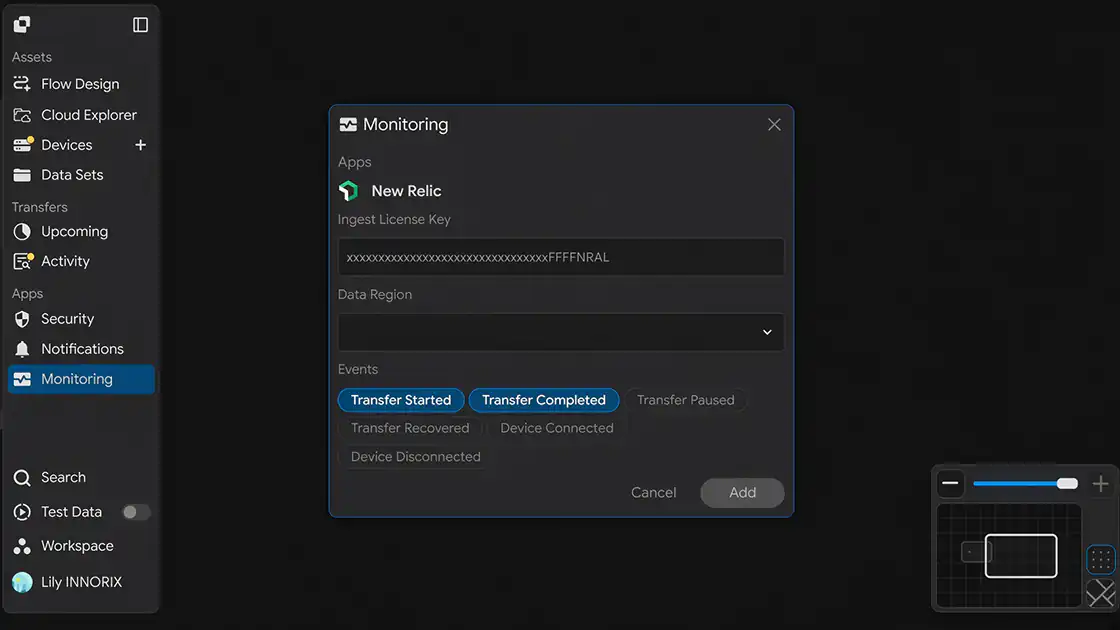
When you open the Monitoring settings window, the following screen is displayed.
Step 1. Enter the Ingest License Key#
Enter the copied License Key in the Ingest License Key field.
Step 2. Select the Data Region#
Select the account's Data Region from the Data Region dropdown.
It must match the Data Region of the account that issued the License Key.
Step 3. Select Events#
Select the events to monitor under Events.
You can select multiple events, and data is sent to New Relic only when the selected events occur.
| Event | When It Occurs |
|---|---|
| Transfer Started | When the transfer task starts |
| Transfer Completed | When the transfer is completed successfully |
| Transfer Paused | When the transfer is temporarily paused |
| Transfer Recovered | When the transfer is automatically recovered and resumed after an interruption or error |
| Device Connected | When a device is connected |
| Device Disconnected | When a device is disconnected |
Step 4. Save the Settings#
After completing the input, click Add to save the integration.
Checklist#
- ✔ The Ingest License Key has been entered.
- ✔ The Data Region has been selected.
- ✔ The events to monitor have been selected.
Verify the Integration#
Verify that the settings are working correctly.
Step 1. Trigger a Test Event#
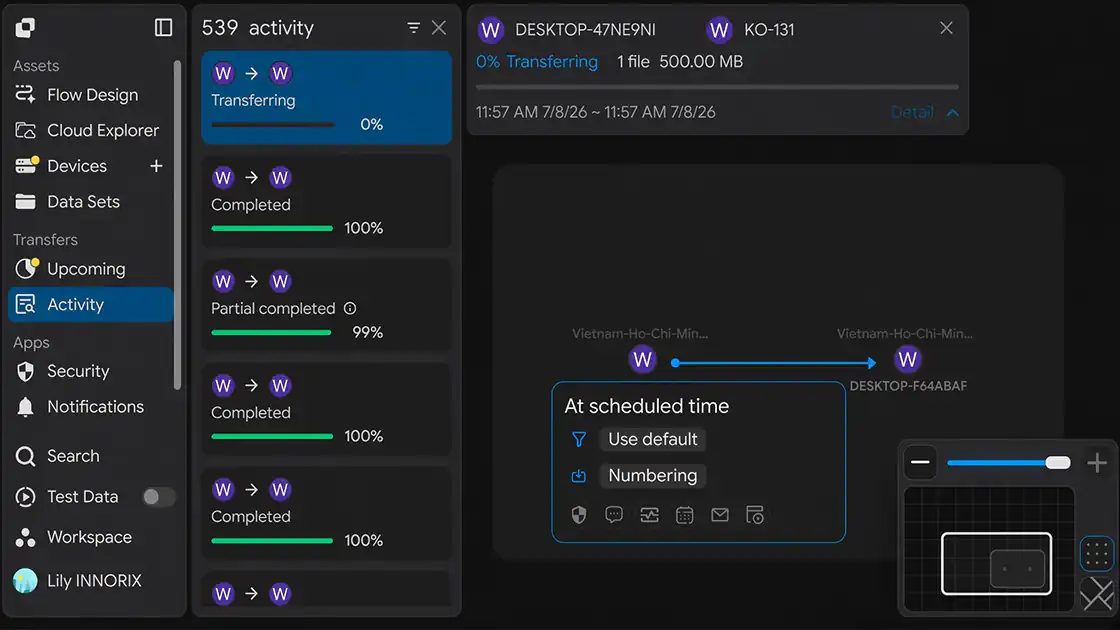
Run an actual transfer task or trigger one of the selected events.
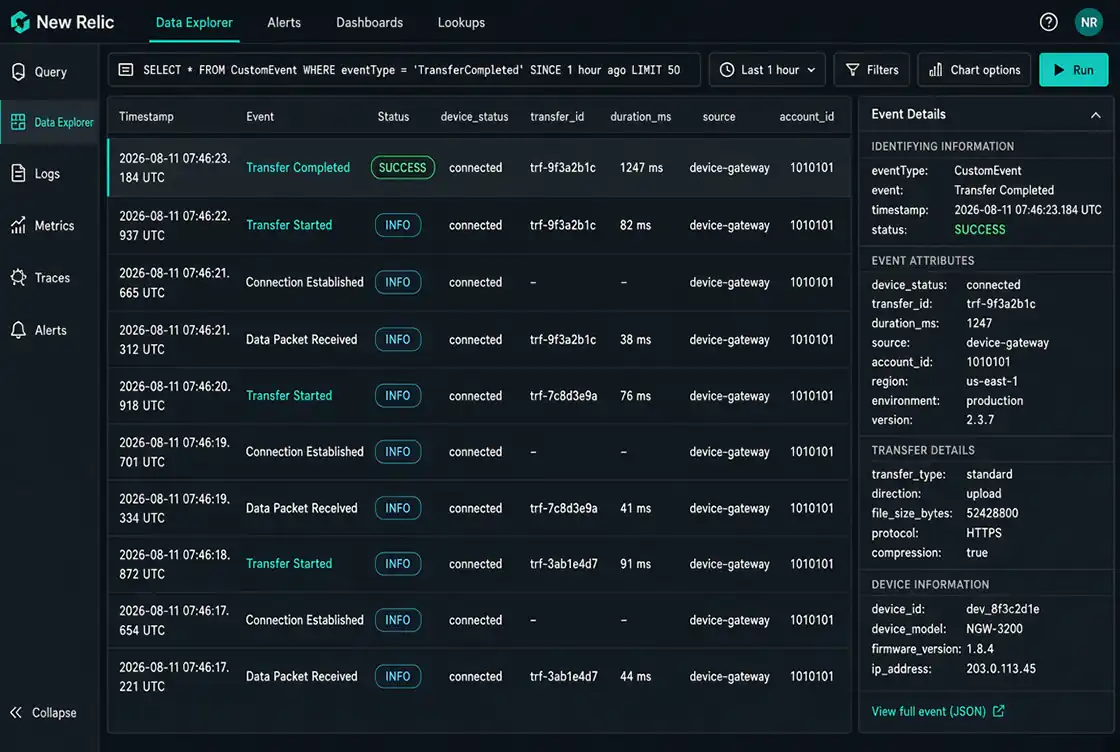
Step 2. Check New Relic#
Check whether the event has been received in New Relic.
Checklist#
- ✔ An event has arrived in New Relic.
- ✔ The triggered event was delivered successfully.
Setup Complete#
Once the settings are saved, the integration is applied.
After that, an event is automatically sent to New Relic whenever the selected events occur.
Troubleshooting#
| Issue | Checklist |
|---|---|
| Events are not displayed | Check whether the Ingest License Key and Data Region are correct and whether there are leading or trailing spaces or missing characters. |
| An authentication error occurs | Check whether the License Key is correct (ending with NRAL) and has not been rotated or reissued. |
| Region mismatch | Check whether the account's Data Region matches the Data Region in the product settings. (A US account key cannot be used with an EU endpoint.) |
| Incorrect key type | Check whether the key used is of the Ingest - License type. (Other types, such as a User API Key, cannot be used.) |
| Integration fails in a closed network | Check whether outbound HTTPS communication to the New Relic Ingest endpoint (443) for the selected Data Region is allowed by the firewall or proxy. |