
Overview
You can configure Fortinet FortiEDR antivirus integration to scan files during transfer and block or detect threats.
After completing the integration, files are scanned at the configured scan timing (Scan timing), and when a threat is detected, the transfer is blocked or an alert is generated according to the specified handling method (On detection). The files to scan are specified by the scan scope (Scan scope).
The entire process consists of two steps: ① Verify Credentials → ② Configure the Integration in the Product.
Prerequisites
Before you begin, check the following.
| Item | Description |
|---|---|
| Fortinet FortiEDR | A Fortinet FortiEDR environment and API access permissions for file scanning are required. |
| API credentials | An API Endpoint and API Key are required. |
| Network | Outbound HTTPS (443) communication to the API Endpoint must be allowed from the environment where the product is installed. |
Verify Credentials
To scan files with Fortinet FortiEDR, you need an API Endpoint and an API Key.
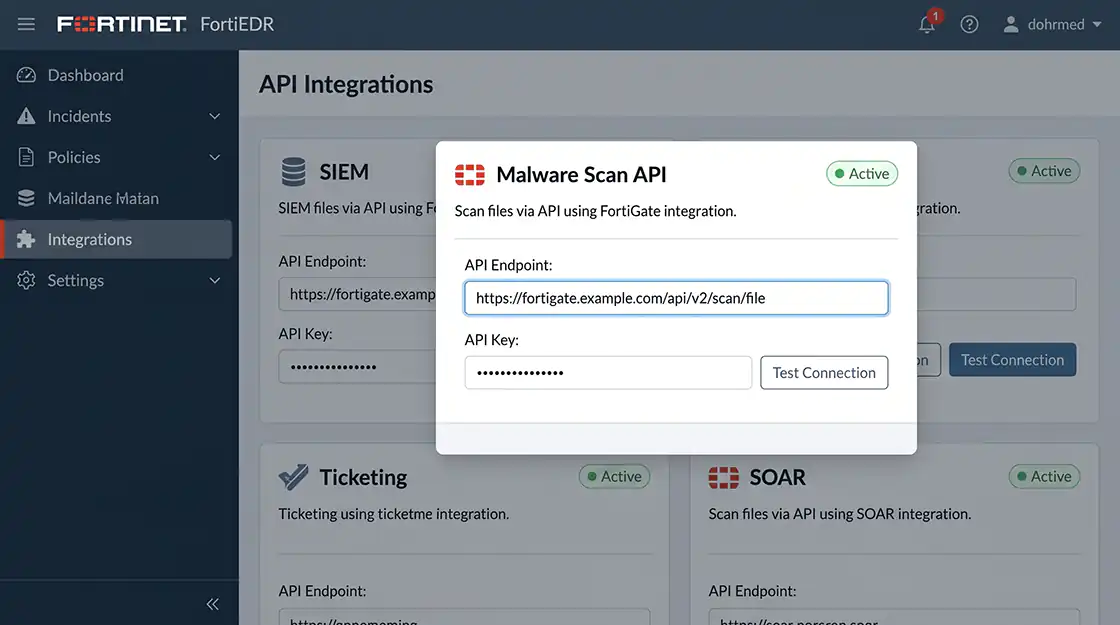
Step 1. Check the API Endpoint
Check the API endpoint address to use for file scanning in the management console. (Example: https://fortigate.example.com/api/...)
Step 2. Obtain an API Key
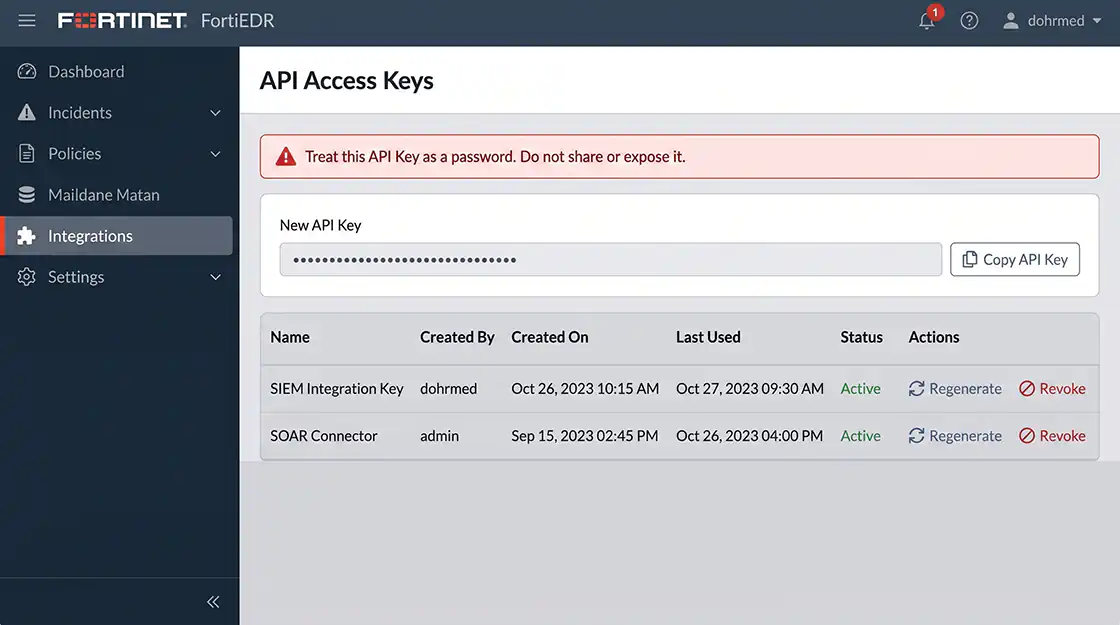
Create or check and copy the API Key in the API access settings of the management console.
ℹ️ This value is equivalent to a password. Anyone who knows it can access the scanning API, so make sure it is not exposed in public repositories or external documents. If it is exposed, revoke it and create a new one.
Checklist
- ✔ The API Endpoint has been confirmed.
- ✔ The API Key has been created.
Fortinet FortiEDR Integration Settings
Enter the confirmed credentials and specify the scanning options.
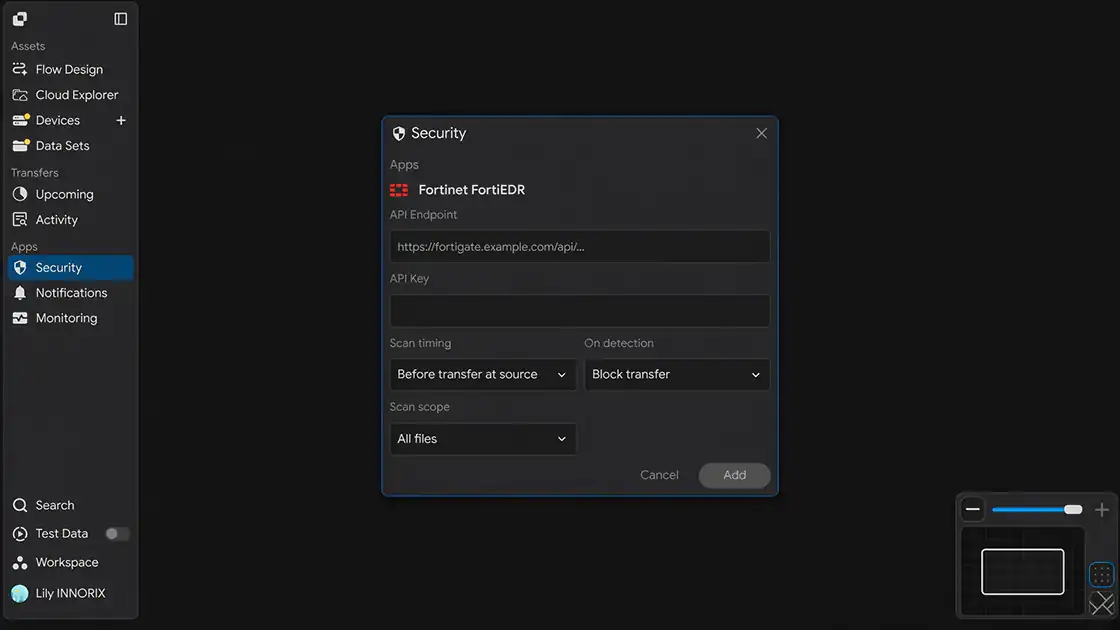
When you open the Security settings window, the following screen is displayed.
Step 1. Enter the API Endpoint
Enter the confirmed address in the API Endpoint field. (Example: https://fortigate.example.com/api/...)
Step 2. Enter the API Key
Enter the key created during credential verification in the API Key field.
Step 3. Select Scan timing
Select when to scan files under Scan timing.
| Option | Description |
|---|---|
| Before transfer at source | Scans files at the source before transfer. |
| After transfer at target | Scans files at the target after transfer. |
| Bothway | Scans files at both the source before transfer and the target after transfer. |
Step 4. Select On detection
Select how to handle a detected threat under On detection.
| Option | Description |
|---|---|
| Block transfer | Blocks the transfer when a threat is detected. |
| Alert only | Allows the transfer to continue but generates only an alert. |
| Admin confirm | Processes the item after administrator confirmation. |
Step 5. Select Scan scope
Select the target scope to scan under Scan scope.
| Option | Description |
|---|---|
| All files | Scans all transferred files. |
| Executable files only | Scans executable files only. |
| Custom exceptions | Scans according to user-defined exception rules. |
Step 6. Save the Settings
After completing the input, click Add to save the integration.
Checklist
- ✔ The API Endpoint and API Key have been entered.
- ✔ Scan timing, On detection, and Scan scope have been selected.
Verify the Integration
Verify that the settings are working correctly.
Step 1. Transfer a Test File
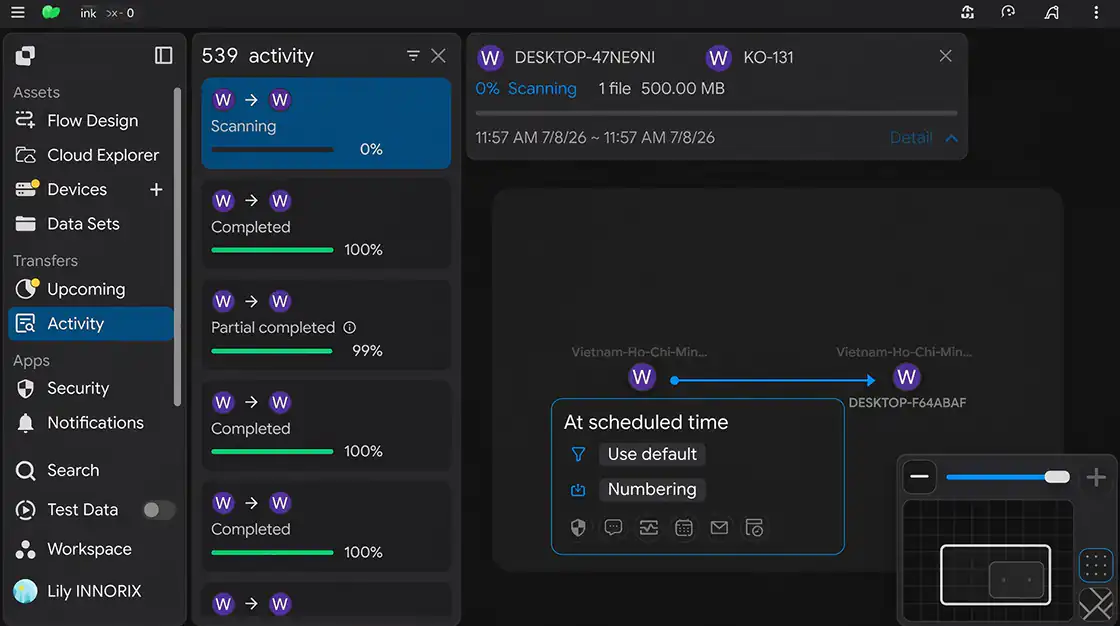
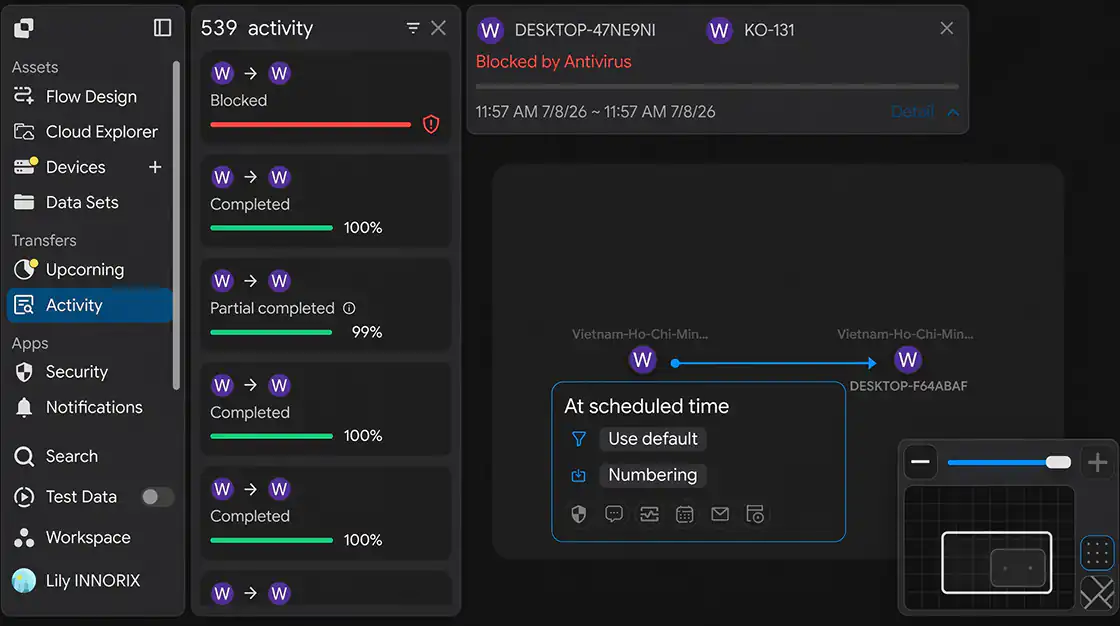
Transfer an actual file to verify that scanning is performed. You can verify scanning behavior with a safe test file, such as the standard antivirus test file (EICAR).
Step 2. Check the Processing Result
Verify that the configured handling method (On detection) works as expected. (For example, Block transfer blocks the transfer, while Alert only generates an alert.)
Checklist
- ✔ File scanning has been performed.
- ✔ It operates according to the configured handling method.
Setup Complete
Once the settings are saved, the integration is applied. Files transferred afterward are scanned at the specified timing and scope, and detected threats are handled according to the specified method.
Troubleshooting
If scanning does not work correctly, check the following items.
| Issue | Checklist |
|---|---|
| Scanning is not performed | Check whether the API Endpoint and API Key are correct and whether there are leading or trailing spaces or missing characters. |
| An authentication error occurs | Check whether the API Key is valid and has not been revoked or re-created. |
| The transfer is not blocked when a threat is detected | Check whether On detection is set to Block transfer. |
| A specific file is not scanned | Check the Scan scope setting (All files / Executable files only / Custom exceptions). |
| Transfer slows down | If Scan timing is Bothway, bidirectional scanning may take more time (adjust if necessary). |
| Integration fails in a closed network | Check whether outbound communication to the API Endpoint (443) is allowed by the firewall or proxy. |