Overview
You can integrate Twilio SendGrid notifications to receive file transfer status changes by email.
After the integration is complete, a notification email is automatically sent to the specified recipient email whenever a selected event occurs, such as a transfer being Started, Completed, or Failed.
The entire process consists of three steps: ① Generate an API Key → ② Verify the sender email → ③ Configure notifications in the product.
Prerequisites
Before you begin, check the following.
| Item | Description |
|---|---|
| SendGrid Account | A SendGrid account that can generate API Keys and verify senders is required. |
| Sender Email/Domain | Verify the email address or domain to use for sending in SendGrid. |
| Network | Outbound HTTPS communication to api.sendgrid.com (443) must be allowed from the environment where the product is installed. |
Generate an API Key
To send email through SendGrid, generate an API Key with permission to send mail.
Step 1. Open API Keys
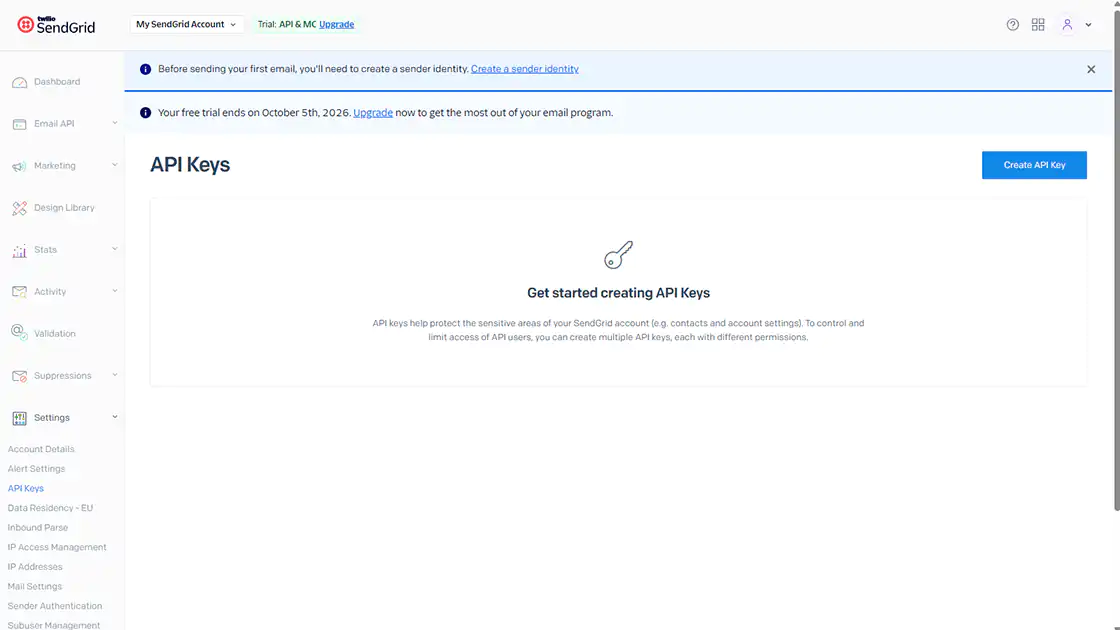
In the SendGrid Console, go to Settings → API Keys, then click Create API Key.
Step 2. Set Permissions and Create
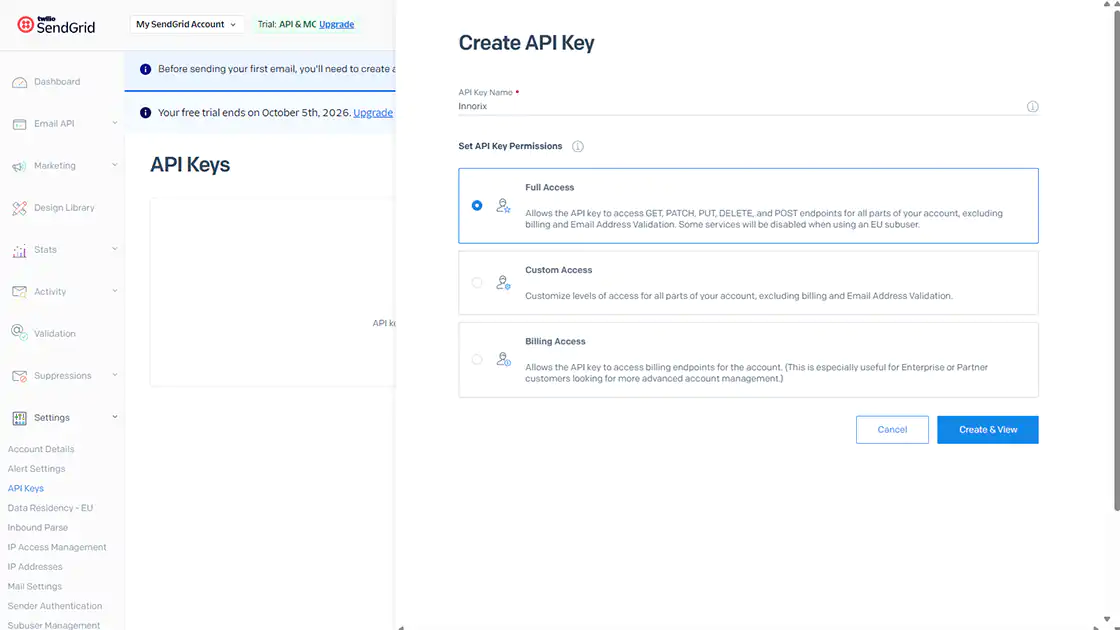
Enter an API Key name and configure its permissions.
Following the principle of least privilege, we recommend granting only Mail Send permission under Restricted Access.
(Email can also be sent with Full Access permission.)
After completing the settings, click Create & View to generate the API Key.
Step 3. Copy the API Key
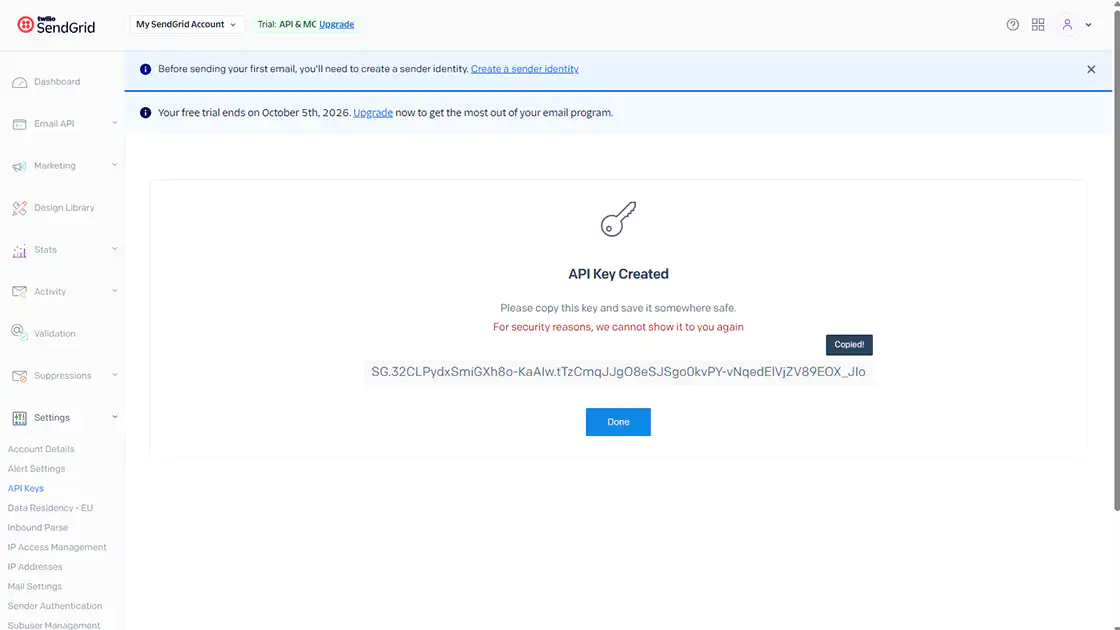
Copy the API Key that starts with SG..
ℹ️ The API Key can only be viewed on the creation screen, so store it in a secure location. Treat this API Key like a password. Anyone who knows the value can send email using the permissions granted to the account, so do not expose it in public repositories or external documents. If the API Key is exposed, delete the existing key in SendGrid and generate a new one.
Verification
- ✔ An API Key with Mail Send permission has been generated.
- ✔ The API Key has been copied and stored securely.
Verify the Sender Email
SendGrid only allows email to be sent from verified senders.
If you use an unverified sender, email delivery is rejected (403), so you must verify the sender email or domain first.
Step 1. Open Sender Authentication
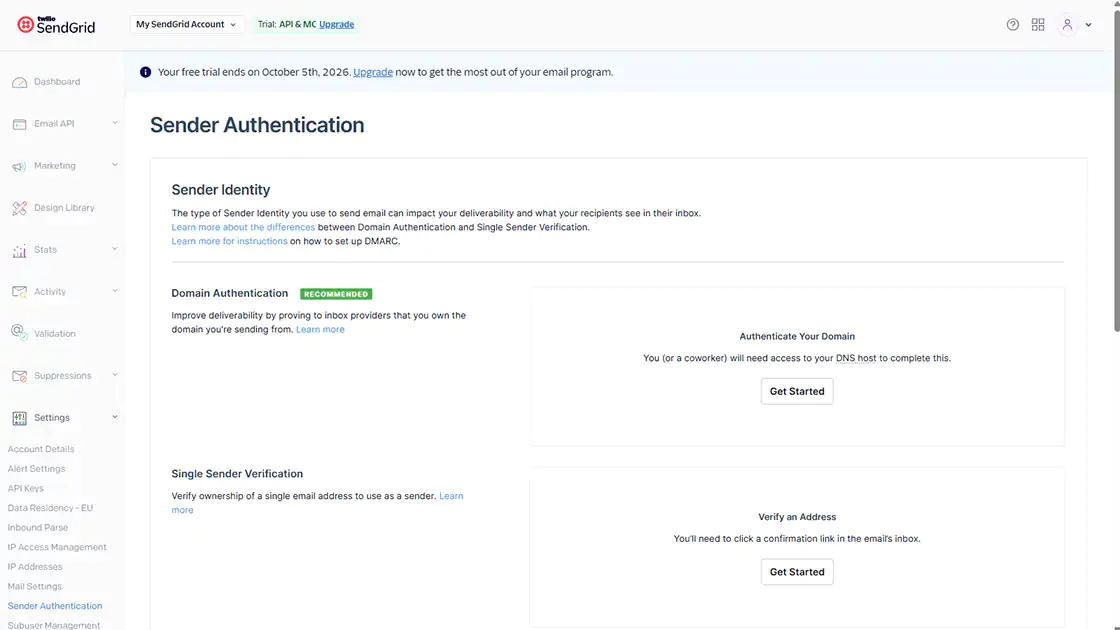
In the SendGrid Console, go to Settings → Sender Authentication.
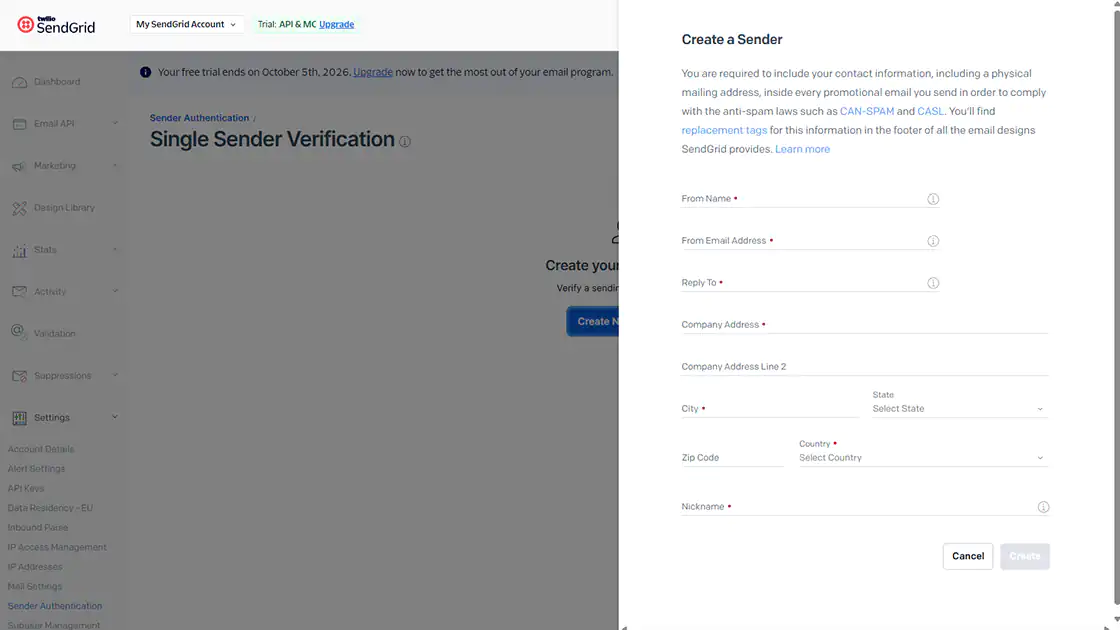
Step 2. Verify the Sender
Verify the sender using one of the following two methods.
- Single Sender Verification - Select Create New Sender, then enter the name, email, and address information. A verification email is sent, and you can use the email address after clicking the link in the message. (Suitable for development and testing environments)
- Domain Authentication (Recommended) - Add the provided CNAME DNS records to your domain for verification. You can use any email address on the verified domain, and it helps reduce spam filtering, making it suitable for production environments.
Verification
- ✔ The sender email or domain has been verified.
Configure Twilio SendGrid Notifications
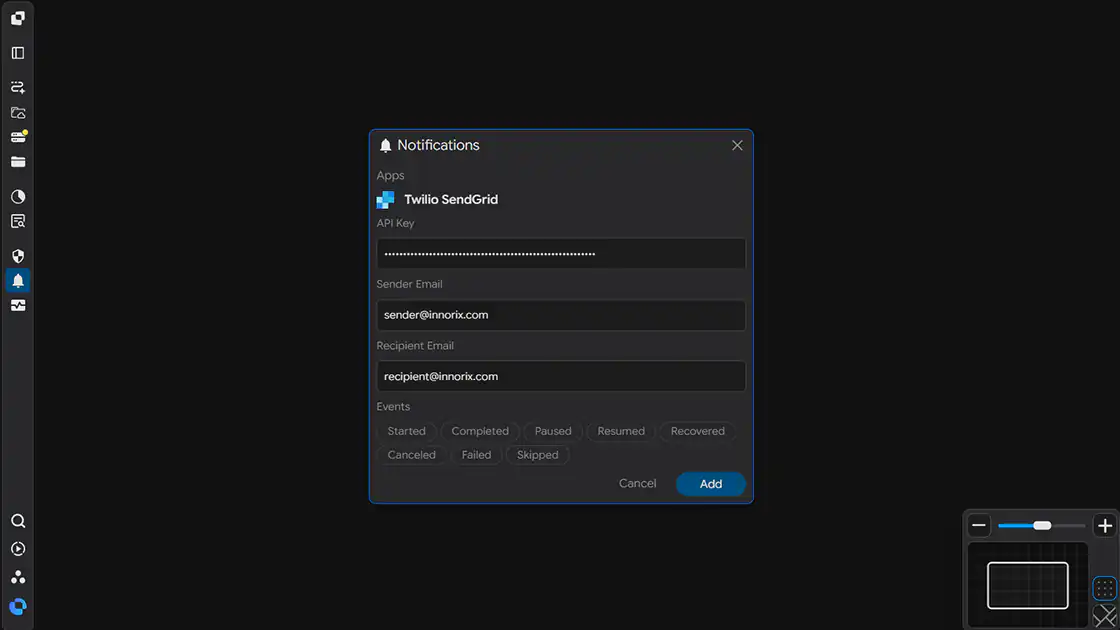
Enter the generated API Key and verified email information in the product's notification settings.
Open the Notifications settings window to display the screen below.
Step 1. Enter the API Key
Enter the API Key copied during API Key generation in the API Key field.
Step 2. Enter the Sender Email
Enter the sender email verified during sender authentication in the Sender Email field.
Step 3. Enter the Recipient Email
Enter the recipient email that will receive notifications in the Recipient Email field.
Step 4. Select Notification Events
Select the events you want to receive notifications for in the Events field.
You can select multiple events. Emails are sent only when the selected events occur.
| Event | When It Occurs |
|---|---|
| Started | When a transfer job starts |
| Completed | When a transfer completes successfully |
| Paused | When a transfer is paused |
| Resumed | When a paused transfer resumes |
| Recovered | When a transfer automatically recovers and resumes after an interruption or error |
| Canceled | When a user cancels a transfer |
| Failed | When a transfer fails |
| Skipped | When a specific file is skipped (for example, because it already exists or matches a filter condition) |
Step 5. Save the Settings
After entering the information, click Add to save the integration.
Verification
- ✔ The API Key has been entered.
- ✔ The sender and recipient emails have been entered.
- ✔ Notification events have been selected.
Verify the Integration
Verify that the configuration works correctly.
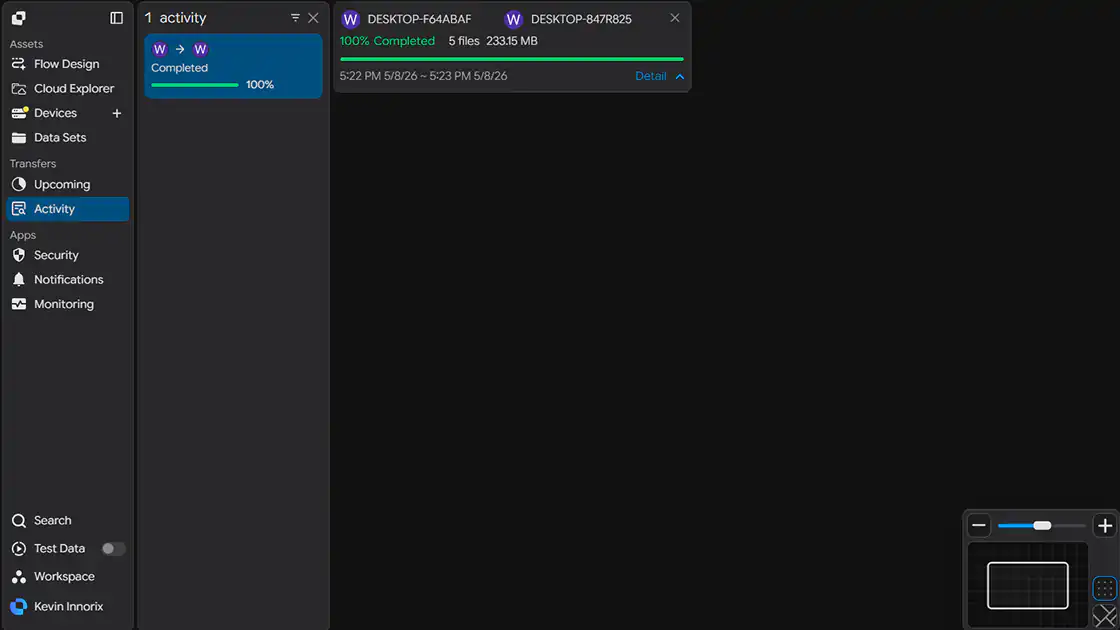
Step 1. Trigger a Test Event
Run an actual transfer job or trigger one of the selected events.
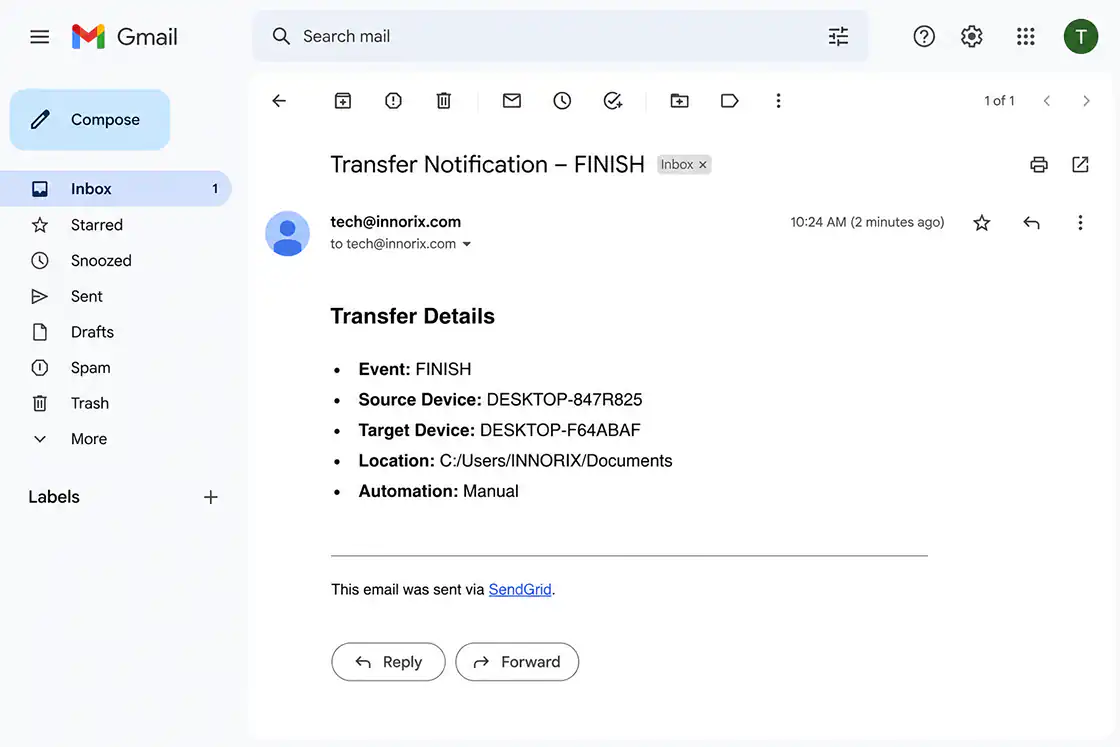
Step 2. Check the Recipient Inbox
Verify that a notification email has arrived at the specified recipient email address.
Verification
- ✔ A notification email has arrived at the recipient email address.
- ✔ The event that occurred has been delivered correctly.
Setup Complete
The integration is applied when you save the settings.
Afterward, a notification email is automatically sent to the specified recipient email whenever a selected event occurs.
Troubleshooting
If the email does not arrive, check the following.
| Problem | What to Check |
|---|---|
| Email is not sent | Verify that the API Key, sender email, and recipient email are entered correctly. |
| Authentication error (401) occurs | Verify that the API Key is correct and has not been deleted or regenerated. |
| Sending is rejected (403) | Verify that the sender email has been authenticated using Single Sender Verification or Domain Authentication, and that the API Key has Mail Send permission. |
| Email is delivered to the spam folder | Verify that Domain Authentication has been completed. |
| Integration fails in a closed network | Verify that outbound HTTPS communication to api.sendgrid.com (443) is allowed through the firewall or proxy. |