
Quick Start#
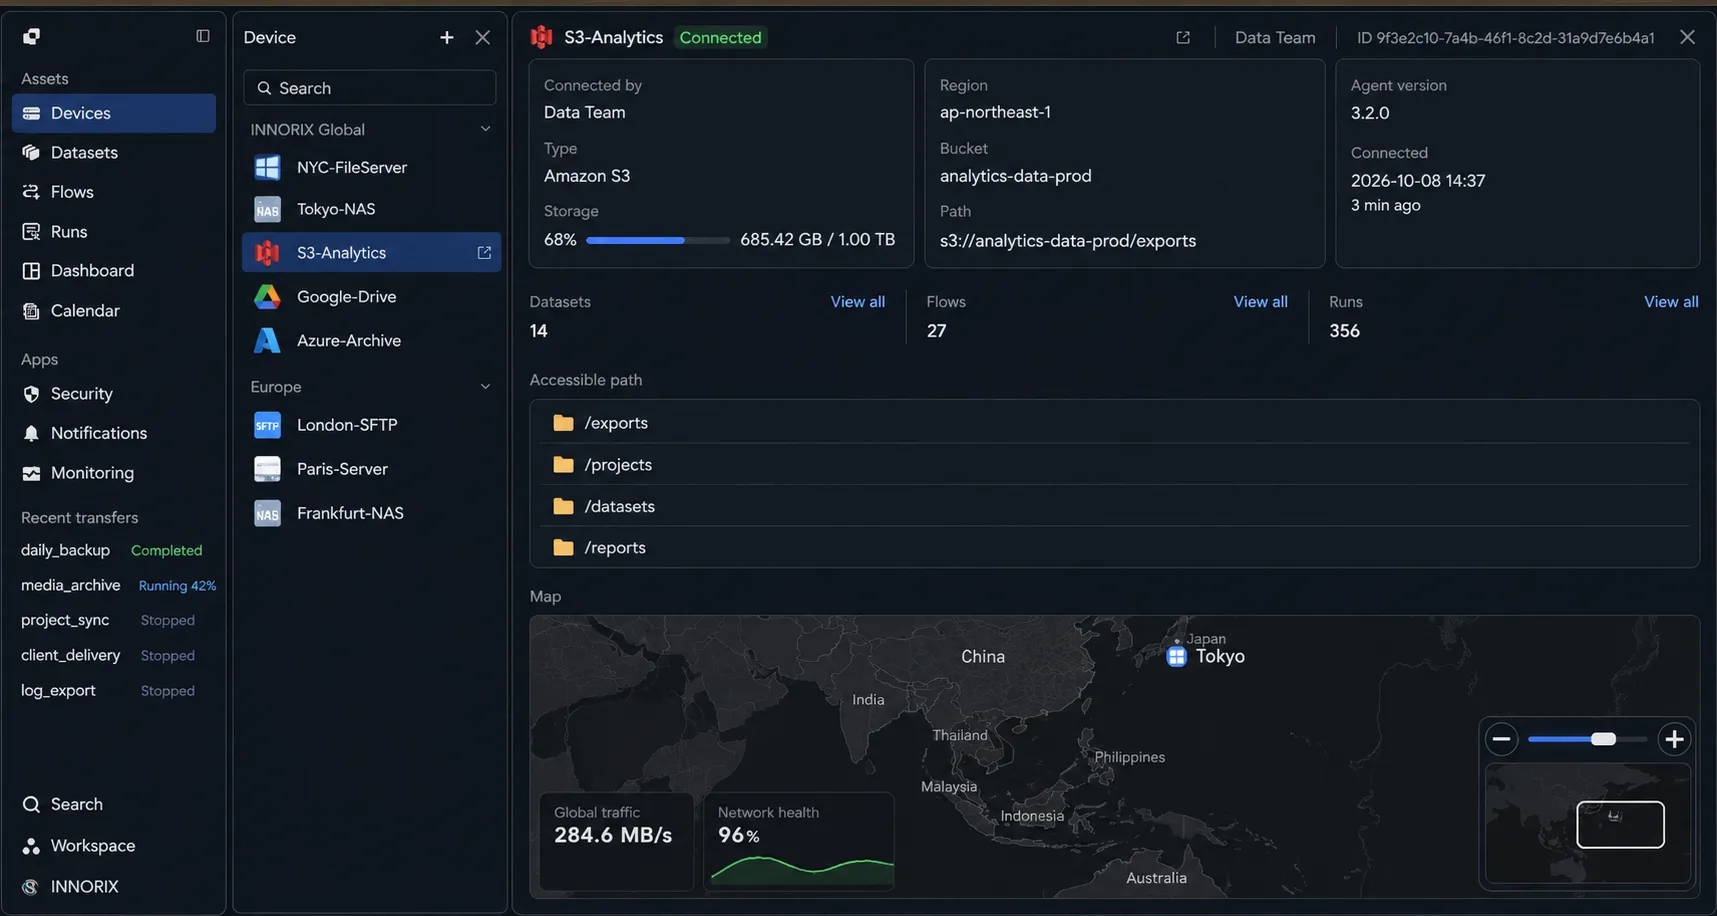
Without installing a server or doing development work, you can create a page in the console, download the frontend (FE) files, and upload them to your website to enable uploads and downloads. Only the frontend files are uploaded to your server; no backend (BE) work, such as server configuration, server libraries, or API integration, is required. S3 handles file storage directly. File transfers use the Agent, so the Agent must be installed on a PC when used for the first time.
① Create Web Based in the console → ② Download files → ③ Upload to your websiteOne Flow serves either uploads or downloads and corresponds to one downloadable HTML file. Create separate Flows if you need both uploading and downloading.
Before You Start#
- An S3 device must be registered in the INNORIX Platform to store files.
- You must know your website address (for example,
https://www.mycompany.com) where you will upload the frontend files. Entering a domain allows use under all paths on that domain.
Create an Upload Page#
- Click Create Web Based in the console and enter a Flow name. This becomes the downloaded HTML filename (
FlowName.html). Select the S3 device to use and choose Upload as the purpose.
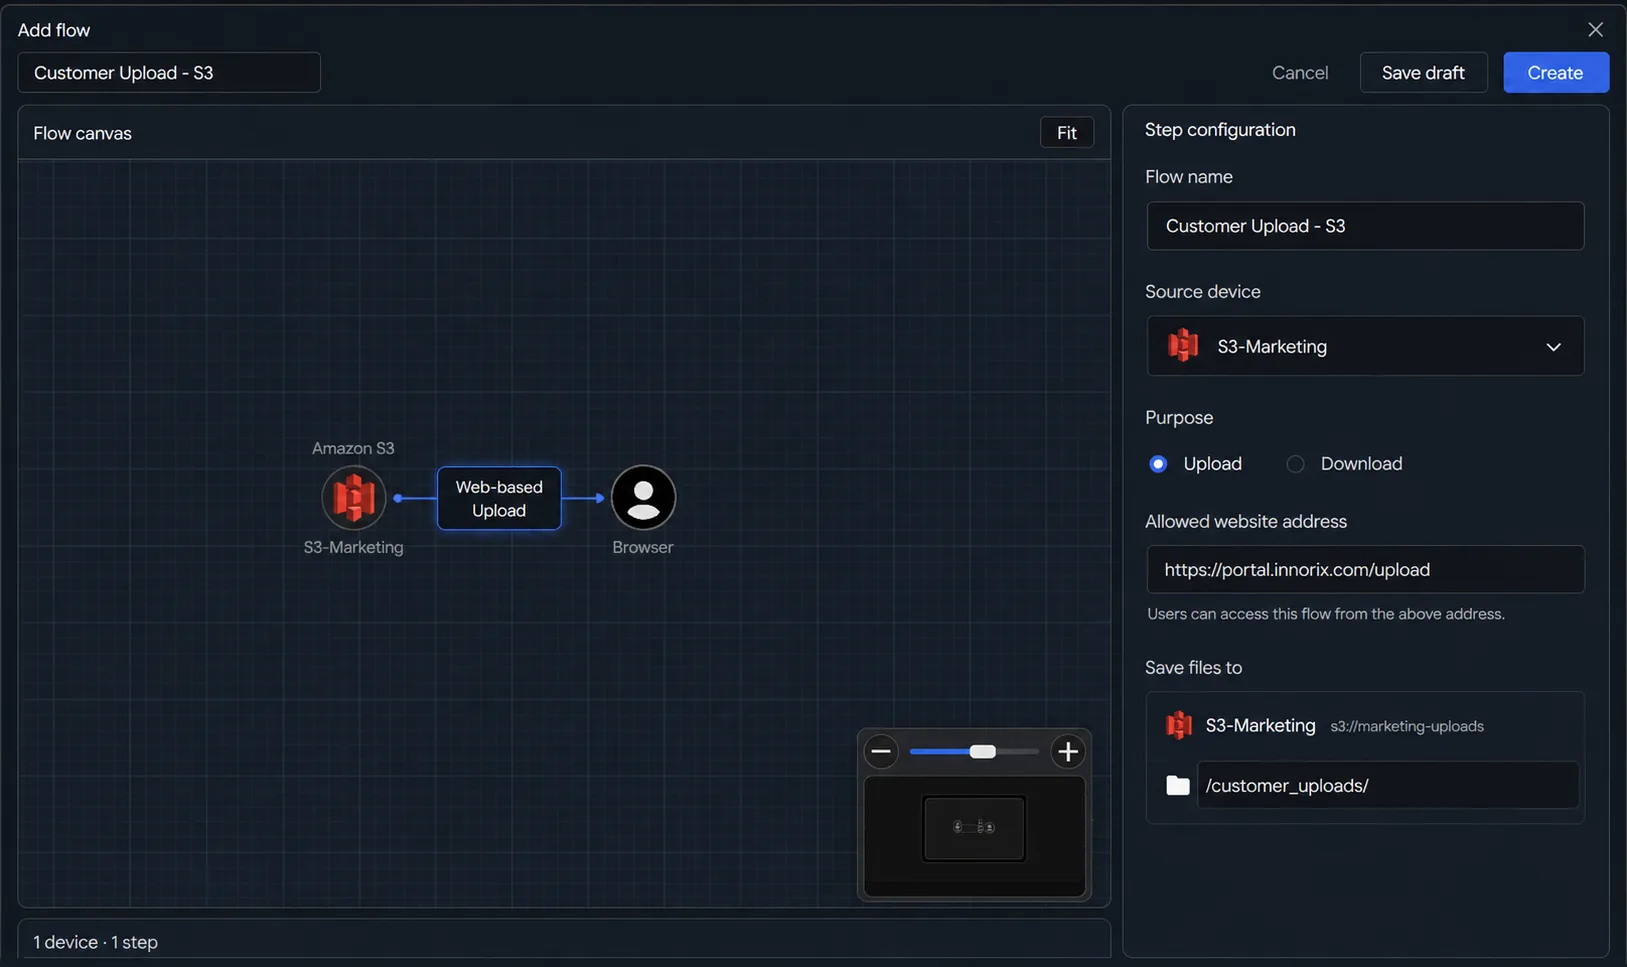
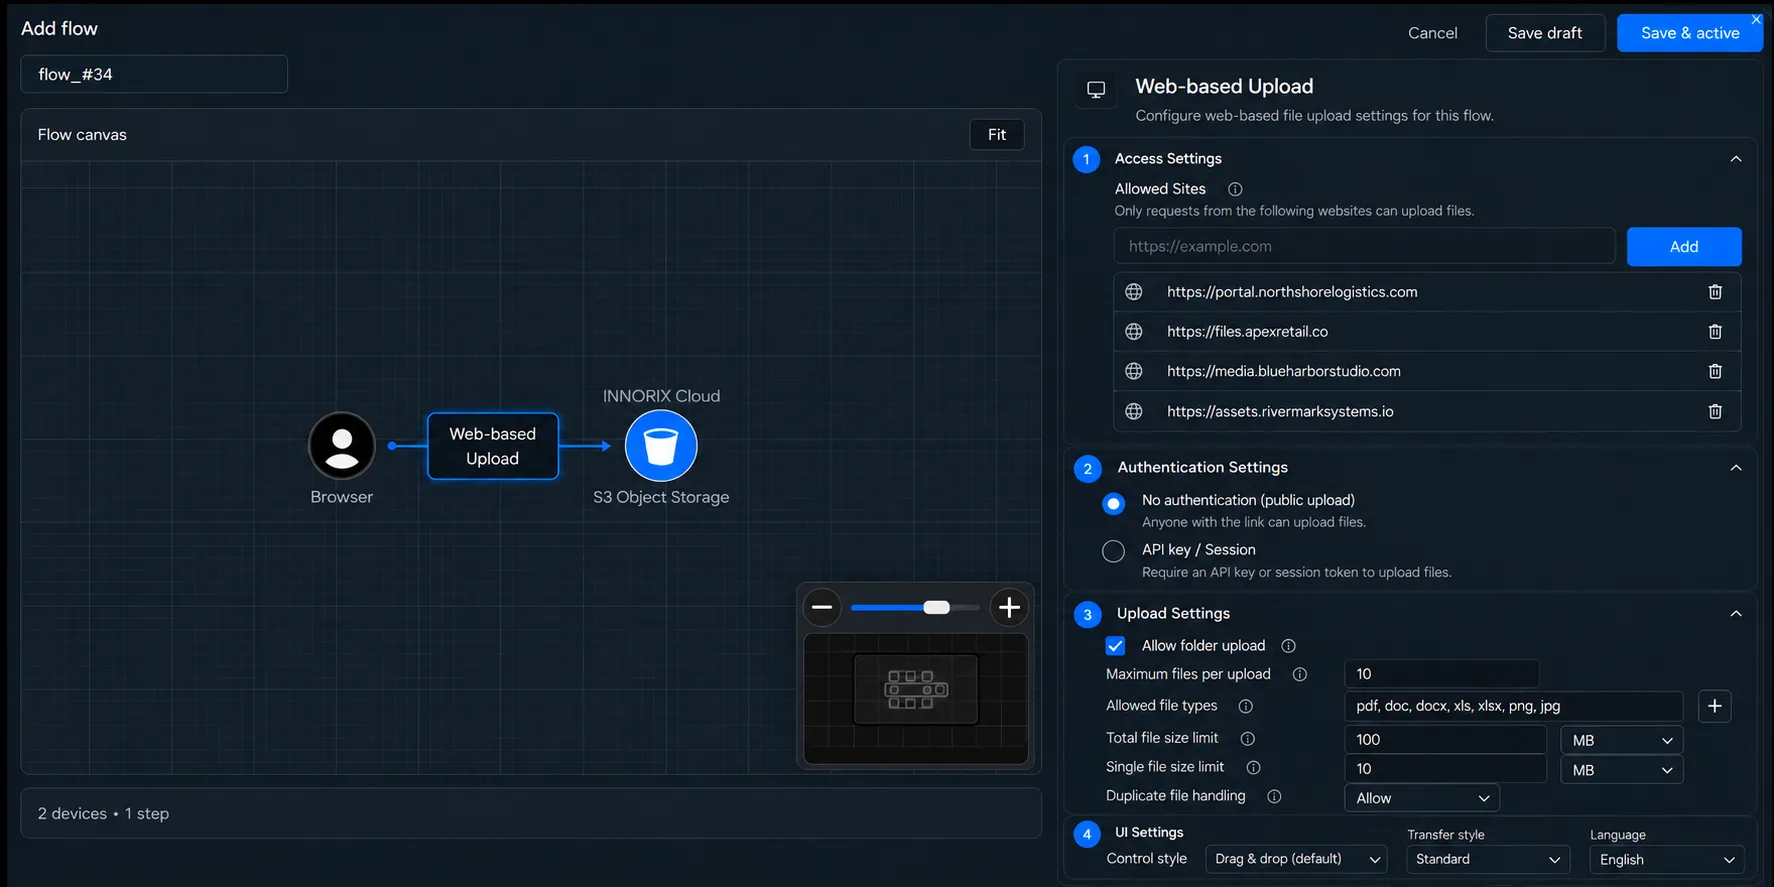
- Enter the address where you will host the frontend files under Allowed Sites, then click [Create]. A license generated for the entered address is included in
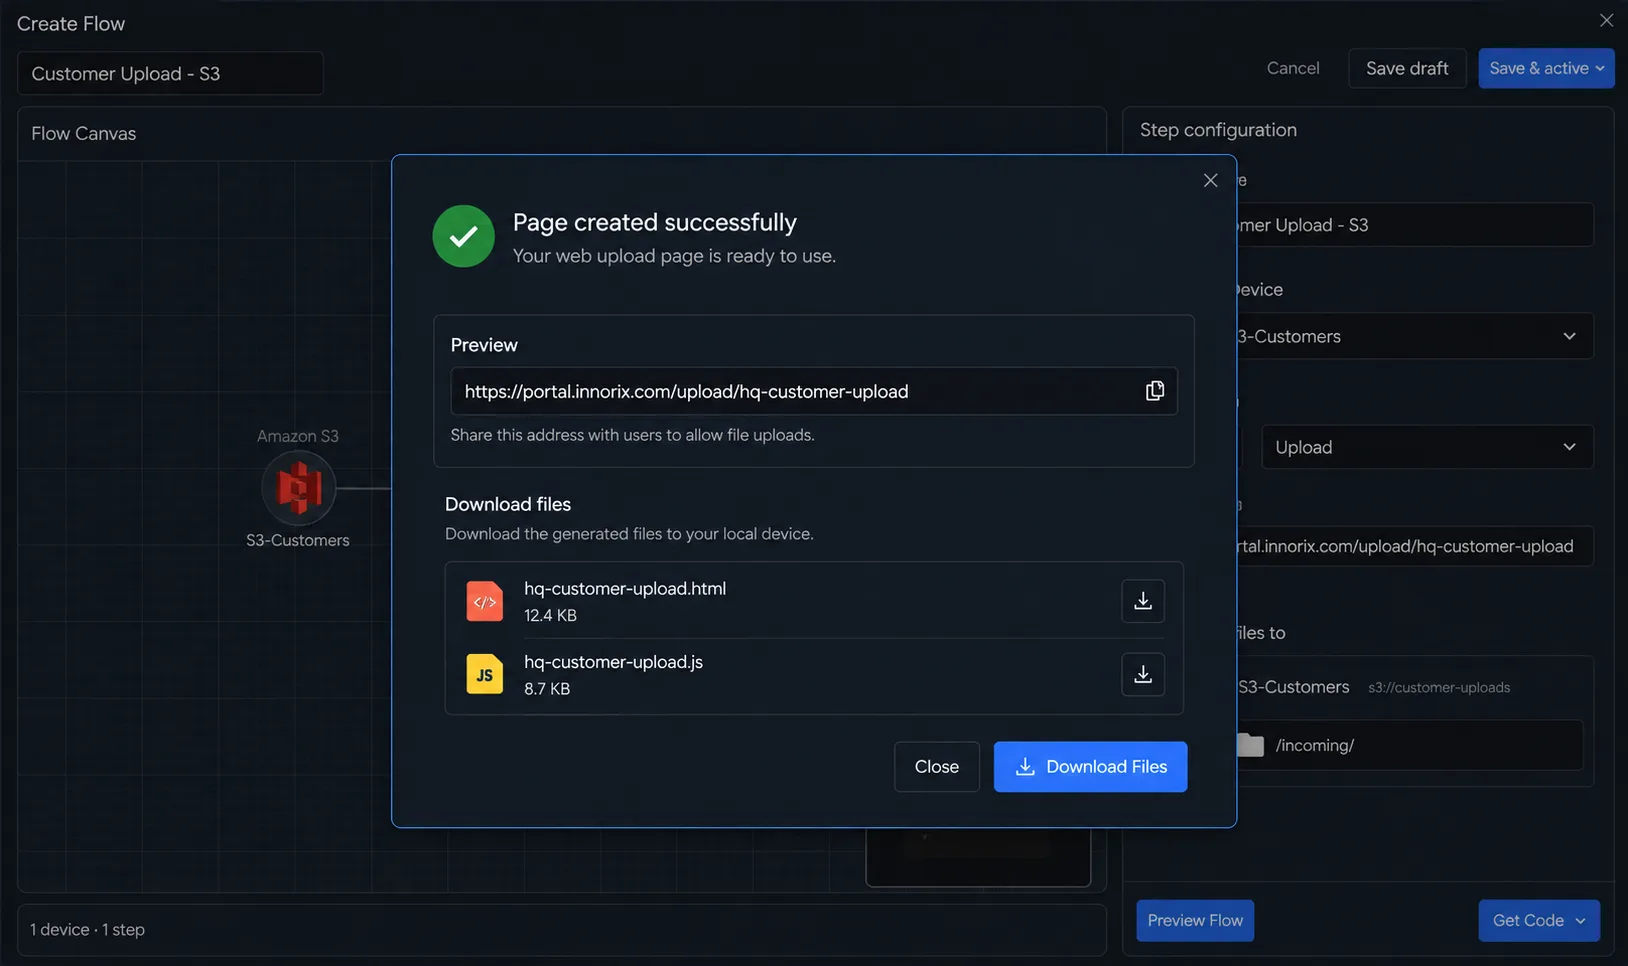
innorix.js. The default values are sufficient for the remaining settings. - Click [Download Files] on the completion screen. Upload the downloaded files (
board-upload.html,innorix.js,innorix.css) to the web server at the allowed site address, preserving the downloaded folder structure.
<!DOCTYPE html>
<html>
<head>
  <meta charset="utf-8">
  <title>File Upload</title>
  <link rel="stylesheet" href="./innorix.css">
  <script src="./innorix.js"></script>
</head>
<body>
  <div id="fileBox"></div>

  <script>
    var box = innorix.create({
      el: '#fileBox',
      flowName: 'board-upload'
    });

    box.on('uploadComplete', function (p) {
      console.log(p.transferID);   // Save this value in your system
    });
  </script>
</body>
</html>
Use the values generated by the console as they are. Page settings are read from the platform at runtime, so you do not need to upload the files again when you change console settings. If you change the allowed site, download and upload a new innorix.js.
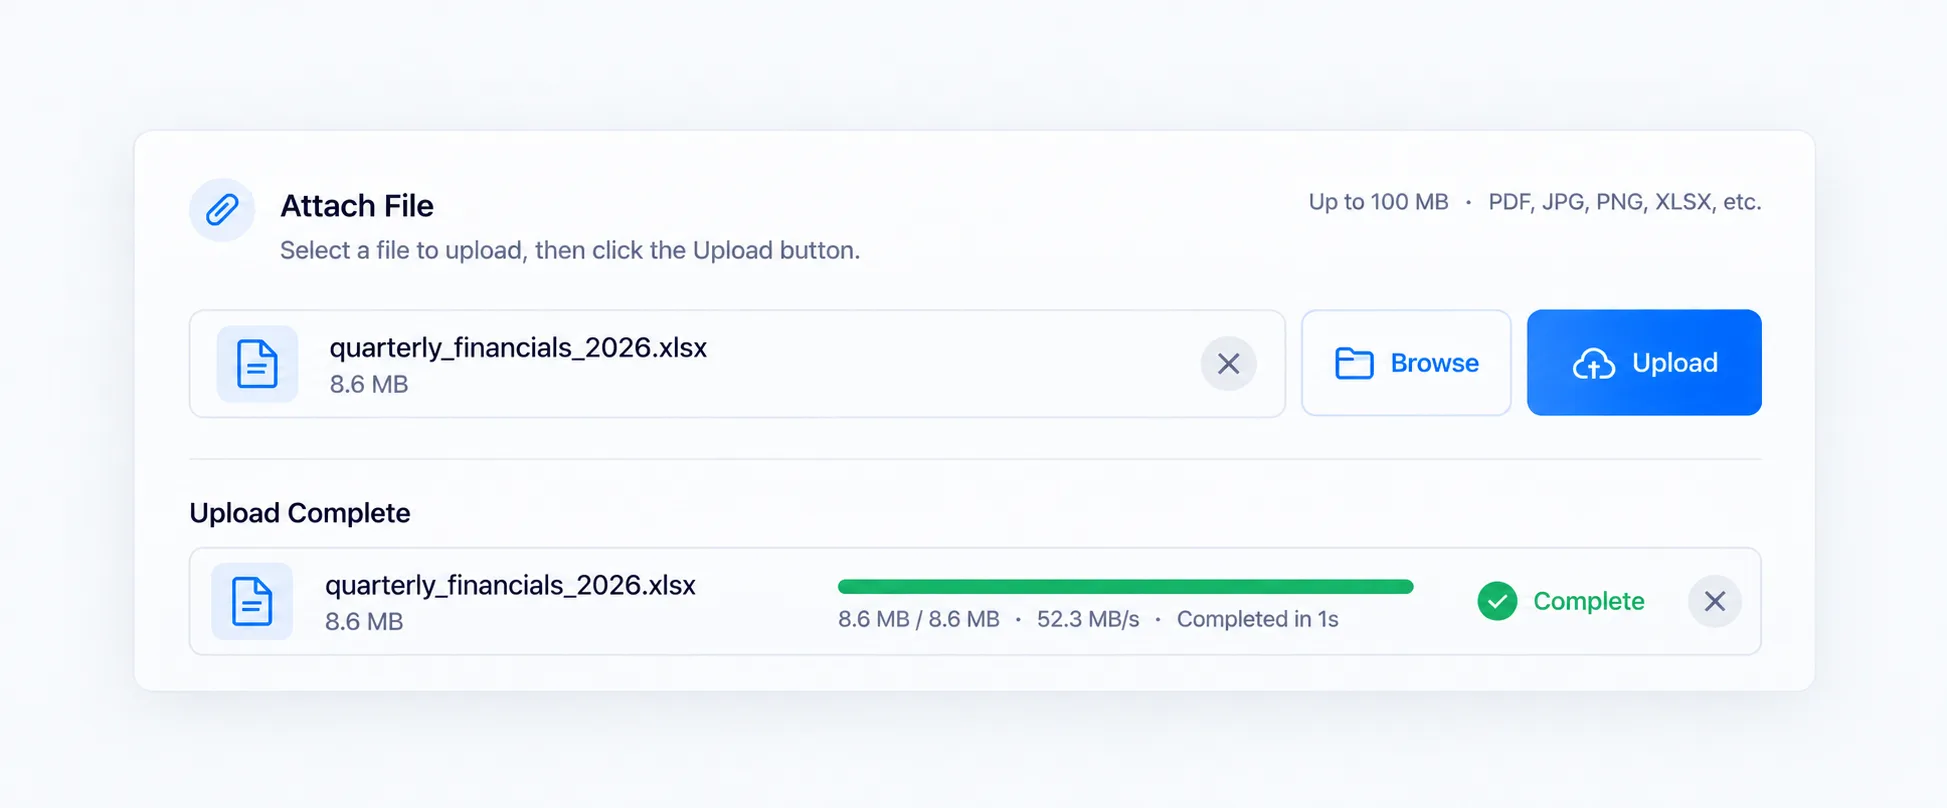
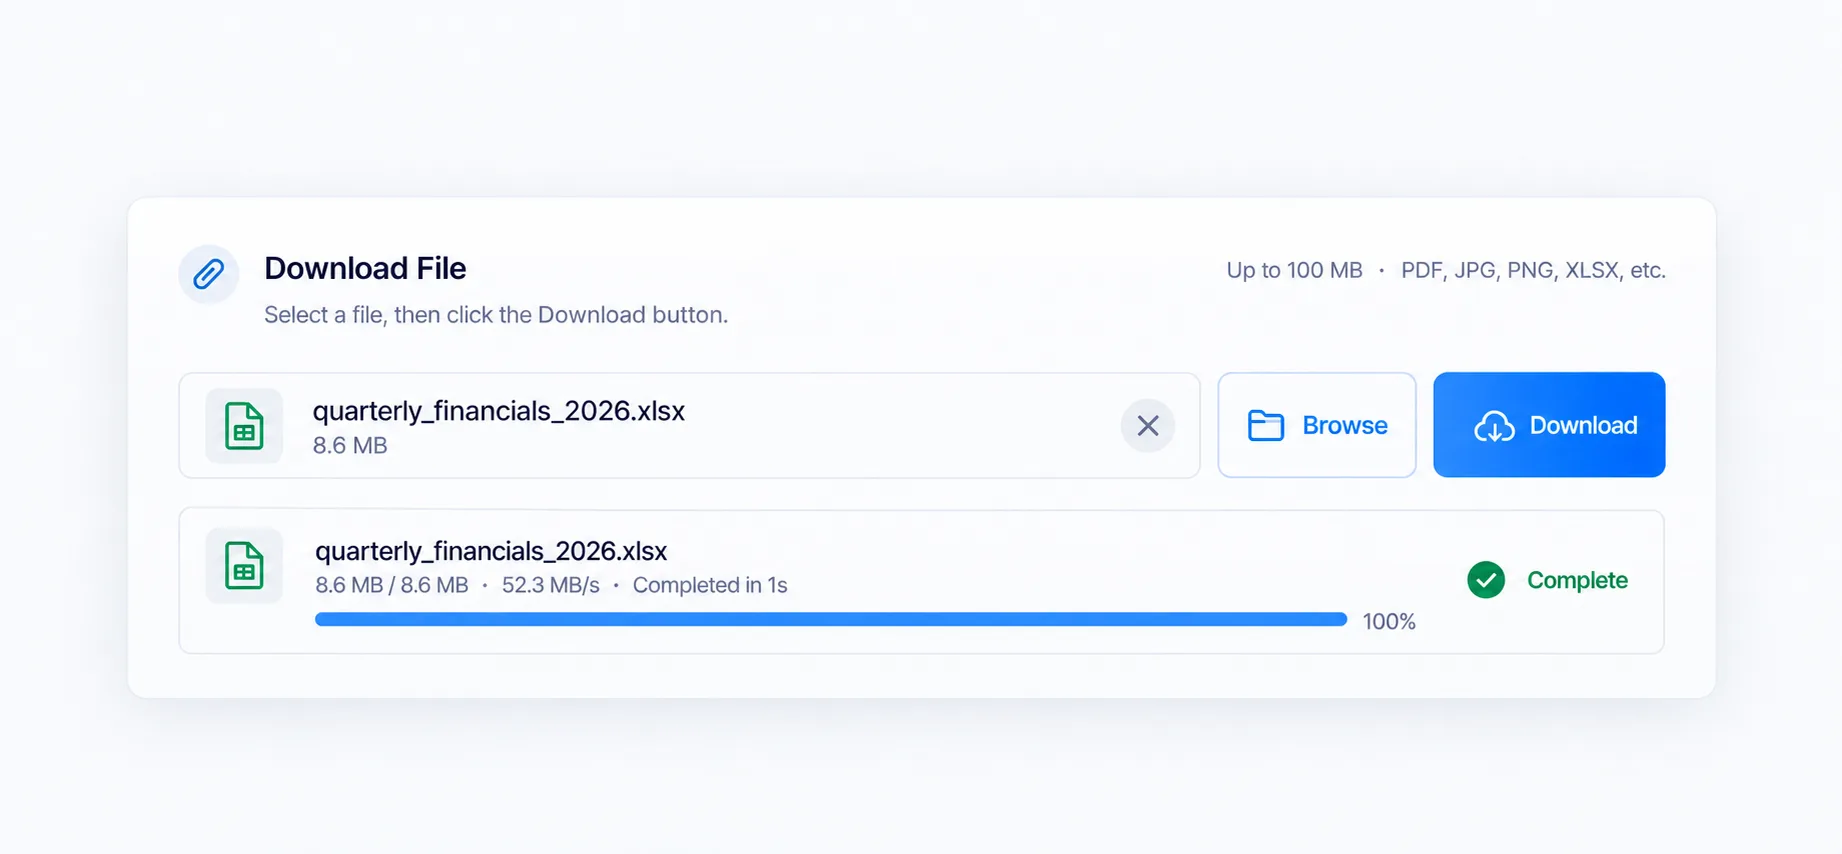
- Open the uploaded page URL, add a file, and click Upload. If the Agent is not installed, an installation prompt appears; follow the instructions and continue. The operation is successful when the transfer window shows Complete. If the page does not appear or the layout is broken, check that the HTML
<script src>and<link href>paths match the uploaded locations ofinnorix.jsandinnorix.css.
You can test functionality using [Preview] on the completion screen before uploading the files. The preview is for verification only.
Create a Download Page#
- In Create Web Based, select Download as the purpose, enter the allowed site, and click [Create].
- Upload the files obtained through [Download Files] (
board-download.html,innorix.js,innorix.css) to your web server. SettransferIdto a previously saved ID to display the files uploaded under that ID (see [Saving transferID] below).
<!DOCTYPE html>
<html>
<head>
  <meta charset="utf-8">
  <title>Attached Files</title>
  <link rel="stylesheet" href="./innorix.css">
  <script src="./innorix.js"></script>
</head>
<body>
  <div id="fileBox"></div>

  <script>
    var box = innorix.create({
      el: '#fileBox',
      flowName: 'board-download',
      transferId: 'T-9f3a7c21e4b8'   // Value saved in your system
    });
  </script>
</body>
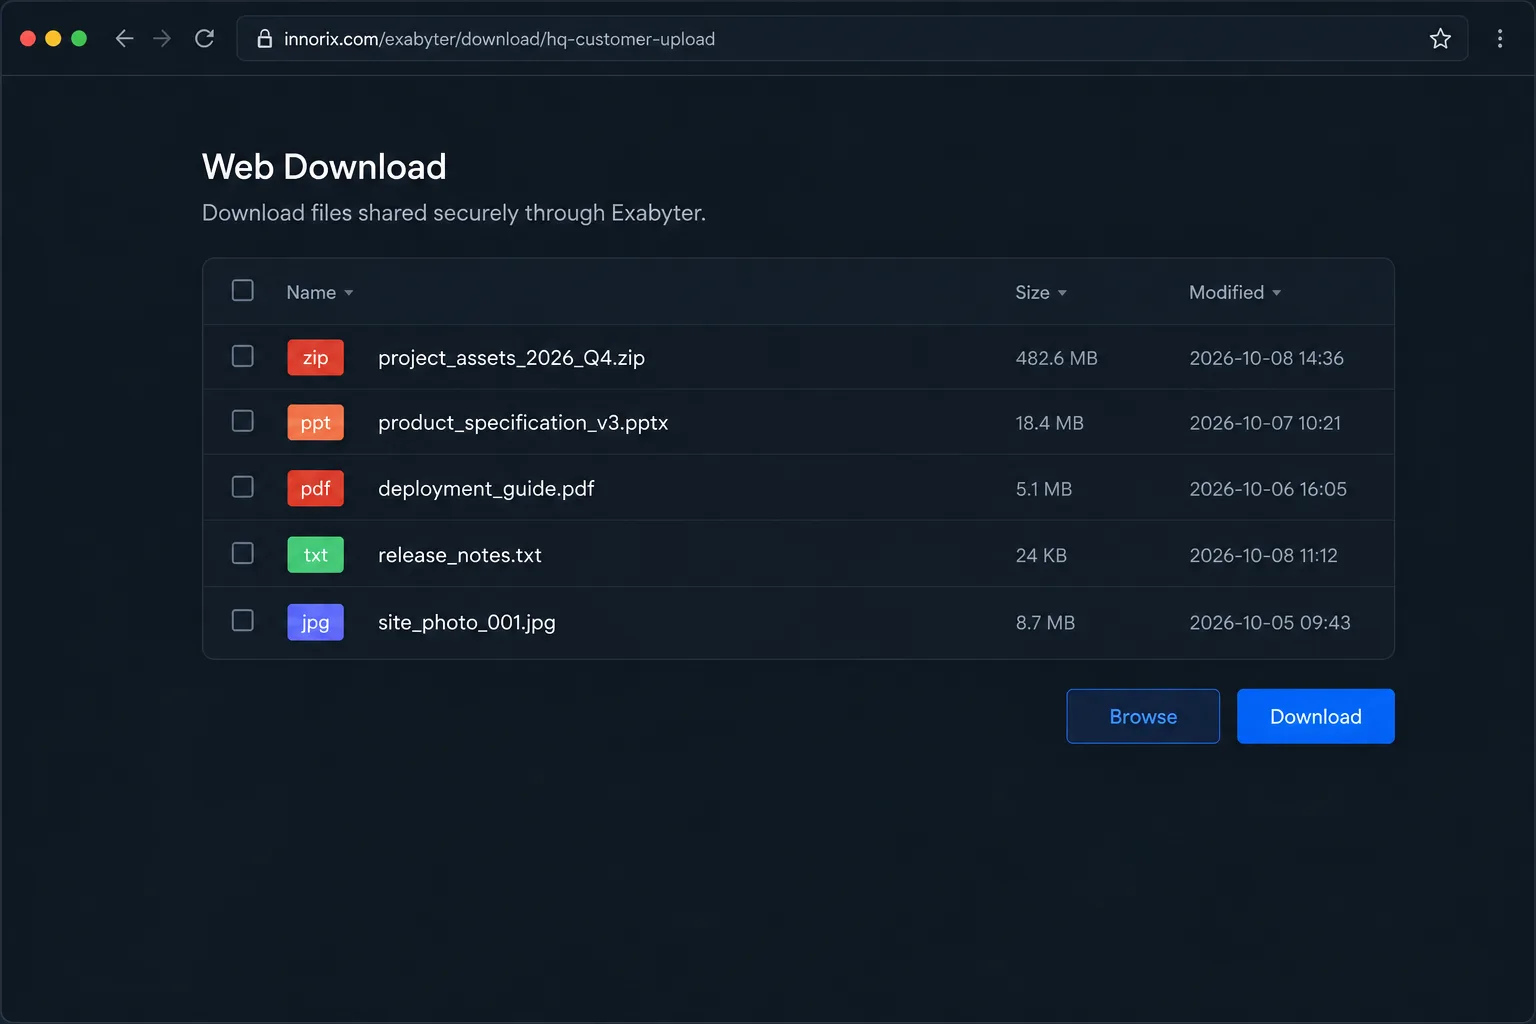
</html>- Select a file from the list and click Download. The operation is successful when the transfer window shows Complete and the file has been saved.
Saving transferID#
After an upload finishes, the page provides a transferID (the ID of the batch of files uploaded). Save this ID in your system to retrieve the same files later on the download page. There are two ways to obtain the ID.
uploadCompleteevent: When an upload finishes,transferIDis returned in the event'spobject. This is the usual method for saving it in your system.- Console RUN menu: Open the relevant Flow's history under RUN to see the transferID of files uploaded by users.
box.on('uploadComplete', function (p) {
  console.log(p.transferID);   // Save this value in your system
});Upload#
This section explains how to upload user-selected files to S3 and return the uploaded batch ID (transferID) to your system. All settings are configured in the console's page settings; the only code you need to write is a few lines to receive the completion event. Each feature follows the order Description → Settings and Events → Example, so you can read only the features you need.
File Selection#
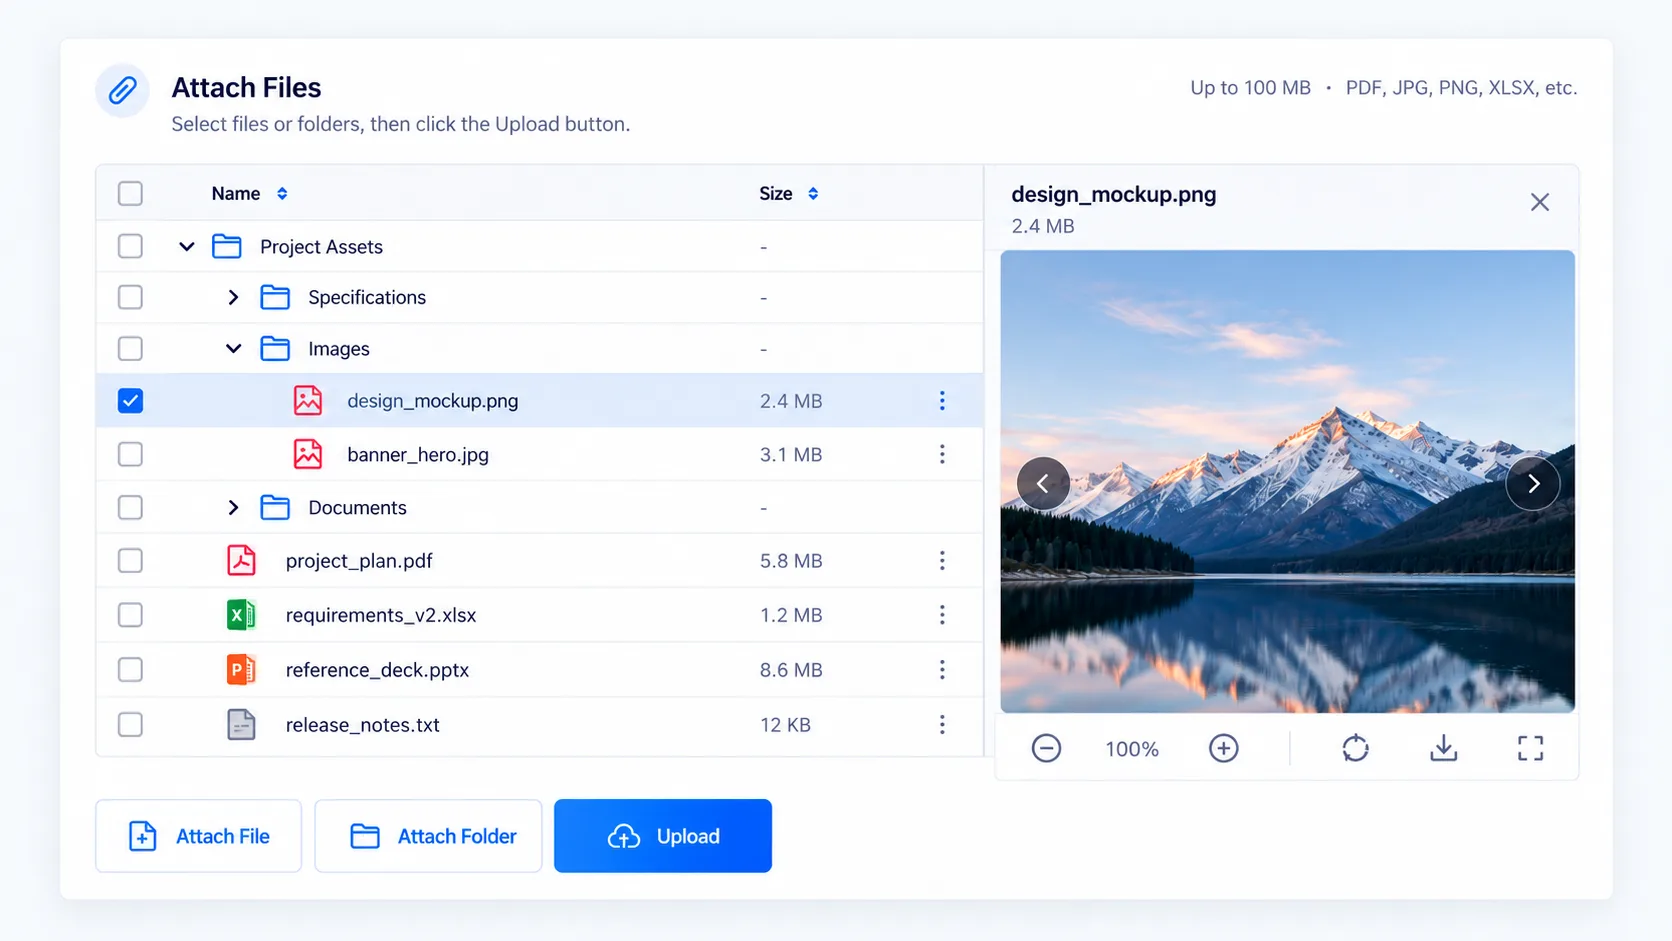
Files added with the Add Files button, dragged from File Explorer, or selected as folders all go into one upload list. Validation and transfer then operate on this list. The page provides the selection interface, so you do not need to create separate buttons.
File selection dialog ─┐
Folder selection dialog ┼→ Upload list → Validation → Transfer
Drag and drop ─────────┘
Folder Options#
| Setting | Description |
|---|---|
folderAttach |
Allow folder attachments |
addFolder |
Preserve the folder structure in storage. When disabled, only the files are uploaded without folder information |
addEmptyFile |
Whether to include zero-byte files |
Automatic Upload#
When autoUpload is enabled, uploading starts as soon as files are added. When disabled, users must click [Upload] to start. Disable it for pages that upload files when saving a post, such as a bulletin board, and enable it for pages used solely to receive attachments.
Restore Previous Transfers#
If the page is closed during a transfer, the active transfer is canceled. On the next visit, unfinished transfers can be restored to the list and resumed. If the original file has changed, that file cannot be restored and the file_is_modified error is returned.
| Setting | Description |
|---|---|
attachIncompleteFiles |
Look up unfinished previous transfers when the page opens |
autoLoadTransfer |
When enabled, restore and resume uploading without asking; when disabled, ask the user whether to continue |
A transfer completed after restoration retains its original transferID.
Attachment Settings#
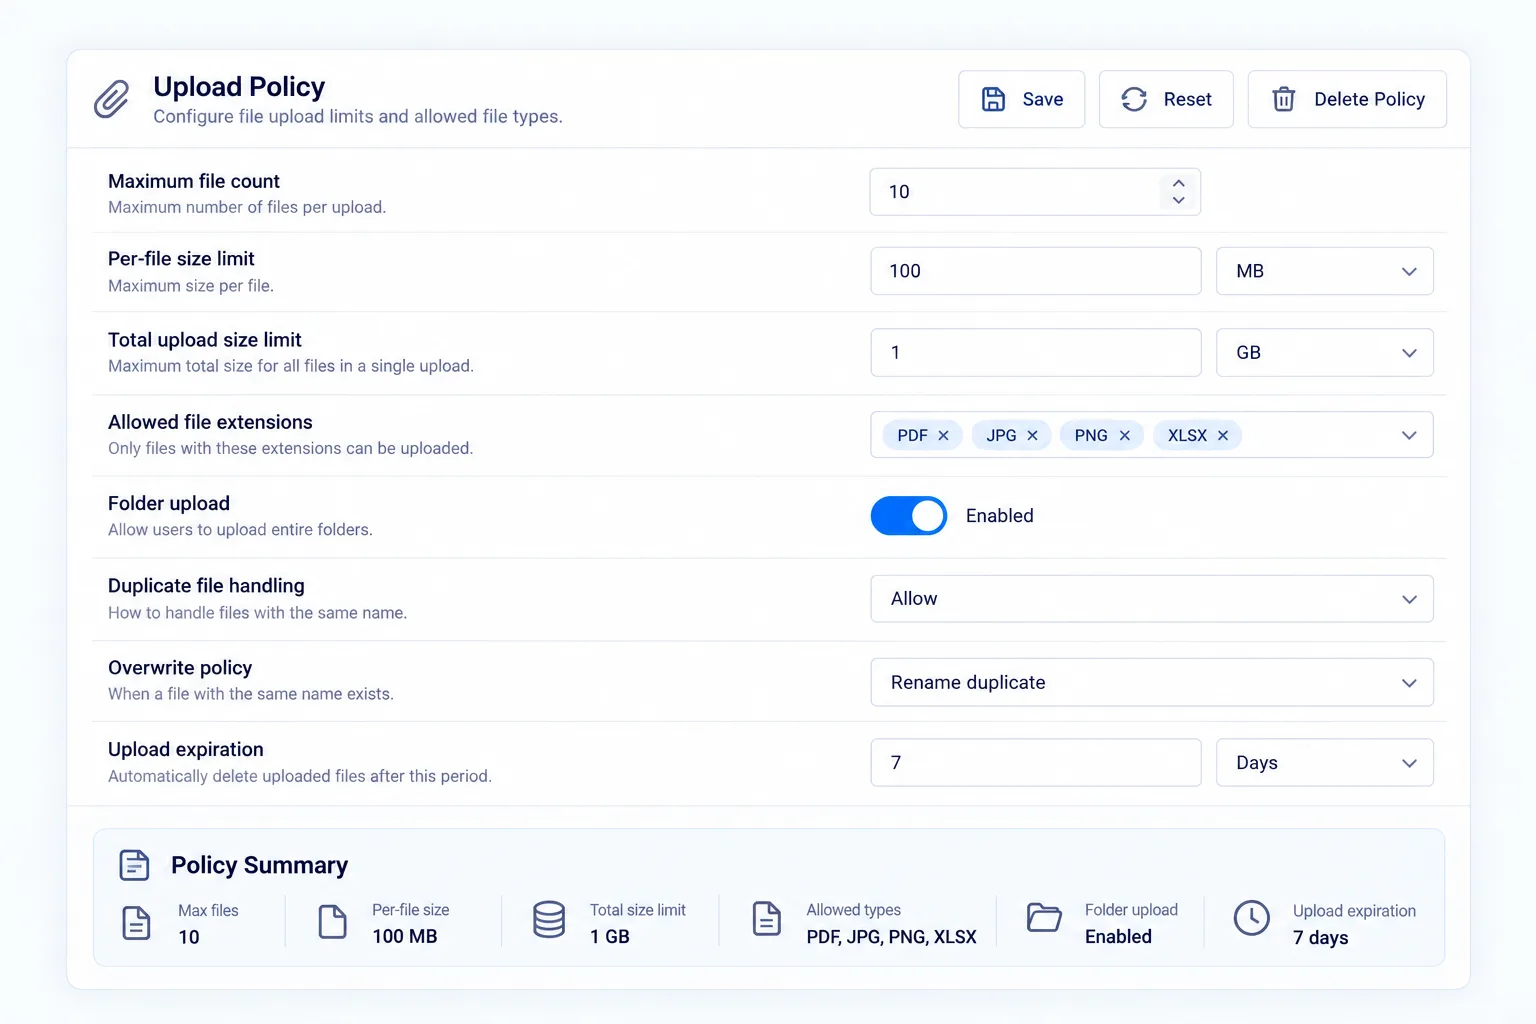
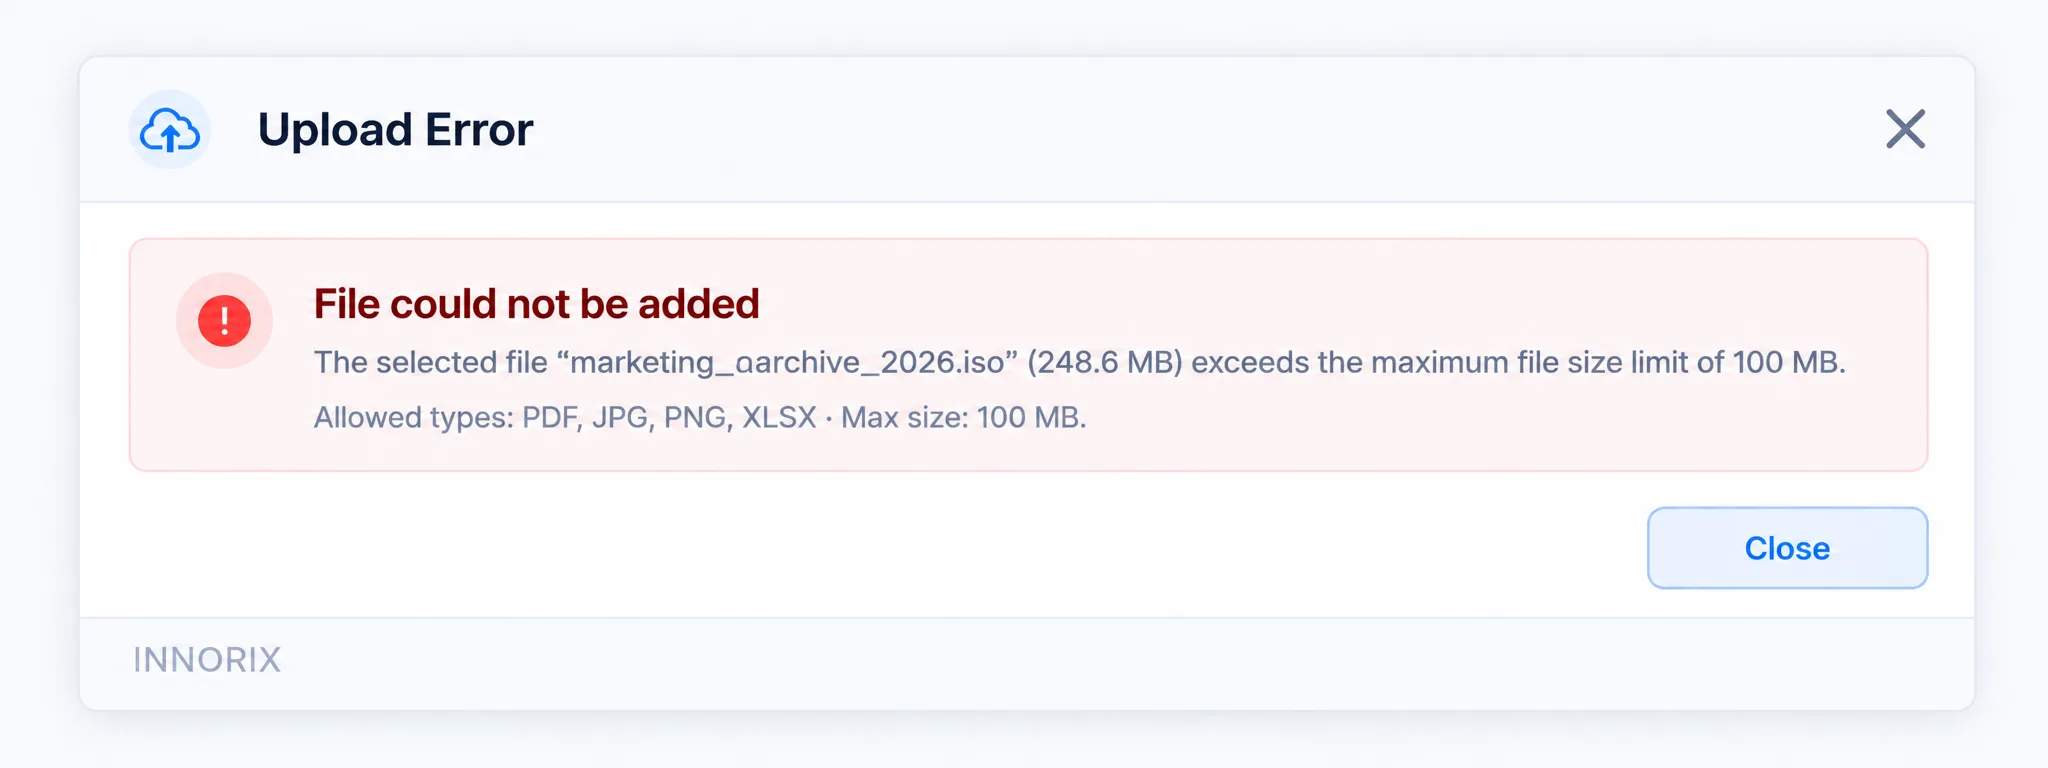
For example, a membership registration form may need restrictions such as “up to five files, PDF and JPG only, maximum 10 MB per file.” Files are validated when added to the list, and only files that violate the rules are rejected.
Selected file → Duplicate → Count → Total size → Denied extensions → Allowed extensions → Individual size → Add to list
                                      (Reject at the first failed check; addFileError)
When the file count or total size limit is reached, processing of the remaining files in the same selection batch stops; files that already passed remain in the list. Extension and individual file size errors skip only the affected file.
Limit Settings#
Configure these under [Upload Policy] → [Attachment Limits] in the console. Unspecified restrictions are not checked.
| Setting | Description |
|---|---|
maxFileCount |
Maximum number of files (count, not bytes) |
maxFileSize, maxTotalSize |
Individual and total size limits; entered in MB in the console |
allowType |
Allowed extensions (lowercase, without dots, comma-separated) |
denyType |
Blocked extensions; denyType takes precedence if it overlaps with allowType |
useSignature |
Check the actual file format using its initial bytes (detects renamed extensions) |
addDuplicateFile |
Duplicate attachment policy |
Files without extensions are rejected when
allowTypeis set. Duplicate detection uses the file path, so files with the same name in different folders are treated as different files.
Handling Violations (addFileError)#
By default, a notification appears within the page. For custom notifications, handle the addFileError event by type. The event's error object contains type, message, and file.
type |
Meaning |
|---|---|
addDuplicateFile |
Duplicate file |
maxFileCount, maxTotalSize, maxFileSize |
Count or size limit exceeded |
denyType, allowType |
Extension restriction violated |
file_is_modified |
Original file changed and could not be restored from an earlier transfer |
box.on('addFileError', function (p) {
  var list = Array.isArray(p) ? p : [p];
  console.log(list[0].type, list[0].message);
});
Server-Side Revalidation#
Because client-side restrictions can be bypassed, the platform checks the same limits again on the server before allowing an upload. Requests that violate the restrictions are rejected and return an error.
Running an Upload#
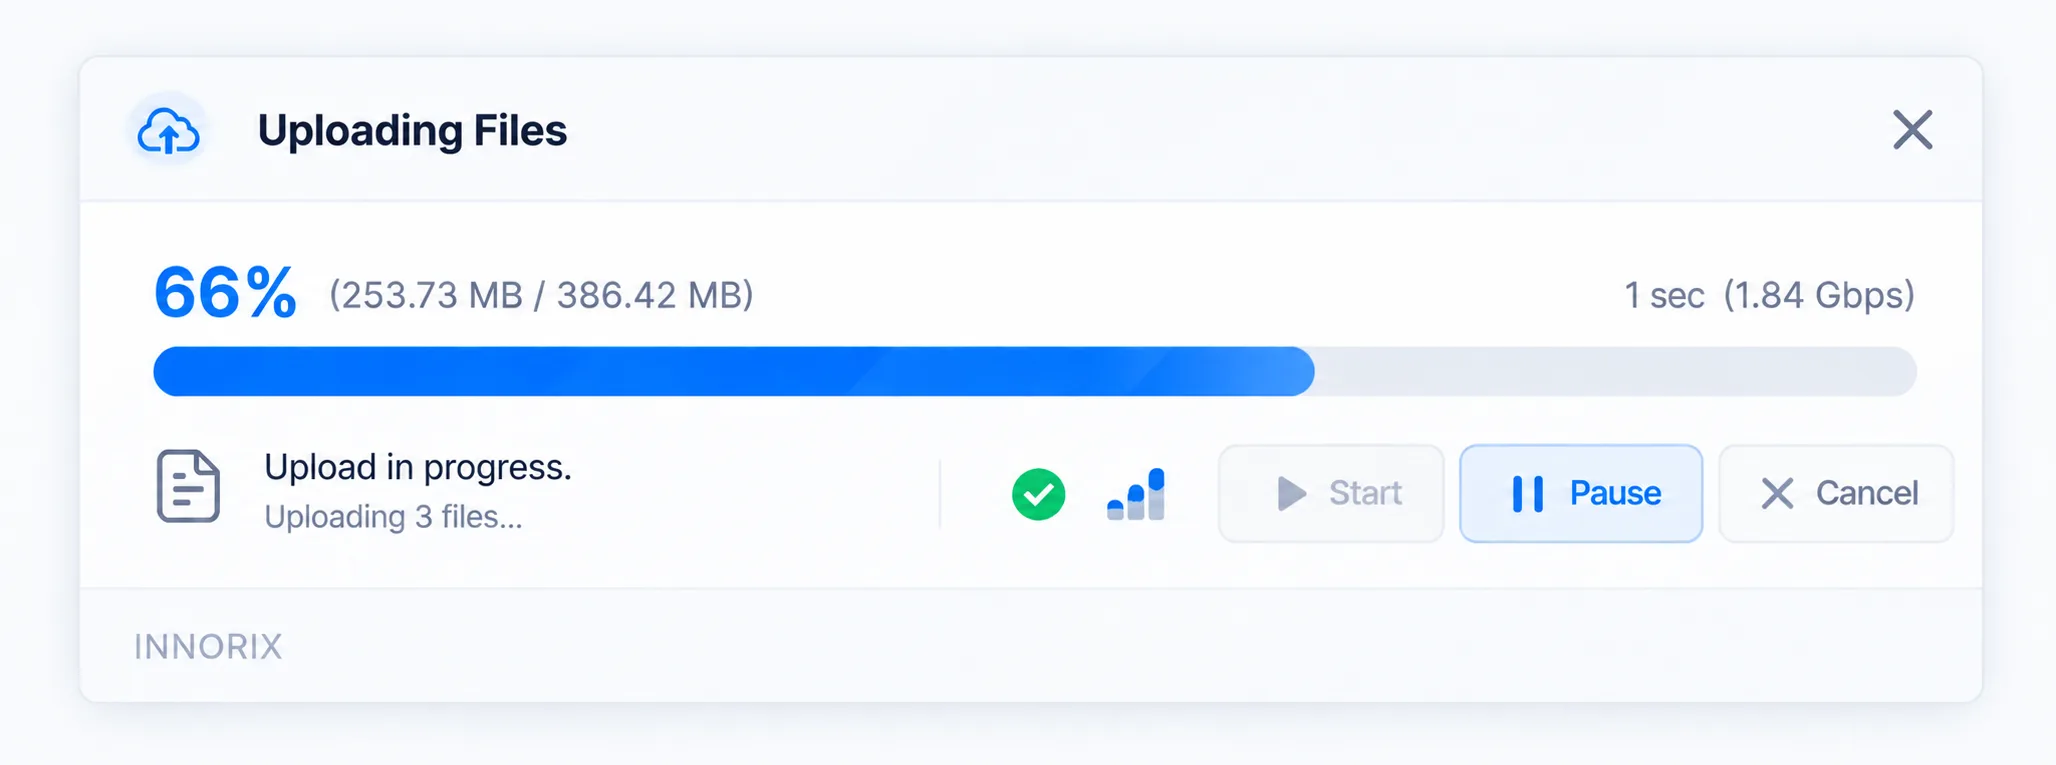
Even if the connection slows while hundreds of photos are uploading, users need to be able to pause, resume, cancel, and continue from the interrupted point. Uploading begins with the page's [Upload] button (or immediately upon adding files when autoUpload is enabled) and is controlled from the transfer window.
[Upload] → Transfer (progress) → uploadComplete
             │
       Pause / Resume / Cancel / Retry errors
Files begin transferring in list order, but multiple files may transfer concurrently, so their completion order may differ. Large files are split into chunks and transferred directly to S3. Interrupted uploads resume from the last transferred position.
Transfer Window Controls#
| Category | Name |
|---|---|
| Transfer window buttons | Start, Pause, Resume, Cancel |
| Events | uploadStart, uploadPause, uploadResume, uploadCancel, uploadComplete, uploadError |
| Settings | cancelConfirmation (confirmation before cancellation), transferStart (whether to click Start in the transfer window) |
- After pausing, resuming continues from the interrupted position.
- Canceling leaves fully uploaded files in place; the platform cleans up chunks that were not fully uploaded.
- Closing the page cancels the active transfer. On returning, unfinished transfers can be detected and resumed (see [Restore Previous Transfers]).
Storage Rules#
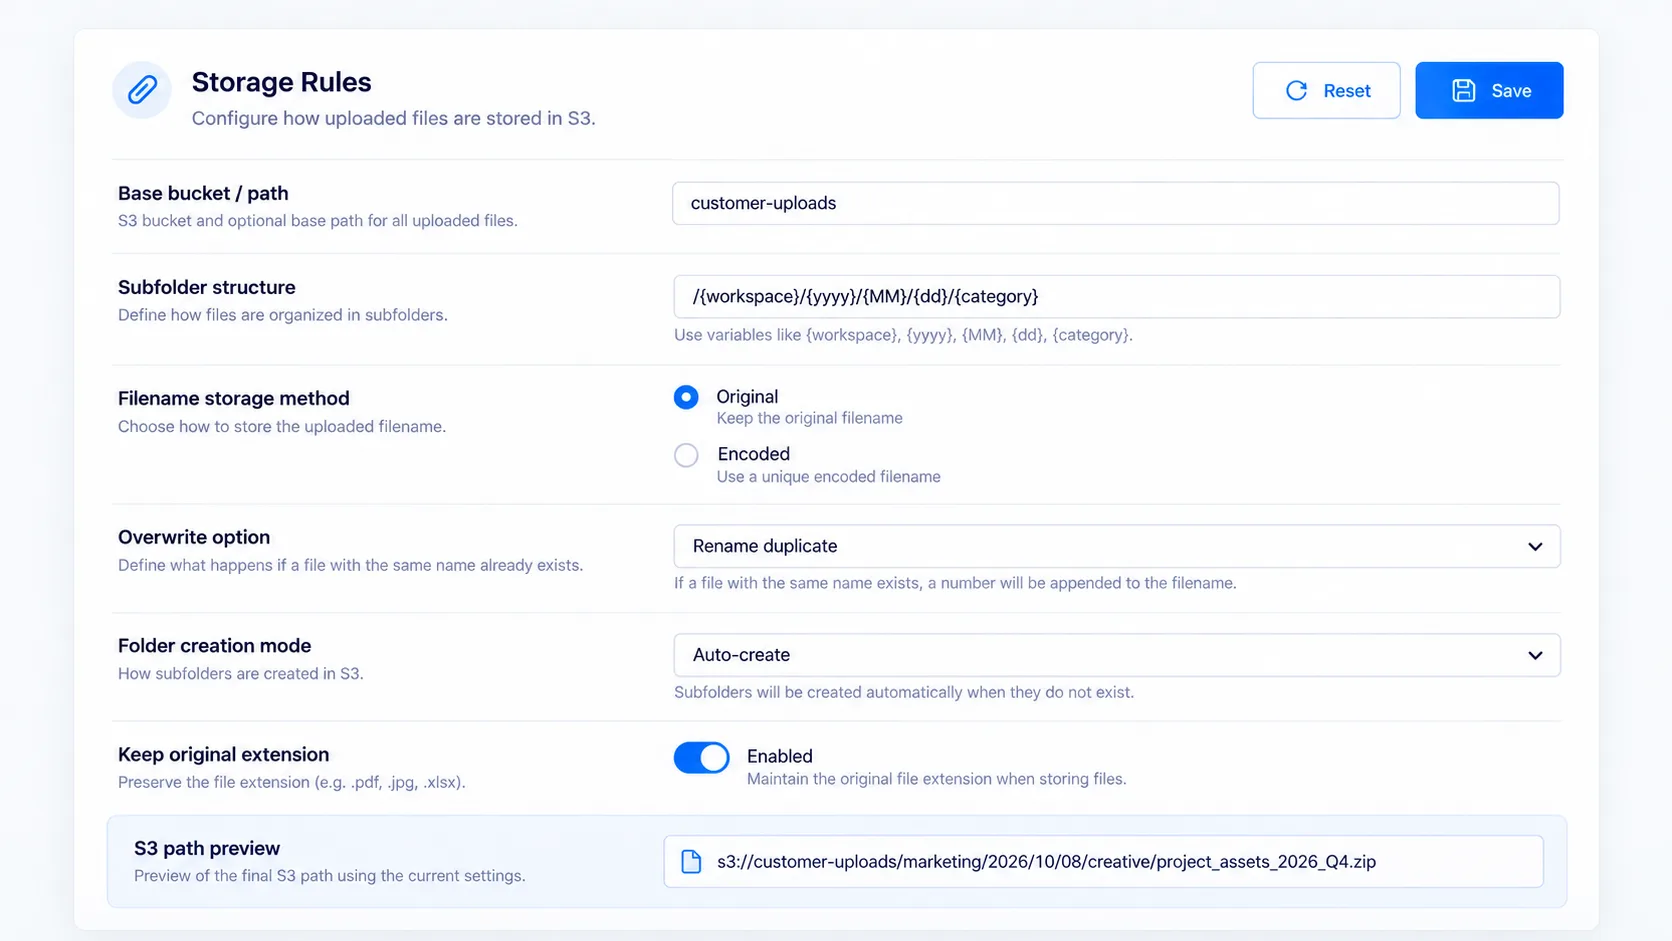
This section determines where and under what filenames bulletin-board attachments are stored in S3. Instead of writing server code, select the subfolder structure and filename storage method in the console; the platform applies them to every upload request. The saved locations and filenames are returned in the upload completion event, so your system does not need to calculate them.
Storage Location#
Uploaded files are stored under a folder named after the transferID in S3 storage. Each upload (one batch of files) gets one folder. If a subfolder rule is specified, an additional folder structure is created beneath the transferID folder.
<bucket>/
└── T-9f3a7c21e4b8/            ← transferID folder (always)
    └── 2026/10/08/            ← If a subfolder rule (subFolderRule) is specified
        ├── 3f2c9a7e41d0.pdf   ← fileNameType: encode (original name: contract.pdf)
        └── attachments/       ← Preserve structure if uploaded as a folder (addFolder)
└── a81d05c2f7b3.jpg (original name: photo.jpg)Settings#
| Setting | Description | Default |
|---|---|---|
subFolderRule |
Subfolder structure under the transferID folder. Combine {yyyy}, {MM}, {dd} (upload date) using /. If empty, files are stored directly under the transferID folder |
Empty |
fileNameType |
Stored filename method: original (keep original name) or encode (store under a generated {uuid}.{ext} name) |
original |
overwrite |
Whether to overwrite an existing file with the same name | Off |
- Even when files are stored with
encode, the platform also records their original names in the transferID list, so downloads display and save them under their original names. - When a file with the same name exists in the same folder (for example, if
addFolderis disabled and files with identical names are selected from different folders), a number is appended by default to save it separately (name(1).extension). Withoverwriteenabled, the existing file is overwritten instead. This does not apply toencode, which generates nonconflicting names. - In
originalmode, the platform replaces characters not allowed in filenames (\ / : * ? " < > |) with_. - The storage location and filename are returned together with the transferID in the
filesfield ofuploadComplete(serverFilePath,serverFileName,clientFileName). See [Completion Handling].
Completion Handling#
When all files have finished uploading, the page fires the uploadComplete event. The event's transferID identifies the batch of files uploaded. Save this ID in your system and use it later on the download page.
Upload complete → uploadComplete(transferID) → Your system saves transferID → Use later on download pageuploadComplete Event#
| Field | Description |
|---|---|
transferID |
File batch ID; a long, unpredictable value |
postData |
Data sent with the upload (postData option) |
files |
List of uploaded files, including each file's original name, stored name, and storage location (see below) |
Each entry in files contains these fields:
| Field | Description |
|---|---|
clientFileName |
Original filename |
serverFileName |
Stored filename: original when original is used, changed when encode is used |
serverFilePath |
Full path in storage (transferID/subfolder/filename) |
rootName |
Parent folder path when uploaded as a folder |
fileSize, fileState |
Size (bytes) and per-file transfer status |
{
  "transferID": "T-9f3a7c21e4b8",
  "postData": { "boardId": "1024" },
  "files": [{
    "clientFileName": "contract.pdf",
    "serverFileName": "3f2c9a7e41d0.pdf",
    "serverFilePath": "T-9f3a7c21e4b8/2026/10/08/3f2c9a7e41d0.pdf",
    "fileSize": 4952305,
    "fileState": "Complete"
  }]
}
Linking to a Bulletin-Board Post#
Send the transferID with the request to save a post so it can be associated with that post. The server only needs to store the received value with the post information.
<form method="post" action="/board/write">
  <input type="hidden" id="transferId" name="transferId">
  <div id="fileBox"></div>
  <input type="submit" value="Save">
</form>

<script>
  var box = innorix.create({
    el: '#fileBox',
    flowName: 'board-upload',
    postData: { boardId: '1024' }
  });

  box.on('uploadComplete', function (p) {
    document.getElementById('transferId').value = p.transferID;   // Send with post when saving
  });
</script>- Store the post ID and transferID as a pair to prevent duplicate storage when saving a post is retried.
- If the window is closed before the upload finishes,
uploadCompletedoes not fire. Check that the transferID is populated before saving the post.
Passing Data#
Use this when you want to record business values such as a post number or category with the files. Values passed in the postData option are recorded with the uploaded batch and returned as postData in uploadComplete.
Your website → postData option → Upload → Recorded with uploaded batch → postData in uploadCompletebox = innorix.create({
el: '#fileBox',
flowName: 'board-upload',
postData: { boardId: '1024', category: 'notice' }
});- Keys may contain only English letters, numbers, and
_; values may contain up to 100 characters. - Users can modify these values in the browser, so do not use them for authentication information such as user IDs. Your system is responsible for authenticating users.
Errors and Recovery#
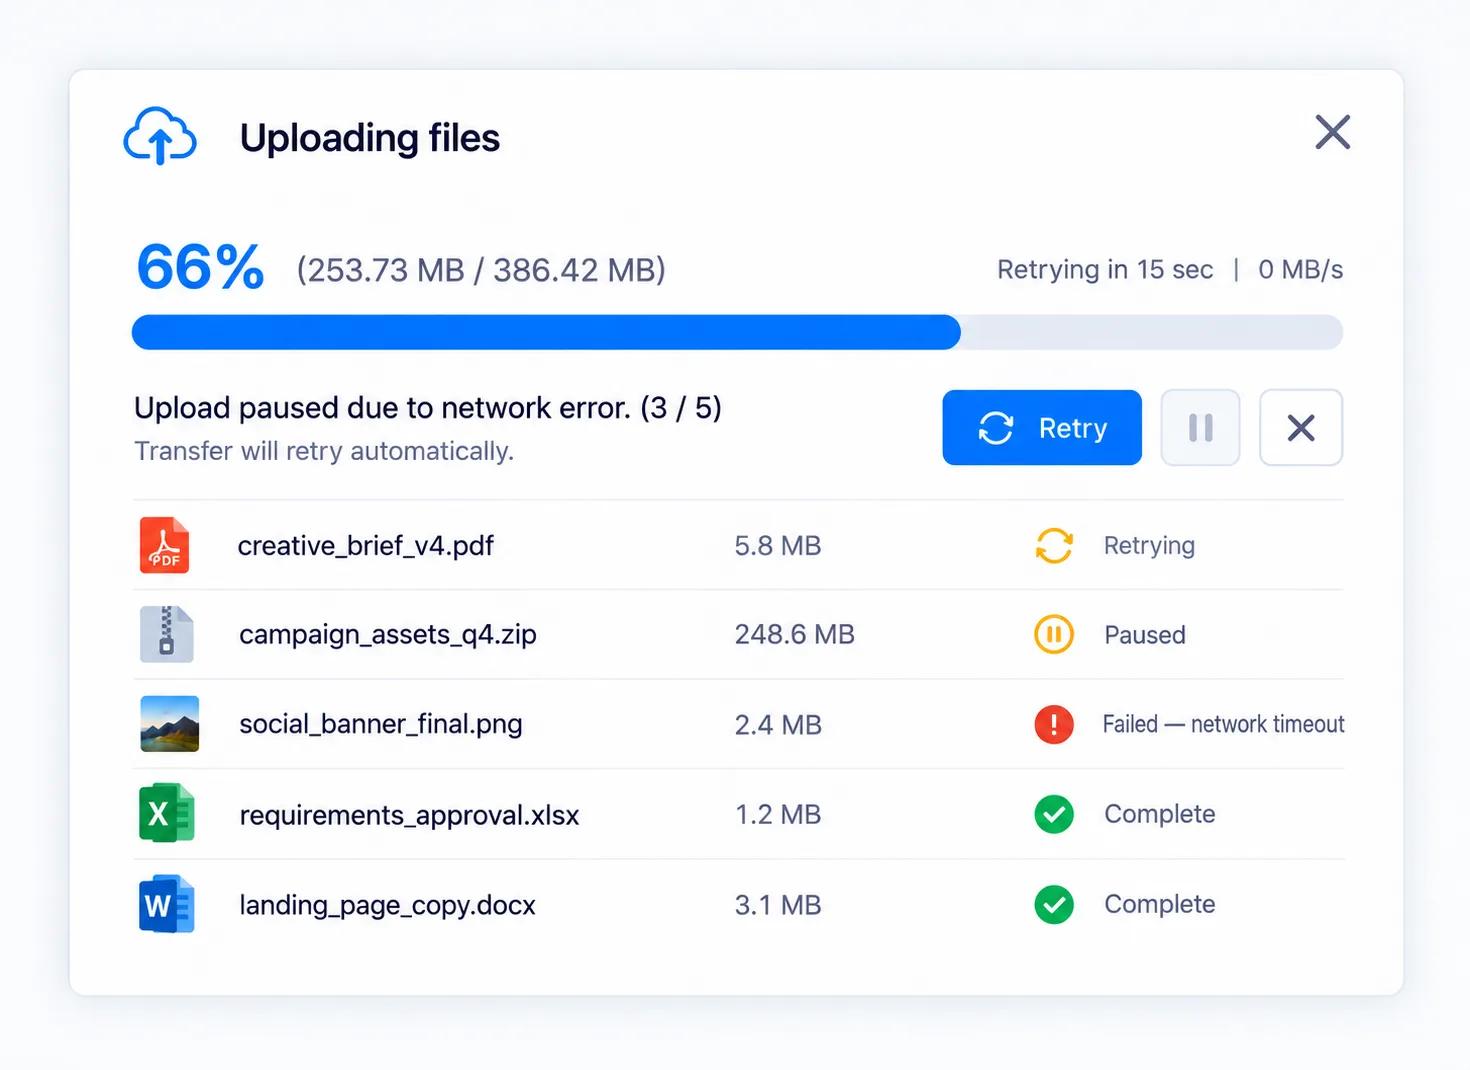
To avoid forcing users to restart uploads when connectivity is briefly interrupted, such as when entering an elevator or switching Wi-Fi networks, temporary errors are retried automatically and uploading resumes from the last transferred position.
Error occurs (uploadError)
   ├ Unrecoverable → Pause (uploadPause) → User resumes
   └ Recoverable → Automatic retry → Resume upload
Retry Settings#
| Setting | Description |
|---|---|
retryCount |
Number of retries; the default is recommended |
autoRecovery |
When enabled, automatically resume after errors; when disabled, the Resume button must be used after each error |
maxErrorCount |
Maximum allowed number of errors |
skipErrorFile |
Skip files with errors. Files violating policy will fail again if retried, so skip them or notify the user by pausing |
Error Events#
Use statusMessage.errorCode from the uploadError event to identify the error.
| Code | Category |
|---|---|
0 |
Frontend (client) error |
400–599 |
Network error |
5000 |
License error: the site where the page runs does not match the allowed site in innorix.js |
10001 and above |
File access or storage write error |
box.on('uploadError', function (p) {
  console.log(p.statusMessage);
});
Download#
This section explains how to let users download files previously uploaded under a transferID. You do not need to build a server API to generate file lists or create your own download server. Each feature follows Description → Settings and Events → Example, so you can read only what you need.
Download List#
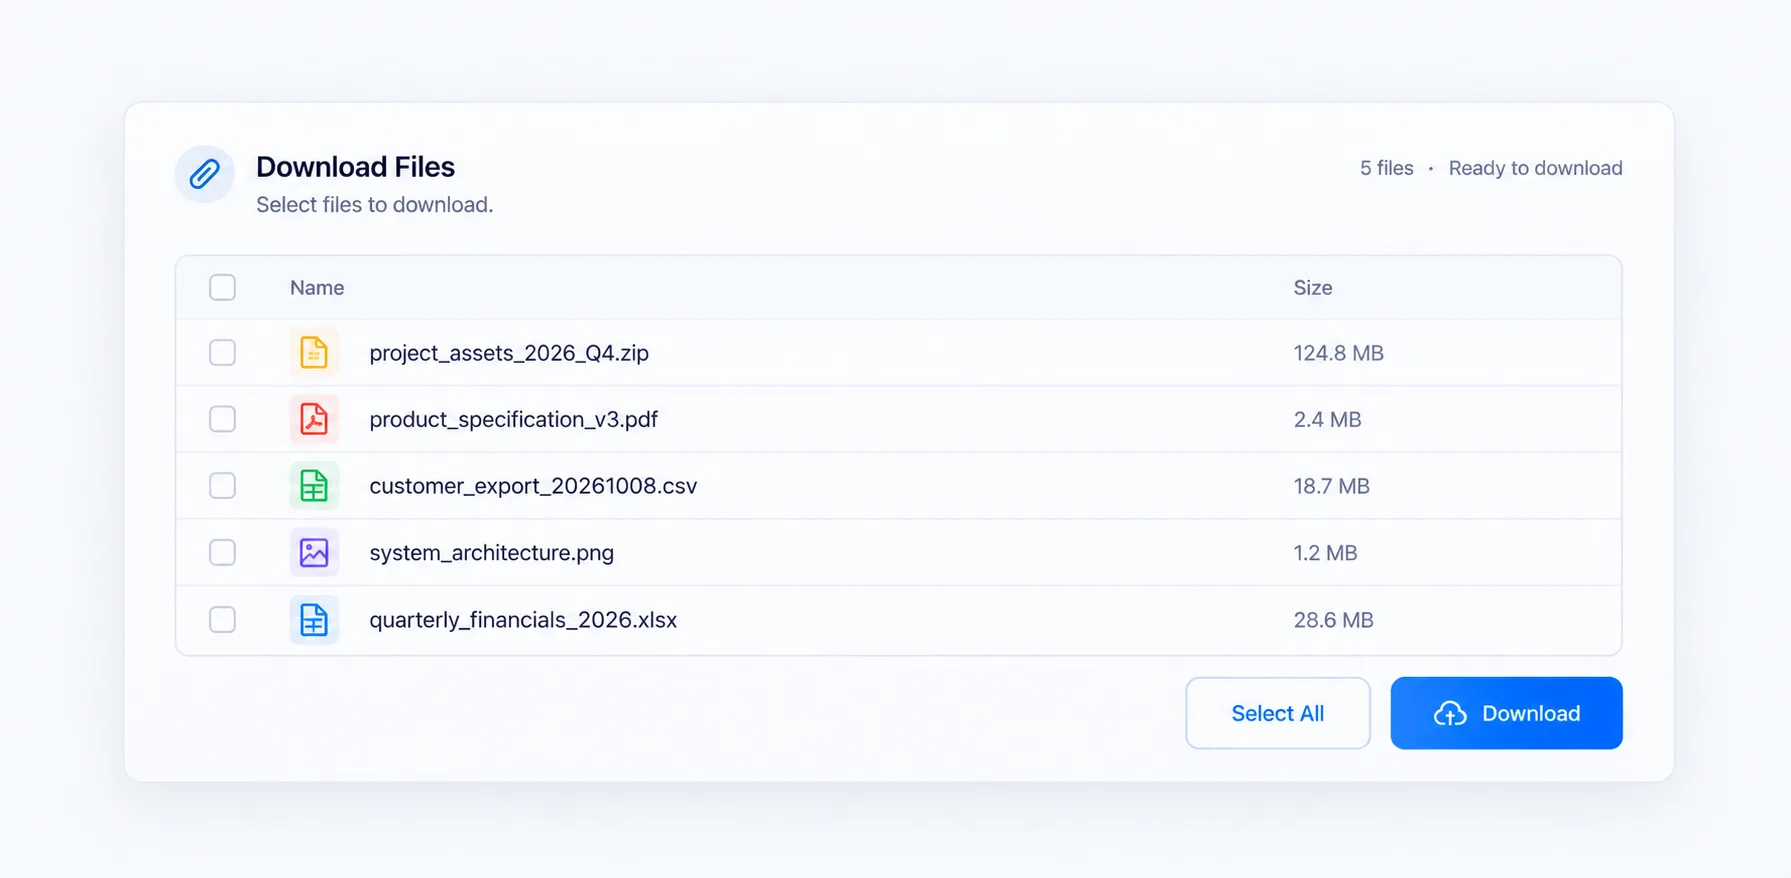
Consider a document management page where a user downloads all files attached to a contract. Specify the ID in the transferId option of create() to list the files uploaded under that ID. The platform builds the list from the transferID, so you do not need to provide filenames or sizes yourself.
Saved transferID → transferId option in create() → File list → Download| Value | List |
|---|---|
transferId: 'T-9f3a7c21e4b8' |
Files uploaded under that ID |
transferId: ['T-9f3a7c21e4b8', 'T-71bc02ad55e0'] |
Files from both IDs in one list |
- Filenames shown in the list are the original upload names (
clientFileName). - Files uploaded as folders appear with their folder structure and can all be selected for download.
- If the ID is missing or invalid, “File not found” is displayed and
downloadErrorfires.
box = innorix.create({
  el: '#fileBox',
  flowName: 'board-download',
  transferId: 'T-9f3a7c21e4b8'   // Value retrieved from your system
});
Access Restrictions#
Anyone who knows a transferID can download its files. Your system determines who can see the ID. Provide it only to users whose login and permissions have been verified, and do not expose it to unauthorized users.
// Return transferId from the server only after permissions are verified (your system's logic)
fetch('/board/1024/attachments/token')
  .then(function (r) { return r.ok ? r.json() : Promise.reject(r.status); })
  .then(function (d) {
    box = innorix.create({
      el: '#fileBox',
      flowName: 'board-download',
      transferId: d.transferId
    });
  });
Running a Download#
On a photo management page, users may want to select a few photos or click “Download All.” The page provides both buttons.
| Button | Description | When to use |
|---|---|---|
| Download | Download only selected items | Pages where users select items with checkboxes |
| Download All | Download the entire list | Pages for downloading everything at once |
With autoDownload enabled, the entire list begins downloading as soon as the page opens. Use this for pages that should start downloading immediately, such as an email “Download Attachments” link.
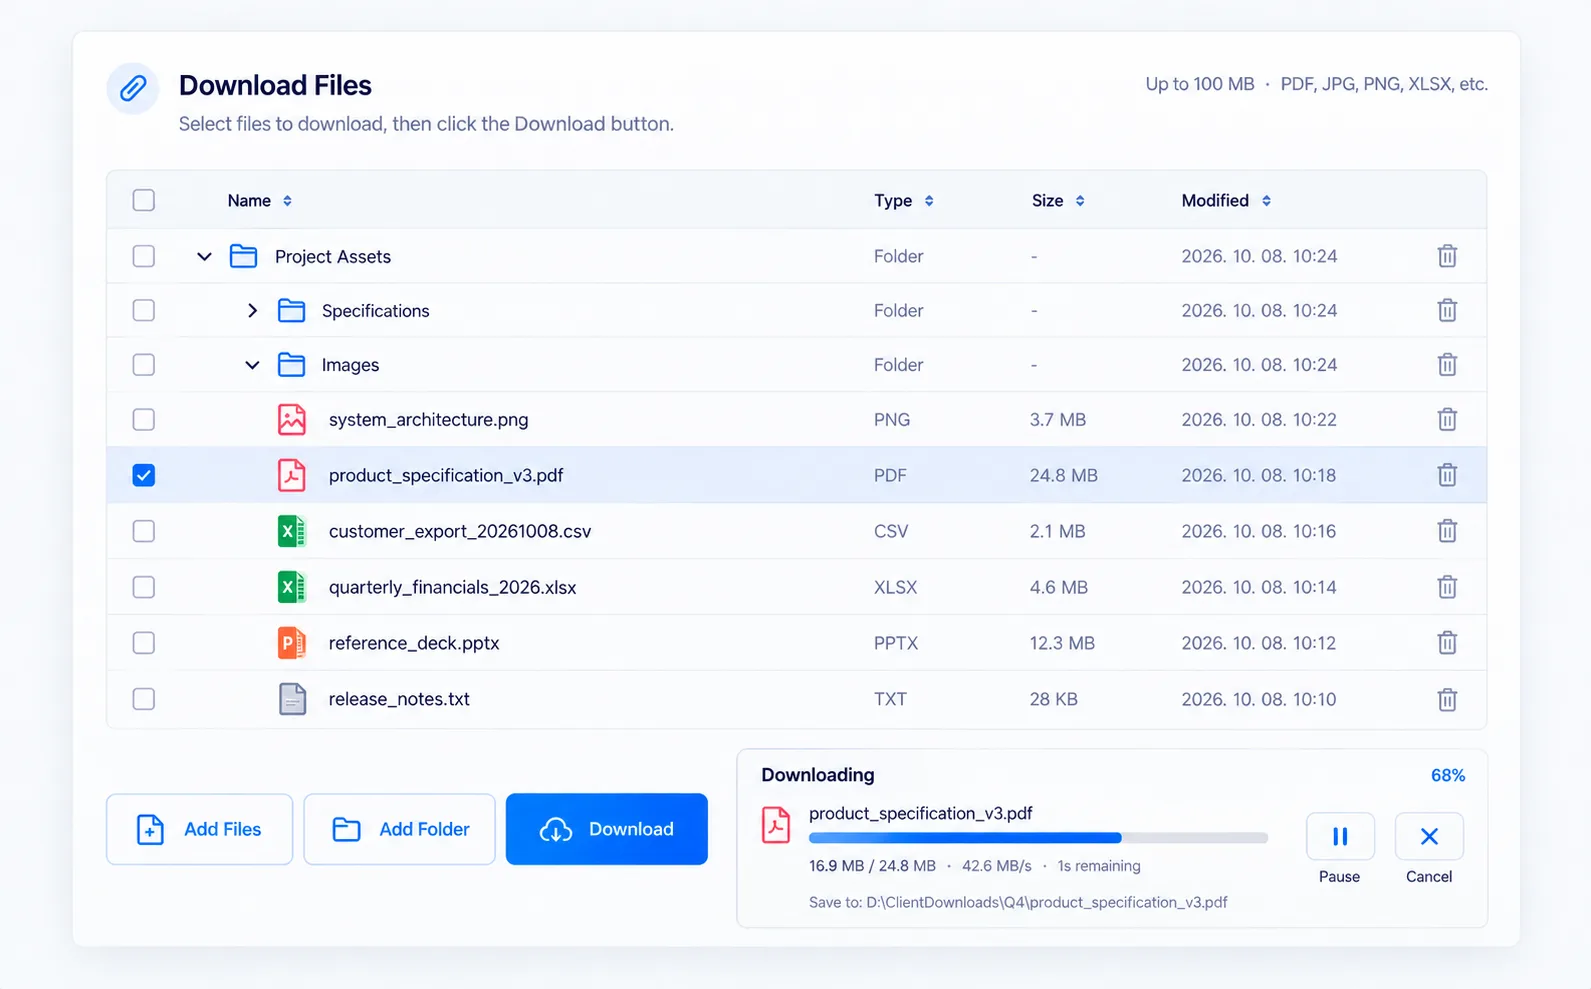
- Files download directly from S3 without passing through the platform. The save location follows the Agent's default path.
downloadStartfires when downloading begins, anddownloadCompletefires when all files have been saved. You can record download history in your system from the completion event.- Set the period during which the download page can be used by specifying an expiration date and time (
downloadExpiration) when creating the page in the console. After expiration, neither listing nor downloading files is possible, and the period is not automatically extended.
Errors and Recovery#
This covers cases where a network interruption causes a download to fail or no files exist for the specified ID. The page displays the status and also notifies your website through downloadError.
| Error | What to check |
|---|---|
File not found (404) |
Verify the transferID in the relevant Flow history under the console's RUN menu; check that the upload completed successfully and that the files have not been deleted |
License error (5000) |
Verify that the page's website address matches the allowed site entered in the console and that the downloaded innorix.js was uploaded unchanged |
| Download page expired | Check the expiration date and time in the console's page settings; extend and reset it if needed |
| Page missing or layout broken | Check that HTML <script src> and <link href> point to the uploaded innorix.js and innorix.css locations and that the files are served correctly |
| Agent not connected | Verify that the Agent is installed and running; if an installation prompt appears, follow it |
Network error (400–599) |
Check whether a proxy or corporate firewall blocks platform or S3 addresses |
box.on('downloadError', function (p) {
  console.log(p.statusMessage.errorCode);
});- If a downloaded file cannot be opened or
downloadCompletedid not fire, the download is incomplete and should be retried. - If failures persist, verify the transferID and uploaded files in the relevant Flow history under the console's RUN menu.
Advanced Usage#
This section covers UI layout, integration, and security beyond basic uploading and downloading. Each subsection starts with a scenario and explains its settings and code in one sequence.
UI Layout#
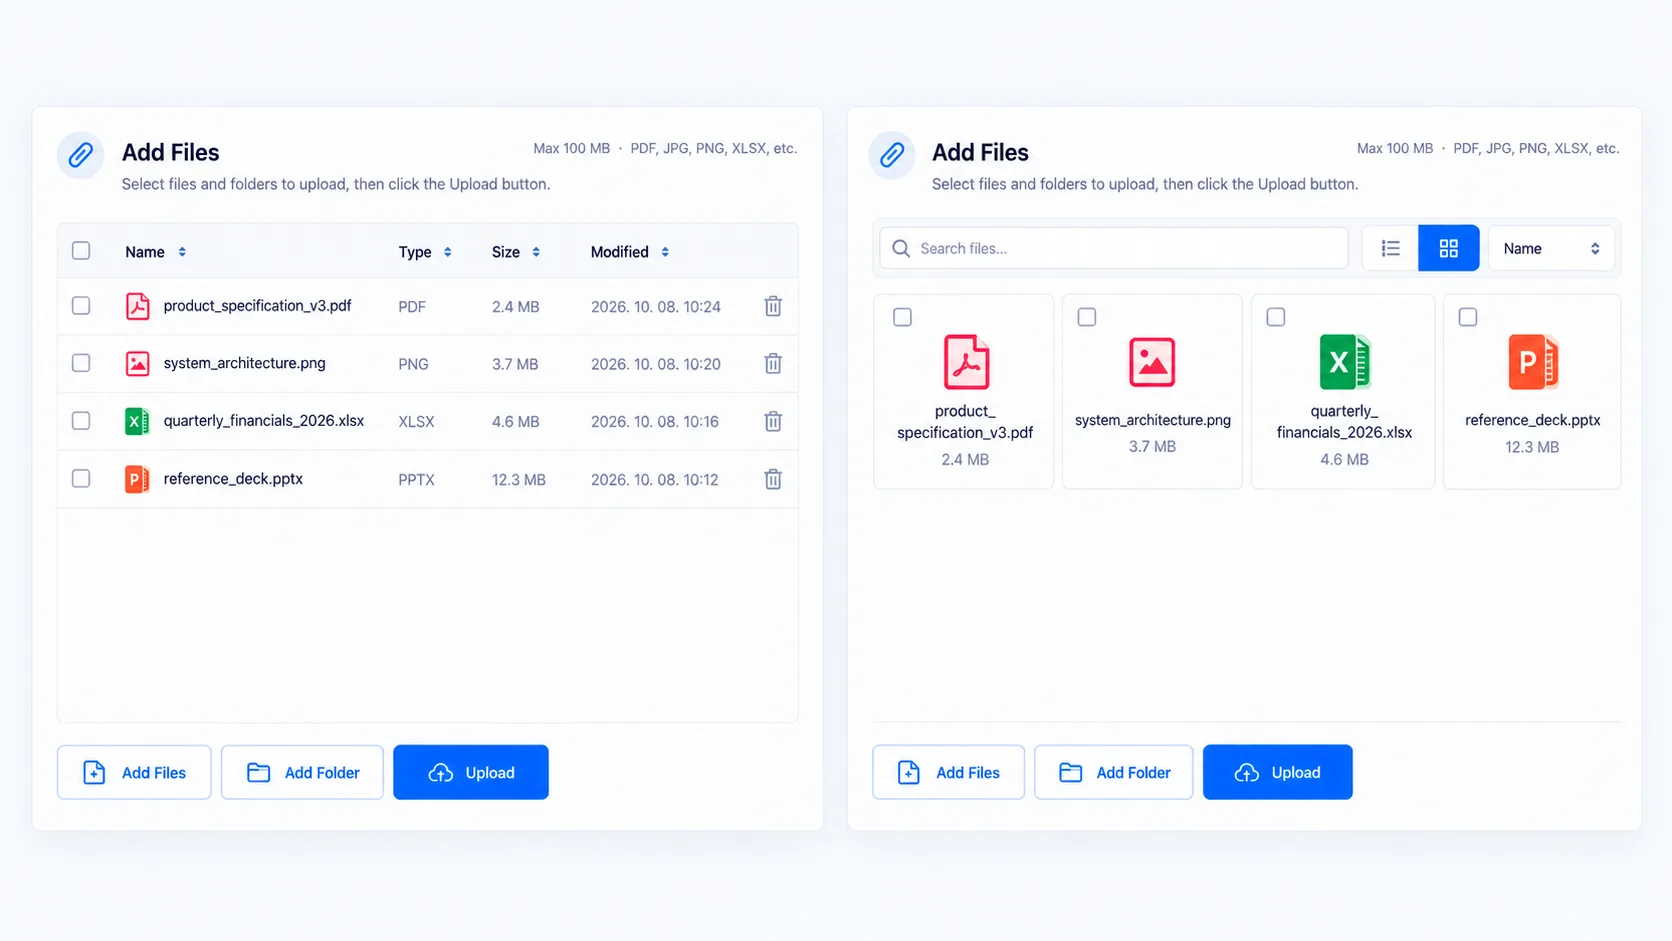
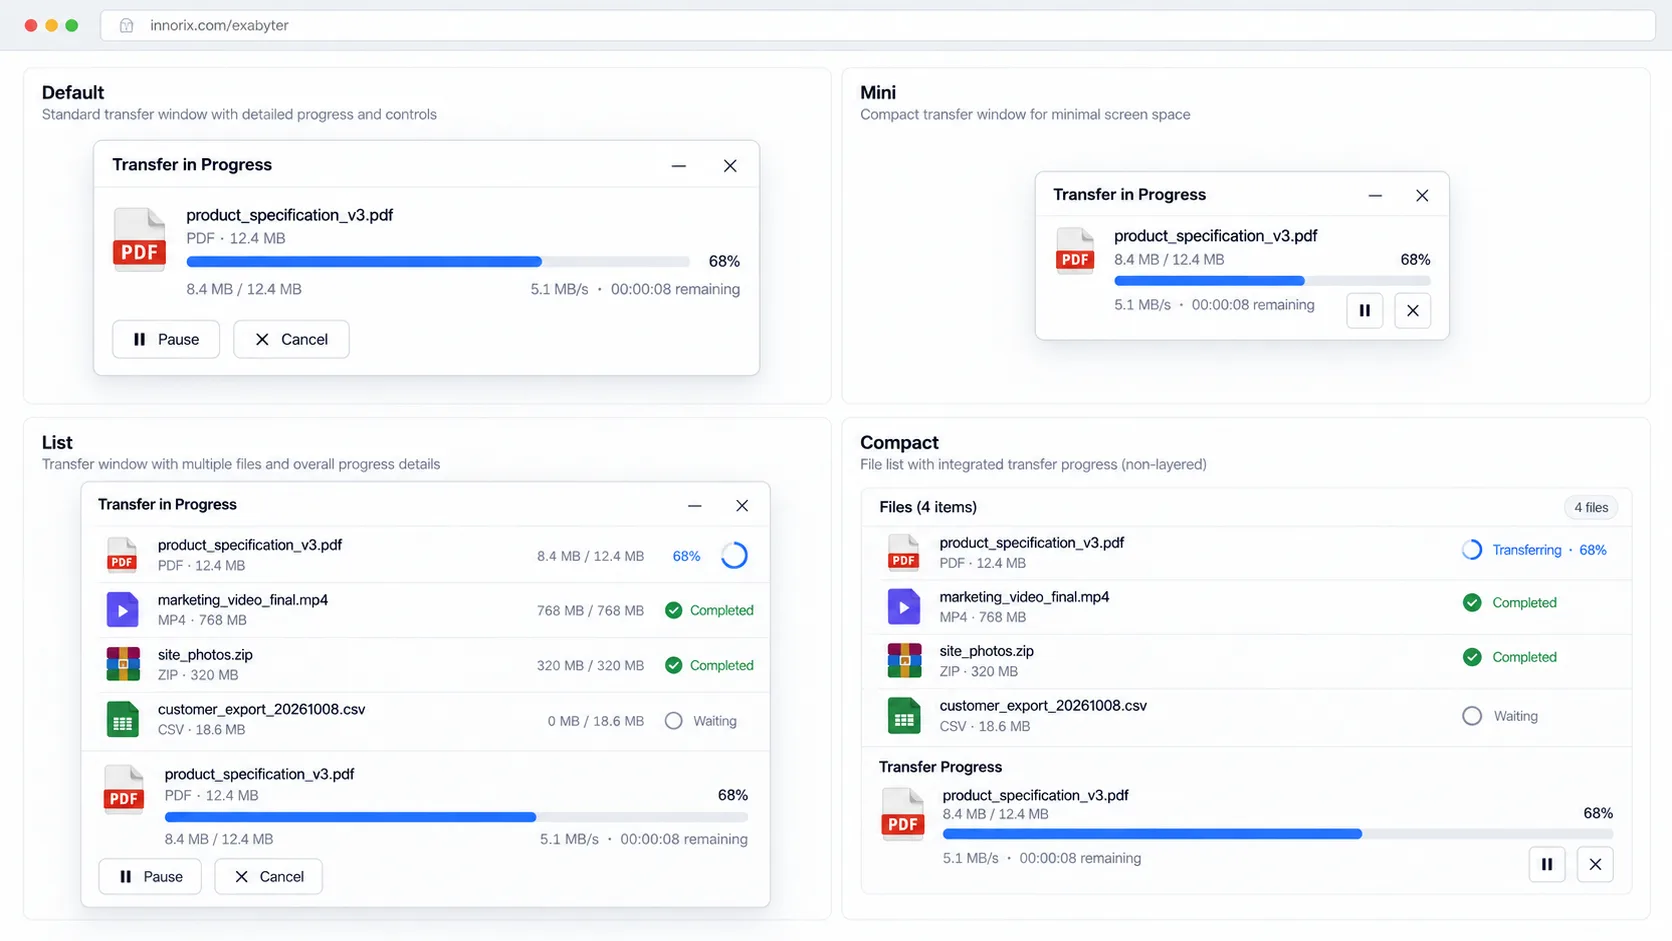
Suppose you want to match the file list and transfer progress shown on a page to your company's internal approval interface. The page has two areas: the list (file list) and the transfer window displayed during transfers. Select the list appearance using boxStyle and the transfer window appearance using transferWindowStyle under [UI Layout] in the console.
Page settings (boxStyle, transferWindowStyle, Size, Language) → Frontend files → Your websiteList Styles#
boxStyle |
Appearance |
|---|---|
list |
List view |
icon |
Icon view |
Transfer Window Styles#
transferWindowStyle |
Appearance |
|---|---|
default |
Standard-size transfer window |
mini |
Smaller version of the layered transfer window |
list |
Layered transfer window showing the file list above the progress indicator |
compact |
Displayed below the list without a separate layer |
When showTransferWindow is disabled, the transfer window does not open and users cannot pause or cancel, so it should generally remain enabled. Choose compact if you do not want a layer displayed over the page.
Size, Title, and Language#
| Setting | Description |
|---|---|
boxWidth, boxHeight |
Control width and height |
transferWindowTitle |
Text displayed in the transfer window title bar |
controlLang |
UI language (ko, en); can also be specified directly in create() |
hideLogo |
Hide the control's logo |
Integrating with Business Data#
This is the most common setup for attaching files to business records such as posts, orders, or contracts. Your system only needs to store one transferID, rather than the files themselves.
[Create post] Upload page → uploadComplete → Save transferID with post information
[View post] Saved transferID → Download page → Display attachment list| Step | What your system does |
|---|---|
| Upload | Send the transferID received from the event with the post-saving request |
| Save | Store the post ID and transferID together (one transfer_id column in the table) |
| Retrieve | Verify permissions, then set transferID as the download page's transferId option |
| Edit | Uploading more files creates a new transferID; update the stored value or retain multiple IDs |
- For posts with additional uploads, supply an array such as
transferId: ['A', 'B']to show the files in one list. - Your system decides whether to delete the files when a post is deleted. Deleting only the ID leaves the files in storage.
Security#
Consider a case where only logged-in users should download attachments to a contract. The page does not know users' permissions, so your system decides who receives the transferID. Frontend restrictions such as allowType and maxFileSize provide guidance, and the platform checks the same rules again on the server.
Security consists of the following elements.
User → [HTTPS] → License (allowed site) verification → File validation (extension, size, signature) → Storage (S3)
Your system: return transferID only after checking permissions| Method | Description | When to use |
|---|---|---|
| Allowed Sites | Enter the site address where frontend files will be hosted in the console; a license for that address is included in innorix.js. The page will not work if the running site's address does not match |
All pages (required) |
| HTTPS | Both your website and platform addresses use HTTPS | Entire production environment |
| Extension and signature validation | allowType, denyType, useSignature, plus platform revalidation |
Block disguised files |
| transferID management | Provide only after verifying permissions; do not expose in logs or shared URLs | Private files |
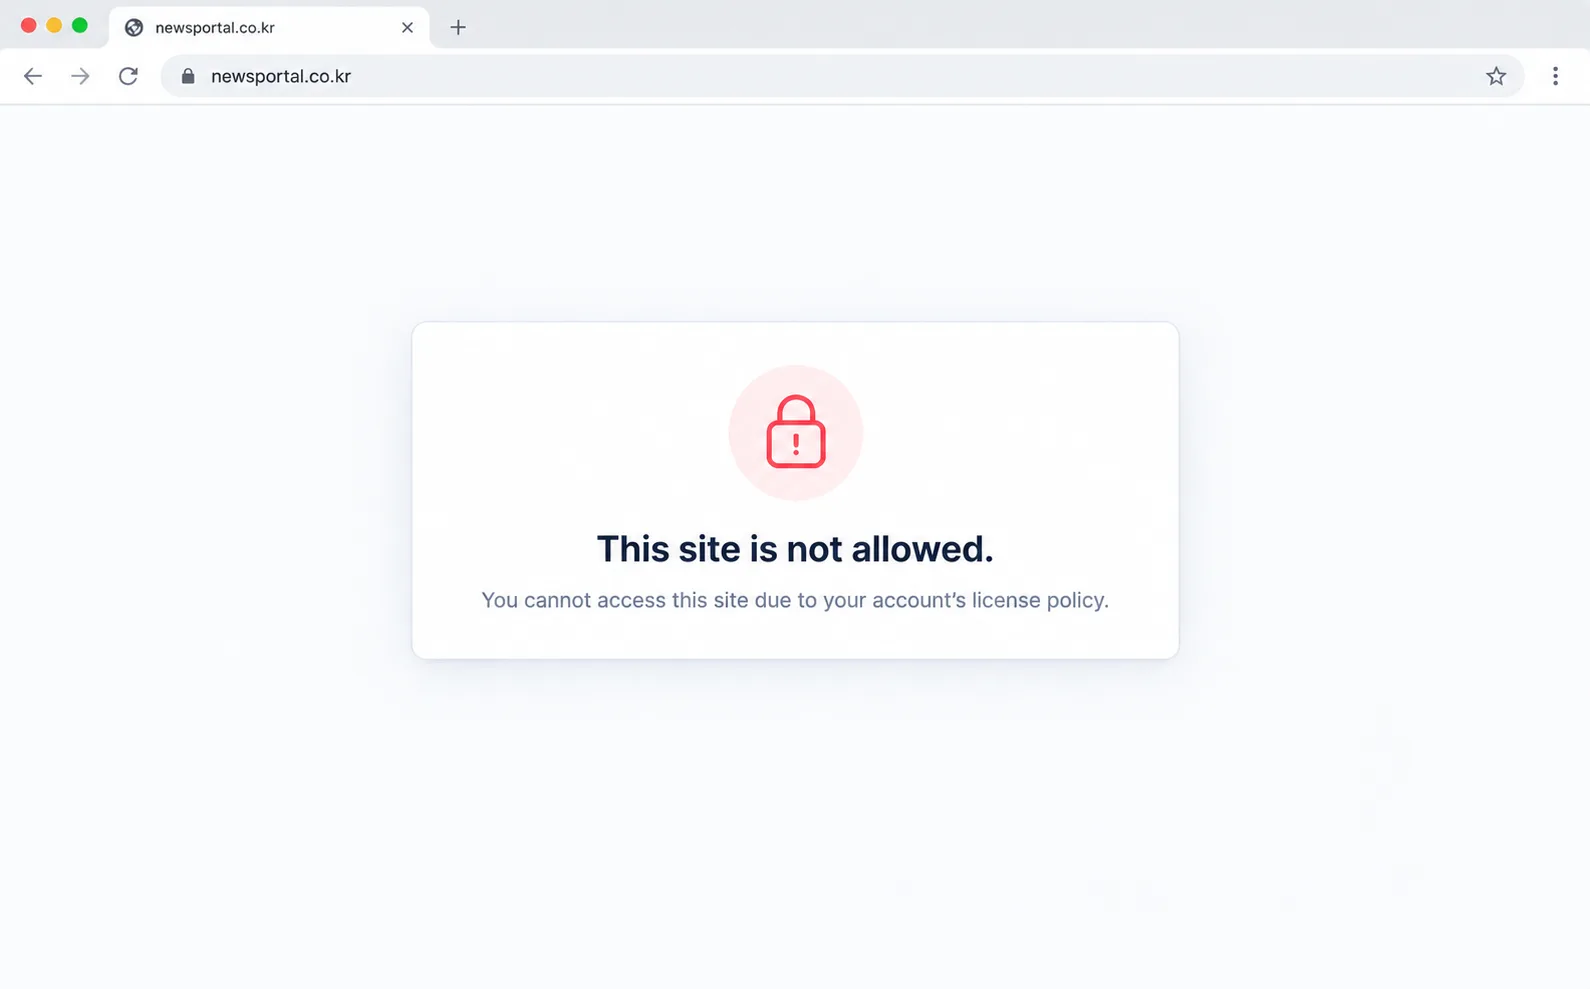
- Allowed Sites: Multiple sites can be entered. Because addresses are entered at the domain level, subpaths do not need to be entered separately. For example, entering
exabyter.comalso permits use atexabyter.com/test. A subdomain such asdev.exabyter.comis a different address and must be entered separately. The site where the page runs is checked against the address in the license contained ininnorix.js. A mismatch prevents the page from working and generates error5000. If the site address changes, update it in the console and upload a newly downloadedinnorix.js. - Flow Name: Frontend files contain only the Flow name, not any secret value. The license in
innorix.jsworks only on the entered allowed sites. - transferID: Although unpredictable, anyone who knows the value can download the files. For private files, verify each user's permissions before providing the ID, and instruct users not to share pages or addresses containing it externally.
API Reference#
This section brings together the console's page settings, create() options, and events emitted by the page. Use it to quickly check names, values, and formats while implementing features. Setting and event names are case-sensitive.
Page Settings#
These are configured on the console's Create Web Based screen. Page settings are read from the platform at runtime, so changes take effect immediately without replacing already uploaded files. However, changing the allowed site requires downloading and uploading a new innorix.js.
Basic#
| Setting | Type | Description |
|---|---|---|
| Flow Name | String | Name used to identify the Flow in the console; used for the downloaded HTML filename and preview address; separate from the transfer window title |
| Device | Selection | S3 device used to store files |
transferMode |
String | Flow purpose: "upload" (upload) or "download" (download) |
| Allowed Sites | Array | Addresses where frontend files will be hosted; required. The license for the entered addresses is included in innorix.js. Subpaths are included, but subdomains must be entered separately |
UI Layout#
| Setting | Type | Description |
|---|---|---|
boxStyle |
String | List appearance: list (list view), icon (icon view) |
transferWindowStyle |
String | Transfer window appearance: default, mini, list, compact |
showTransferWindow |
Boolean | Show the transfer window |
transferWindowTitle |
String | Transfer window title |
boxWidth, boxHeight |
Number / String | Control width and height |
controlLang |
String | UI language (ko, en) |
hideLogo |
Boolean | Hide the control logo |
showSelectBox |
Boolean | Show selection checkboxes for rows |
showFileListHeader |
Boolean | Show the list header |
showByteSize |
Boolean | Display sizes as numeric byte values |
showNotificationLayer |
Boolean | Use the notification layer inside the control |
useContextMenu |
Boolean | Enable the right-click context menu |
File Selection and Validation#
| Setting | Type | Description |
|---|---|---|
allowType |
Array | Allowed extensions (lowercase, no dots) |
denyType |
Array | Blocked extensions |
maxFileCount |
Number | Maximum number of files in the upload list |
maxFileSize |
Number | Maximum size of an individual file (entered in MB in the console) |
maxTotalSize |
Number | Total size limit for the upload list (entered in MB in the console) |
useSignature |
Boolean | Detect disguised extensions using file signatures |
addDuplicateFile |
Boolean | When false, reject duplicate additions from the same path |
addEmptyFile |
Boolean | Allow adding zero-byte files |
addFolder |
Boolean | Add folder items |
folderAttach |
Boolean | Allow folder attachments |
showFolderItems |
Boolean | Display expanded contents of folders |
openFolderItems |
Boolean | Expand/collapse folder contents by clicking a folder |
Storage Rules#
| Setting | Type | Description |
|---|---|---|
subFolderRule |
String | Subfolder structure beneath the transferID folder; combine {yyyy}, {MM}, {dd} using /. Empty by default |
fileNameType |
String | Stored filename method: original (unchanged) or encode (generated name); default original |
overwrite |
Boolean | Overwrite files with the same name; default false (save separately with an appended number) |
The storage location is always beneath the transferID folder. See [Storage Rules] in the Upload section for details.
Transfer Behavior#
| Setting | Type | Description |
|---|---|---|
autoUpload |
Boolean | Upload immediately when files are added |
autoDownload |
Boolean | Download the entire list immediately when the page opens |
transferStart |
Object | Whether the Start button must be clicked in the transfer window; { upload, download }; "auto" or manual |
cancelConfirmation |
Boolean | Show confirmation dialog on cancellation |
retryCount |
Number | Allowed number of retries |
maxErrorCount |
Number | Pause when cumulative errors exceed this value |
autoRecovery |
Boolean | Automatically retry on errors |
skipErrorFile |
Boolean | Skip files with errors |
attachIncompleteFiles |
Boolean | Find and restore unfinished previous transfers when the page opens |
autoLoadTransfer |
Boolean | Add a previous transfer to the list and automatically resume uploading without confirmation |
downloadExpiration |
String | Download page expiration date and time in YYYY-MM-DD HH:mm format (for example, 2026-12-31 23:59), set in the console when creating the page |
Creation Options#
These options are passed to innorix.create() in the downloaded HTML. Page settings such as upload limits and storage rules are configured in the console, not here.
var box = innorix.create({
  el: '#fileBox',
  flowName: 'board-download',
  transferId: 'T-9f3a7c21e4b8'
});| Option | Type | Applies to | Description |
|---|---|---|---|
el |
String | Both | Selector for the element where the page is rendered; required |
flowName |
String | Both | Flow name created in the console, matching the downloaded HTML filename; required |
transferId |
String / Array | Download | ID of the file batch to download; an array can specify multiple IDs |
postData |
Object | Upload | Values to record with the upload batch. Keys may contain letters, numbers, and _; values up to 100 characters. Returned as postData in uploadComplete |
controlLang |
String | Both | UI language (ko, en); overrides the console setting |
Preview URL#
The console's [Preview] opens at https://app.innorix.com/{userID}/exabyter/{flowName}. Use it to verify upload and download functionality before hosting the page on your website; do not use it in production.
Events#
Register events using box.on(name, handler) and remove all handlers for an event using box.off(name). Multiple events can be registered together using box.on({ name: handler, ... }).
box.on('loadComplete', function () {
  console.log('Control ready');
});

box.on('uploadComplete', function (p) {
  console.log(p.transferID, p.files);
});
Event List#
| Event | When it fires | p |
|---|---|---|
loadComplete |
Immediately after the page is ready to use | None |
addFileError |
When a count, size, extension, or other validation check fails | Error object or array |
uploadStart |
When an upload transfer starts | Transfer status object |
uploadComplete |
After all files finish uploading | Transfer status object |
uploadCancel |
When a transfer is canceled | Transfer status object |
uploadError |
When an error occurs during transfer | Transfer status object |
uploadPause, uploadResume |
When a transfer is paused or resumed | Transfer status object |
downloadStart |
When downloading begins | Transfer status object |
downloadComplete |
After all files finish downloading | Transfer status object |
downloadError |
When an error occurs while retrieving the list or downloading | Transfer status object |
The error object from addFileError is { type, message, file }. Possible type values are addDuplicateFile, maxFileCount, maxTotalSize, maxFileSize, denyType, allowType, and file_is_modified. Always normalize it to an array before processing.
Transfer Status Object#
All transfer events provide an object with the same structure.
| Field | Type | Description |
|---|---|---|
transferID |
String | File batch ID; used as transferId on the download page |
type |
String | "upload" or "download" |
state |
String | Before, Ready, Transferring, Complete, Cancel, Error, Pause |
progress |
Number | Progress (0–100) |
speed |
Number | Transfer speed (bytes/s) |
totalSize |
Number | Total size (bytes) |
transferSize |
Number | Transferred size (bytes) |
totalFileCount |
Number | Total number of files |
transferCompletedFileCount |
Number | Number of files with completed transfers |
retries |
Number | Retry count |
stopRetrying |
Boolean | Whether retries have stopped |
postData |
Object | postData values supplied during upload |
files |
Array | Array of file objects included in the transfer |
statusMessage |
Object | { id, errorCode }: status identifier and error code (false if none) |
The files field in uploadComplete contains these fields:
| Field | Type | Description |
|---|---|---|
clientFileName |
String | Original filename (shown in the UI) |
serverFileName |
String | Filename stored in storage (changed when fileNameType is encode) |
serverFilePath |
String | Full path within storage (transferID/subfolder/filename) |
rootName |
String | Parent folder path when uploaded as a folder |
fileSize |
Number | Size (bytes) |
fileState |
String | Per-file transfer status |
Error Codes#
statusMessage.errorCode is classified as follows.
| Code | Category |
|---|---|
0 |
Frontend (client) error |
404 |
No files found for the specified ID (transferId) |
400–599 |
Network error (excluding 404) |
5000 |
License error |
10001 and above |
File access or storage write error |