
Overview#
You can configure Microsoft Purview antivirus integration to scan files during transfer and block or detect threats.
After completing the integration, files are scanned, and when a threat is detected, the transfer is blocked or an alert is generated according to the specified handling method (On detection).
The entire process consists of two steps: ① Verify Credentials → ② Configure the Integration in the Product.
Prerequisites#
Before you begin, check the following.
| Item | Description |
|---|---|
| Azure AD app | Azure AD (Entra ID) app registration permissions are required to obtain a Tenant ID, Client ID, and Client Secret. |
| API credentials | A Tenant ID, Client ID, and Client Secret are required. |
| Network | Outbound HTTPS (443) communication to Microsoft (Entra/Purview) endpoints must be allowed from the environment where the product is installed. |
Verify Credentials#
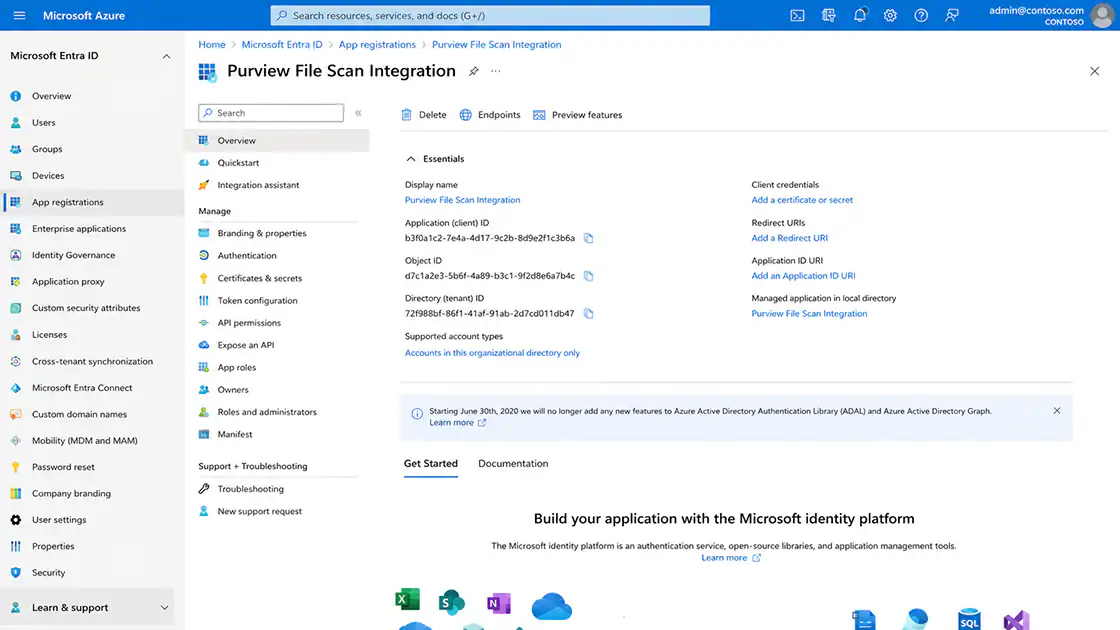
To integrate with Microsoft Purview, obtain a Tenant ID, Client ID, and Client Secret through Azure AD (Entra ID) app registration.
Step 1. App Registration and Value Verification#
Register an app in Azure AD (Entra ID) and check the Tenant ID and Client ID (Application ID). Grant the app the permissions required for Purview integration.
Step 2. Obtain a Client Secret#
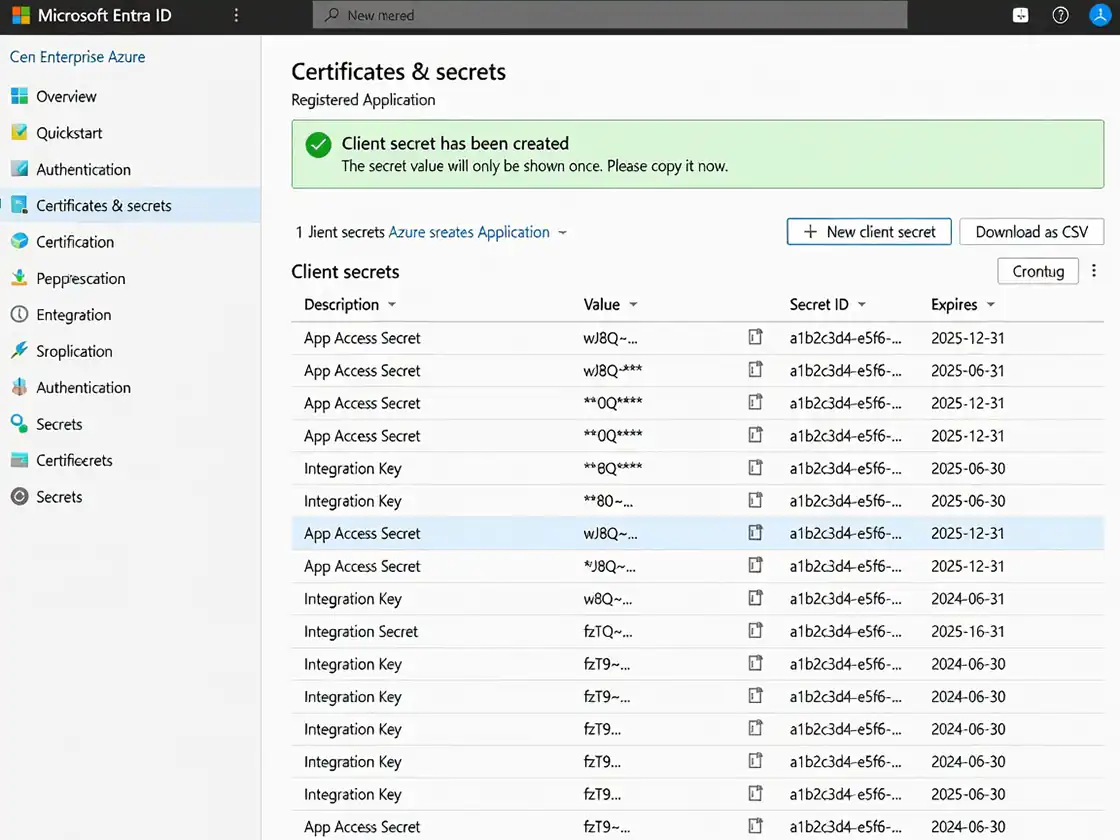
Create and copy a Client Secret under Certificates & secrets for the registered app. The Secret value is displayed only once when it is created.
ℹ️ This value is equivalent to a password. Anyone who knows it can access the scanning API, so make sure it is not exposed in public repositories or external documents. If it is exposed, revoke it and create a new one.
Checklist#
- ✔ The Tenant ID and Client ID have been confirmed.
- ✔ The Client Secret has been created.
Configure Microsoft Purview Integration#
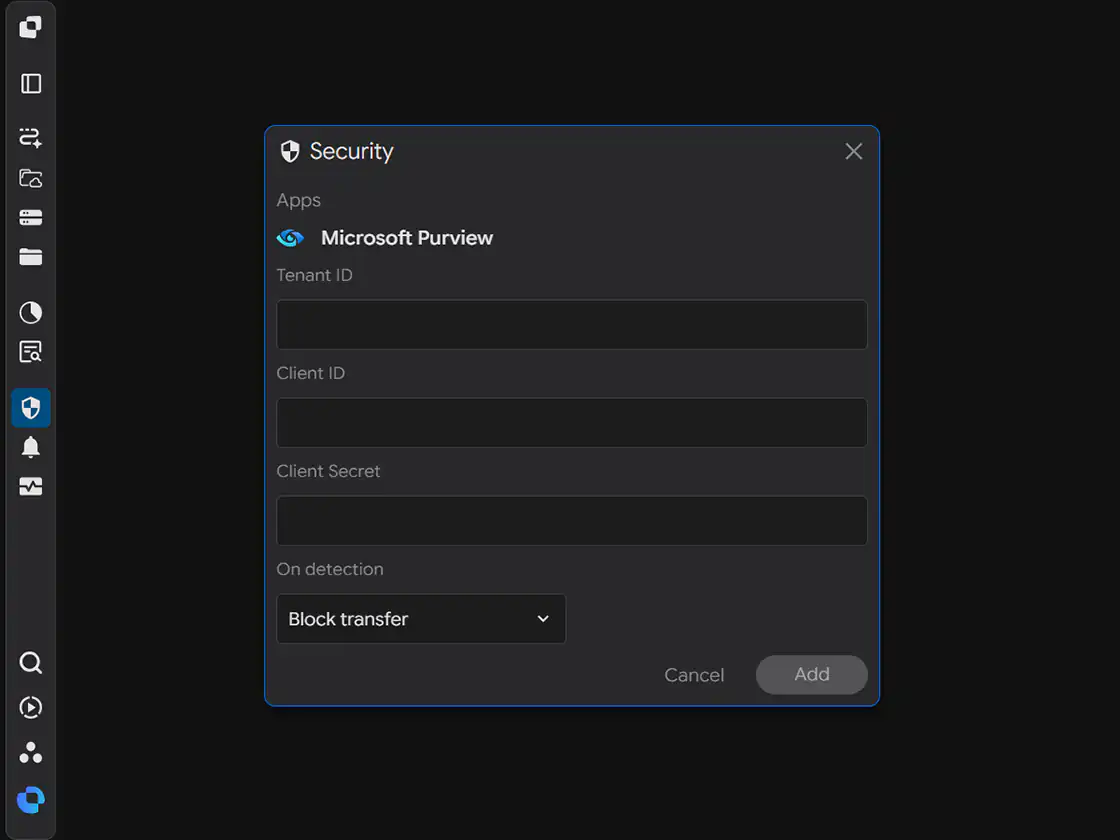
Enter the confirmed credentials and specify the scanning options.
When you open the Security settings window, the following screen is displayed.
Step 1. Enter the Tenant ID#
Enter the confirmed value in the Tenant ID field.
Step 2. Enter the Client ID#
Enter the confirmed value in the Client ID field.
Step 3. Enter the Client Secret#
Enter the value created during credential verification in the Client Secret field.
Step 4. Select On detection#
Select how to handle a detected threat under On detection.
| Option | Description |
|---|---|
| Block transfer | Blocks the transfer when a threat is detected. |
| Alert only | Allows the transfer to continue but generates only an alert. |
| Admin confirm | Processes the item after administrator confirmation. |
Step 5. Save the Settings#
After completing the input, click Add to save the integration.
Checklist#
- ✔ The Tenant ID, Client ID, and Client Secret have been entered.
- ✔ On detection has been selected.
Verify the Integration#
Verify that the settings are working correctly.
Step 1. Transfer a Test File#
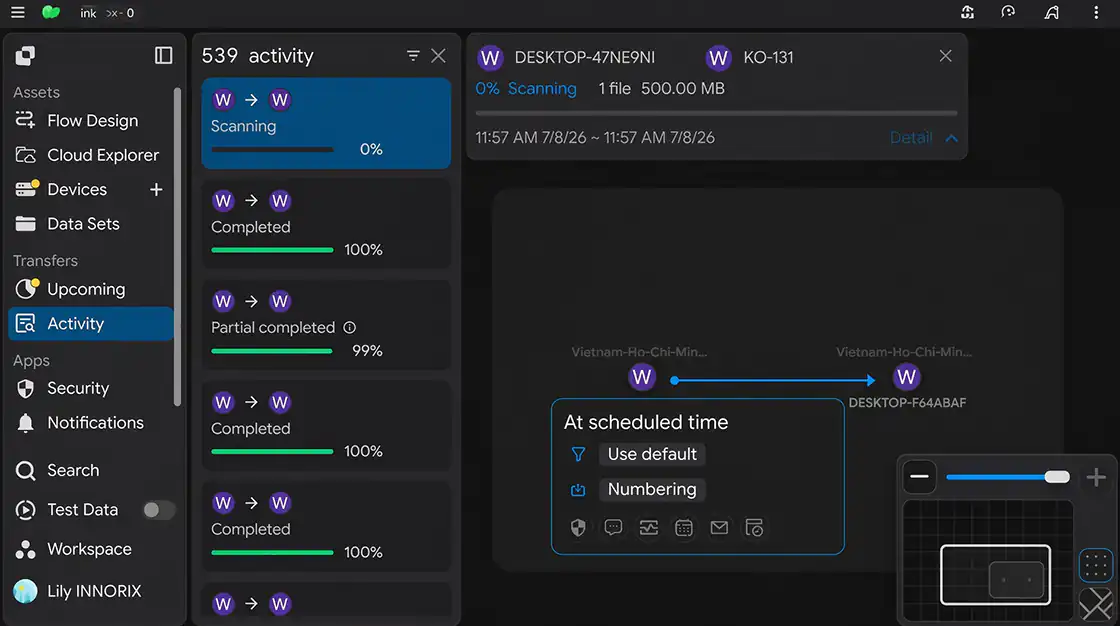
Transfer an actual file to verify that scanning is performed. You can verify scanning behavior with a safe test file, such as the standard antivirus test file (EICAR).
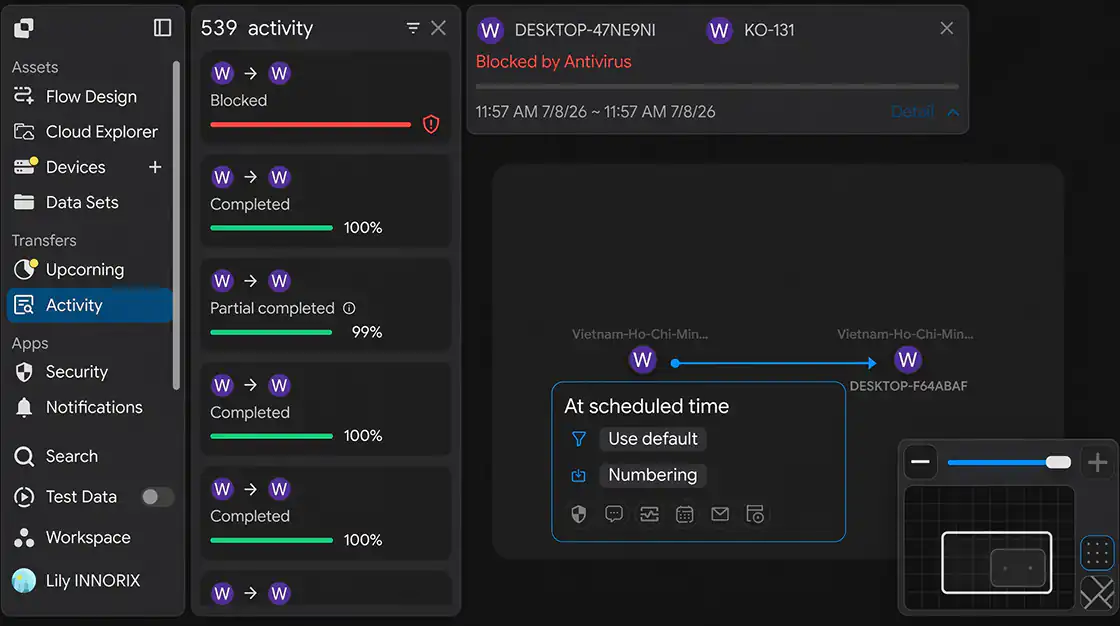
Step 2. Check the Processing Result#
Verify that the configured handling method (On detection) works as expected. (For example, Block transfer blocks the transfer, while Alert only generates an alert.)
Checklist#
- ✔ File scanning has been performed.
- ✔ It operates according to the configured handling method.
Setup Complete#
Once the settings are saved, the integration is applied. Files transferred afterward are scanned, and detected threats are handled according to the specified method.
Troubleshooting#
If scanning does not work correctly, check the following items.
| Issue | Checklist |
|---|---|
| Does not work | Check whether the Tenant ID, Client ID, and Client Secret are correct. |
| An authentication error occurs | Check whether the Client Secret has expired or been revoked and whether the required app permissions have been granted. |
| The transfer is not blocked when a threat is detected | Check whether On detection is set to Block transfer. |
| Integration fails in a closed network | Check whether outbound communication to Microsoft (Entra/Purview) endpoints (443) is allowed. |